If you need to run a 400W, 600W, or 1000W HID bulb in a grow tent without cooking your plants, a cool tube reflector is one of the most practical solutions available. It seals the lamp inside a glass tube, connects to ducting on both ends, and pulls hot air out of the grow space before it ever reaches your canopy. The result is that you can hang the fixture closer to your plants than you could with an open reflector, manage tent temperatures more easily, and run higher-wattage bulbs in tighter spaces. The catch is that cool tubes trade some light spread efficiency for that thermal control, so sizing and setup matter a lot. This guide covers what to look for, which models are worth your money, and exactly how to configure everything for your space.
Cool Tube Grow Light Review and Buying Guide


What a cool tube grow light actually is
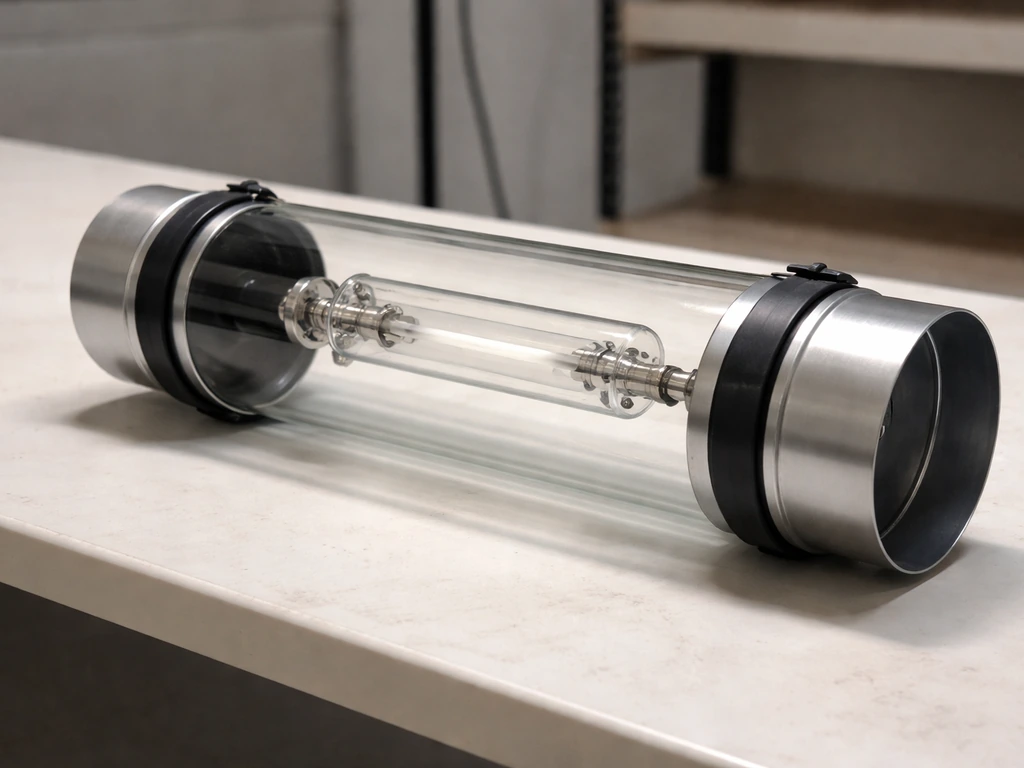
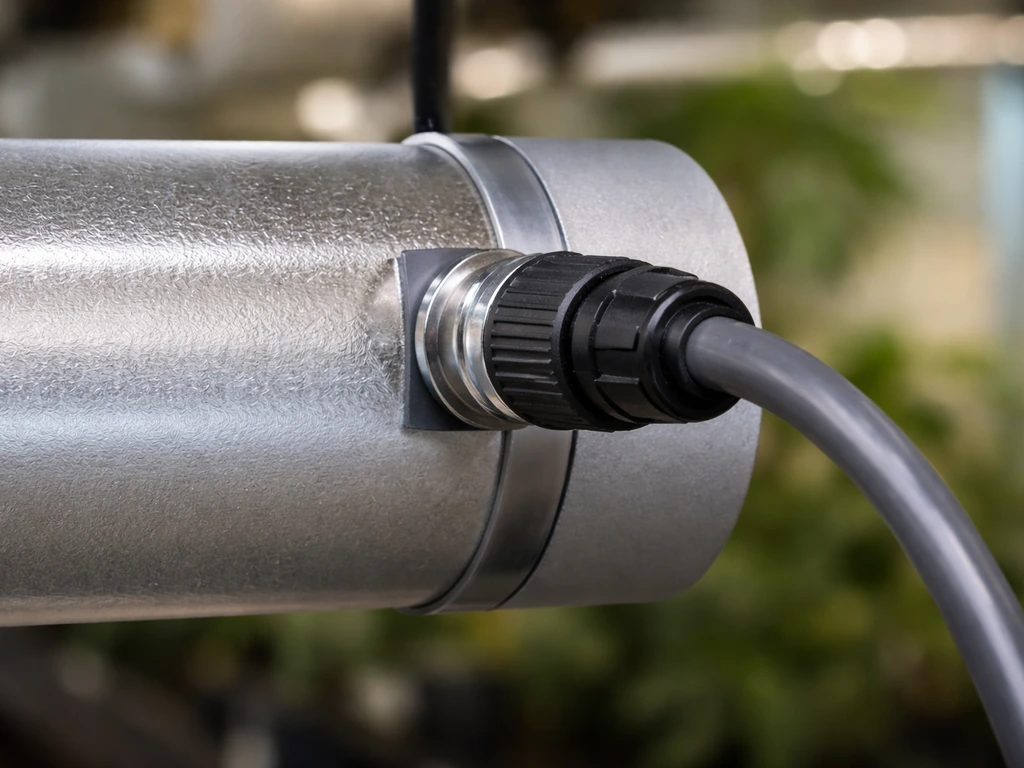
A cool tube is an air-cooled reflector built around a sealed glass tube. The lamp sits inside the tube, which is capped on both ends with flanges sized for standard ducting (usually 5-inch, 6-inch, or 8-inch). You attach a duct to each end and connect one side to an inline fan. The fan draws air through the tube, picks up the heat the bulb generates, and exhausts it outside the grow space. Because the lamp is physically enclosed in glass, that heat never mixes with your tent air in the first place.
This is different from a standard open-wing reflector, which sits in open air and radiates heat into the room. It is also different from an enclosed hood reflector, which has a glass lens on the bottom and reflective walls but typically has more surface area and a wider light spread. The cool tube format is the most thermally aggressive of the three, but it pays a real cost in light distribution. Because the tube is narrow, the beam is more concentrated and less uniform across a wide canopy. If you have ever read that cool tubes are not as good at spreading light as larger air-cooled hoods, that is accurate. The trade-off is worth it in specific situations, which this guide will spell out.
Key specs to look at before you buy
Wattage compatibility
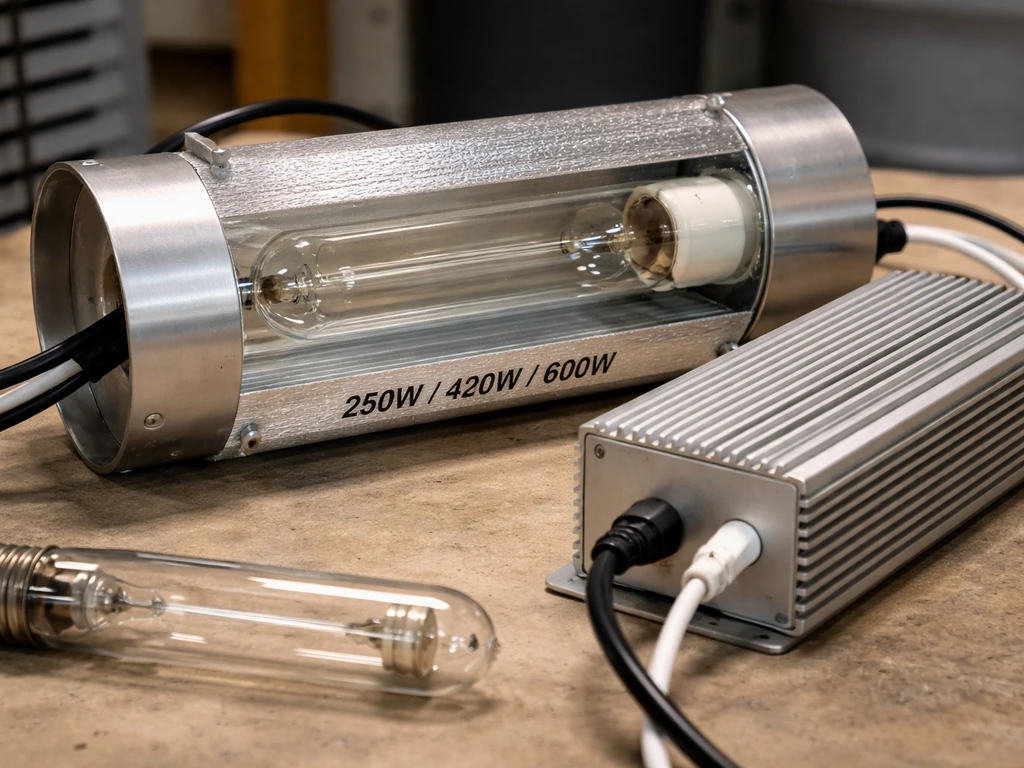
Most cool tubes are rated for HPS or Metal Halide bulbs in the 250W to 1000W range. The Prima Klima classic cool tube, for example, is rated for 250W, 400W, and 600W HPS and MH. The UltraGROW UG-RCT/6 handles up to 1000W. Before buying any tube, confirm the wattage ceiling and whether the socket is mogul base, which is standard for HID bulbs above 150W. A 15-foot heavy-duty lamp cord connecting to your external ballast is typical, as seen on both the Hydrofarm RFCOOL8 and the UltraGROW units.
Duct diameter
Duct size directly affects how much airflow you can push through the tube and therefore how well it manages heat. The most common sizes are 5-inch (125mm), 6-inch, and 8-inch. At minimum, you need 400 CFM of airflow to effectively cool an inline reflector according to Hydrofarm's own documentation. The Hydrofarm TRFV8 fan listing reports a maximum airflow of 684 CFM, which you can use as a practical ceiling reference when matching fan capability to duct sizing. An 8-inch tube allows higher airflow and is a better choice for 600W to 1000W builds. A 5-inch or 6-inch tube works for 250W to 400W setups in a reasonably ventilated space. Hydrofarm's RFCOOL6 and RFCOOL8 name the duct diameter right in the model number, which makes matching accessories straightforward.
Reflector material and glass quality
The tube itself should be heat-resistant tempered glass. Cheaper units sometimes use lower-grade glass that can stress-crack over time from thermal cycling. The interior reflector surface is usually anodized aluminum or mirror-finish aluminum. High-reflectivity aluminum (95% or better) makes a meaningful difference in how much of the lamp output actually reaches your plants rather than getting absorbed by the fixture. If the product listing does not mention reflectivity percentage or material, that is a flag worth noting.
Ballast compatibility
Cool tubes use external ballasts, not built-in ones. The Hydrofarm RFCOOL8 connects via a Lock and Seal plug that works with Hydrofarm and Xtrasun ballasts. Hydrofarm’s RFCOOL8 product page also says it includes the exclusive Lock & Seal 15’ 600V heavy-duty lamp cord and mogul socket for use with Hydrofarm or Xtrasun ballasts Lock and Seal plug. If you are mixing brands, double-check plug compatibility or plan to use a standard socket adapter. Some kits bundle the ballast, like the Osram Plantastar 400W kit that includes a 125mm cool tube and a MaxiBright Varidrive 250W to 600W adjustable ballast. Buying a kit simplifies compatibility but usually costs more upfront.
How to actually evaluate a cool tube before and after you buy
Marketing copy for grow equipment is reliably optimistic, so you need a short checklist of things to measure yourself once you have the fixture running.
- Canopy temperature: Hang a thermometer at plant level and compare it to the ambient temperature in the room outside the tent. If you have the ducting and fan sized correctly, canopy temp should stay within 5 to 8 degrees Fahrenheit of ambient, even with a 600W bulb running.
- Tent air temperature: Measure at mid-tent height. If it is creeping above 82 to 85 degrees Fahrenheit with the cool tube running, your fan is undersized or you have a duct leak.
- PPFD at canopy: Use a PAR meter or a phone-based sensor (less accurate, but useful for relative comparisons) to check light intensity at plant level. A 600W HPS in a cool tube at 18 to 24 inches should deliver roughly 400 to 700 micromoles per square meter per second at the canopy, depending on reflector quality and hanging height.
- Duct integrity: Feel along duct connections for warm air leaking out. A cool tube that is leaking defeats the purpose.
- Glass clarity: After a few weeks of use, inspect the glass tube for any brown or yellow residue from the lamp. This reduces light transmission and needs to be cleaned with a soft cloth.
One honest limitation to acknowledge: cool tubes are harder to PAR-test fairly compared to a bare reflector because the glass absorbs a small percentage of light output, typically 3 to 8 percent depending on glass quality. That is the cost of the heat isolation. If you are obsessing over raw photon delivery, a good enclosed hood or even a modern LED bar will outperform a cool tube at the same wattage. But if heat management is your primary problem, that trade-off is usually worth it.
Cool tube models worth looking at
There is no single best cool tube for every setup. Here is a comparison of the standout options across the main specs that matter.
| Model | Duct Size | Max Wattage | Lamp Type | Notable Feature |
|---|---|---|---|---|
| Hydrofarm RFCOOL6 | 6 inch | 600W | HPS / MH | Lock & Seal 15ft cord, pairs with Hydrofarm/Xtrasun ballasts |
| Hydrofarm RFCOOL8 | 8 inch | 1000W | HPS / MH | Higher airflow capacity, mogul socket, same cord system |
| UltraGROW UG-RCT/6 | 6 inch | 1000W | HPS / MH | Tempered glass, pre-attached mogul socket, 15ft cord |
| Prima Klima Cool Tube | 6 inch | 250W to 600W | HPS / MH | Heat-resistant glass, European design, good mid-range option |
| Hydro Crunch XXL Cool Tube + Wings | 6 inch | 600W | HPS / MH | Add-on wings for wider light spread, one of the largest cool tube designs |
| Biohydro Cool Tube 6" | 6 inch | 600W | HPS / MH | Inline airflow through both ends, straightforward build |
| HORTOSOL 5-inch Cool Tube | 5 inch (125mm) | 400W | HPS / MH | Compact format for small tents or 250 to 400W builds |
| HTG Supply 48" Dual Socket + 6" Cool Tube | 6 inch | Up to 2x 600W | HPS / MH | Dual-lamp configuration for expanded coverage |
| Growlite OG Air-Cooled Reflector | 6 inch | 600W | HPS / MH | CVAT airflow design, claims full reflective surface utilization |
For most home growers running a single 400W or 600W HPS in a 3x3 or 4x4 tent, the Hydrofarm RFCOOL6 or the UltraGROW UG-RCT/6 are the most practical starting points. If you are specifically comparing the Sylstar grow light lineup, this same 400W and 600W cool-tube sizing logic will help you judge whether the Sylstar option fits your tent and airflow needs sylstar grow light review. If you are comparing options, you may also want to look up a detailed yintatech grow light review to see how it performs in real grow setups. They are widely available, have documented compatibility, and use standard 6-inch ducting that is easy to source. If you are running a 1000W lamp or need higher airflow, step up to the RFCOOL8 or the UltraGROW 6-inch rated to 1000W. The Hydro Crunch XXL with wings is interesting if you need better canopy coverage than a standard tube delivers, since the add-on wings extend the beam spread without fully sacrificing heat management.
Setup and ventilation: how to actually install this correctly
The installation process is straightforward if you follow the right order. Here is how to do it.
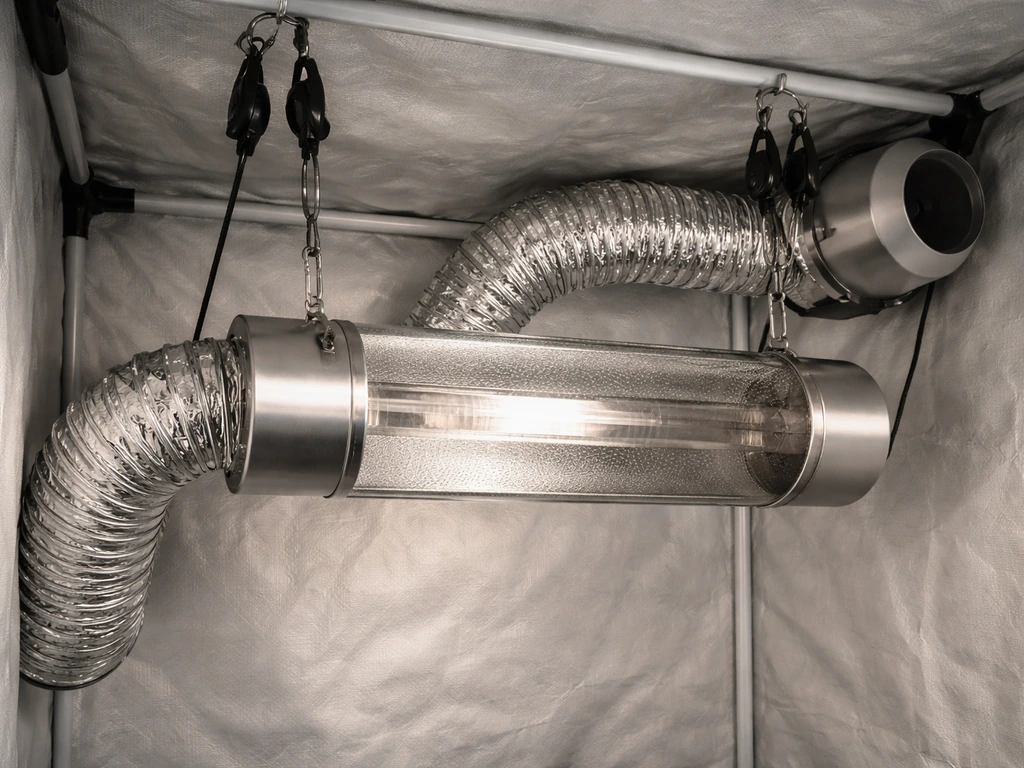
- Mount the cool tube first using ratchet hangers or a chain and carabiner system. Most cool tubes have a center hang point. Make sure it is level so the bulb sits horizontally and the airflow path through the tube is unobstructed.
- Attach ducting to both flanges before inserting the bulb. Use aluminum flex duct rated for high temperatures and secure with hose clamps or metal duct tape. Do not use plastic clamps or regular tape; they degrade quickly near a hot fixture.
- Connect the ducting to your inline fan on one side and run the exhaust duct out of the tent on the other. The fan should pull air through the tube, not push it. Pulling (negative pressure) is more effective for heat removal.
- Size your fan to at least 400 CFM for a 6-inch system. For a 1000W lamp or an 8-inch tube, 600 to 750 CFM is more appropriate. Variable speed controllers let you dial back noise at night.
- Install the bulb with clean hands or gloves (skin oil on HID glass causes hot spots and premature failure). Screw it fully into the mogul socket and confirm it is seated.
- Connect the lamp cord to your ballast per the manufacturer's spec. For Hydrofarm units, this is the Lock and Seal plug. For other brands, confirm the socket is properly seated before powering on.
- Power on and immediately verify airflow is moving through both ends of the tube. Hold your hand near the exhaust end of the duct outside the tent. You should feel warm air within the first 30 seconds of lamp startup.
Tent sizing and ducting layout
In a 4x4 tent, a single 6-inch cool tube with a 400W to 600W HPS is a comfortable fit. You have room to hang it at 18 to 24 inches above the canopy and still have space for plants to grow toward it. In a 3x3 tent, stick to 400W maximum unless your room ambient temperature is very cool. A 5x5 tent with a 600W cool tube will show light falloff at the corners, which is the light spread limitation discussed earlier. If you are covering more than 16 square feet, consider the dual-socket 48-inch configuration from HTG Supply or pair two single cool tubes run off a dual-lamp ballast.
One thing to plan for: if you are also running a carbon filter for odor control, you need separate airflow capacity for the filter. Do not run your cool tube ducting through your carbon filter. They require different airflow rates and the filter will restrict the flow the cool tube needs. Run them as separate loops: one fan for the cool tube, one fan (or a Y-junction off a larger fan) for the carbon filter exhaust.
Safety requirements you cannot skip
Hydrofarm's instructions are explicit: the cool tube must be air-cooled during operation at all times. Running the lamp without airflow, even for a few minutes, risks cracking the glass from heat stress and can cause fire. This is not a soft recommendation. Additionally, keep the entire system in a well-ventilated area. If the exhaust duct terminates into a small enclosed room with no fresh air exchange, you are just recirculating hot air and the system will not work as intended.
Coverage planning: what you can realistically light
Cool tubes produce a more focused, elliptical beam compared to wide-wing reflectors. This means coverage area estimates need to be realistic, not based on the manufacturer's optimistic footprint numbers.
| Wattage | Growth Stage | Recommended Coverage | Hanging Height Above Canopy | Target PPFD at Canopy |
|---|---|---|---|---|
| 250W HPS | Seedling / Early Veg | 2x2 ft to 2x3 ft | 18 to 24 inches | 150 to 300 µmol/m²/s |
| 400W HPS | Veg | 3x3 ft | 18 to 24 inches | 300 to 500 µmol/m²/s |
| 400W HPS | Flower | 2.5x2.5 ft | 16 to 20 inches | 500 to 700 µmol/m²/s |
| 600W HPS | Veg | 4x4 ft | 24 to 30 inches | 300 to 500 µmol/m²/s |
| 600W HPS | Flower | 3x3 to 3.5x3.5 ft | 18 to 24 inches | 600 to 900 µmol/m²/s |
| 1000W HPS | Flower | 4x4 ft to 5x5 ft | 24 to 36 inches | 700 to 1000+ µmol/m²/s |
The cool tube's narrower beam means the center of your canopy will receive significantly more light than the edges. To compensate, rotate plants weekly or use a light mover. If you are growing in a Sea of Green or Screen of Green style, this concentration in the center actually works in your favor since you can pack plants more tightly under the hot spot. For a standard garden with multiple distinct plants, pay attention to corner plants and supplement if needed.
During veg, raising the fixture and accepting slightly lower PPFD is fine. Plants in vegetative growth do well at 300 to 500 micromoles and the wider, more diffused coverage helps develop even growth across all plants. During flower, you want intensity at canopy level, so lower the fixture and accept that the footprint shrinks. A 600W cool tube in flower is realistically covering a 3x3 footprint well, not a 4x4.
Value, reliability, and mistakes to avoid
Total cost of ownership
A bare cool tube reflector runs $40 to $120 depending on size and brand. Add a compatible HID ballast ($80 to $250 depending on wattage and whether it is digital or magnetic), a quality HPS or MH bulb ($30 to $80), an inline fan ($50 to $150), and flex ducting ($20 to $40). A complete 600W cool tube setup costs $220 to $650 to put together from scratch. That is meaningful money, and LED alternatives in the same price range have gotten genuinely competitive. However, if you already own an HID ballast or if you are running in a hot climate where heat management is your dominant problem, the cool tube system still makes practical sense and remains less expensive than replacing a full lighting setup. If you are comparing options like ipower grow light reviews, focus on heat output and coverage planning, since those factors drive how well a system performs in real tents cool tube system.
HPS bulbs need replacement every 12 to 18 months under typical 12/12 flowering schedules. Budget $30 to $80 per replacement. The cool tube glass itself is durable if you maintain it correctly, but check for micro-cracks annually, especially at the flange connection points where thermal stress concentrates.
Common buying and setup mistakes
- Undersizing the fan: The single most common mistake. If you buy a 200 CFM fan for a 6-inch cool tube running a 600W lamp, you will not move enough air to keep temperatures in check. Start at 400 CFM minimum for any 6-inch setup at 400W or above.
- Routing the cool tube exhaust through a carbon filter: As mentioned, this starves both systems of the airflow they need. Keep them separate.
- Running the lamp without airflow: Even brief periods without airflow risk glass cracking or thermal runaway. Never power the lamp before the fan is running.
- Buying a tube without checking ballast compatibility: Lock and Seal plugs, standard socket adapters, and proprietary connectors all exist. Verify before ordering.
- Expecting 4x4 coverage from a single cool tube at 600W in flower: The beam spread limitation is real. Set your expectations at 3x3 for quality flower coverage and treat the 4x4 claim on the box skeptically.
- Ignoring the glass: Dust, residue, and water spots on the tube glass reduce light transmission noticeably over time. A quick wipe-down every few weeks keeps output consistent.
- Choosing a cool tube when an LED would be better: If you are starting fresh with no existing HID equipment, a quality LED panel or bar system (like those reviewed in related guides on this site) may offer better efficiency and lower operational cost over time, especially in already-warm climates.
Who should buy a cool tube and who should pass
A cool tube setup makes the most sense if you already own an HID ballast, grow in a warm climate where heat is your primary challenge, and want to run a 400W to 600W HPS closer to your canopy without burning plants. It is also a good fit for growers in small tents where an enclosed air-cooled hood is too bulky. If you are starting from scratch with no existing equipment and your main priority is efficiency and low operating cost, LED systems have become the stronger long-term choice and are worth comparing before committing to an HID cool tube build. For growers who have made the HID investment and want to squeeze more practical performance from it, a well-sourced cool tube with proper ducting is a reliable, proven approach that has worked for a lot of people for a long time. If you want to compare specific products and see real-world performance notes, check the chilled grow lights review for model-by-model takeaways.
FAQ
Can I run different HID bulb wattages on the same cool tube and ballast?
Most cool tubes are designed around external HID ballasts and fixed lamp wattages. If you want to use a single setup for different bulbs (for example 400W later to 600W), look for a ballast that supports that wattage range and confirm the cool tube is rated for the higher wattage before swapping. Also verify the HID socket and ignitor type (MH vs HPS use different lamp chemistry, even if the socket is the same).
What happens if I try to connect my cool tube ducting through a carbon filter to save space?
Yes, but plan for airflow limits and ducting resistance. A common mistake is putting the carbon filter in the same duct path as the cool tube, or adding too much restriction downstream. Instead, run a separate fan loop for the cool tube exhaust and a separate exhaust system for the carbon filter, then size both using their target CFM requirements rather than tent volume.
How do I know my cool tube is exhausting heat to the right place, not just moving it around?
Aim for consistent external exhaust conditions, not just “the fan is on.” If your inline fan pulls hot air out of the tube but the duct terminates in a room that heats up quickly or has poor fresh-air exchange, the system can recirculate heat and the glass can still see damaging thermal stress. Use the shortest, straightest duct route possible to the outside and confirm air actually exits the tent environment.
How often should I inspect the glass tube, and where do cracks usually start?
Tempered glass is meant to handle thermal cycling, but micro-cracks tend to start at stress points like the flange or where the glass interfaces with hardware. A simple practice is to visually inspect around both end flanges annually, and replace the tube at the first sign of cracking, cloudiness, or a loose seal that could let hot air contact the glass unevenly.
What symptoms suggest my cool tube is not cooling effectively anymore?
If airflow drops, the cool tube loses its safety margin first. Signs you should check immediately include higher-than-usual tent temps near the canopy, unusually hot exhaust air, louder or vibrating fan operation, or a noticeable drop in duct airflow. Common causes are clogged inline filters, kinked flex duct, mismatched duct adapters that restrict diameter, and fan speed set too low for the tube size.
Should I change the hanging height between veg and flower with a cool tube?
A cool tube can be used for both veg and flower, but you should treat hanging height differently by growth stage. During veg, higher mounting is often tolerable because plants can handle lower intensity and you want better uniformity. During flower, lower mounting is usually needed for adequate center intensity, while still respecting the manufacturer’s max operating height and heat management so the tube glass remains within design expectations.
How can I improve canopy uniformity when a cool tube concentrates light in the center?
Yes, but do it intentionally. Since the beam is more concentrated, even lighting depends on maintaining canopy position and managing the center hotspot. If you cannot use a light mover, rotate plants weekly and consider an even canopy strategy like SCROG or consistent plant training so the same plants sit in the beam center as they grow.
How should I handle light falloff if my tent is larger than the cool tube’s typical footprint?
A ballpark check is to match your tent area and plant layout to the realistic footprint, not the marketed “coverage” number. In larger tents, expect corner falloff, then compensate with plant placement (more plants under the center hotspot) and possible supplemental lighting at the edges. If you are seeing persistent edge underperformance, a second tube or a dual-lamp configuration is usually more effective than raising the fixture.
When is buying a cool tube actually cheaper than switching to an LED system?
They generally cost less than an LED system only when you already own compatible HID gear or when heat is your dominant limiting factor. If you are starting from scratch, compare total cost including bulb replacements, ballast compatibility, fan, ducting, and any additional exhaust capacity needed for odor control. Also factor replacement bulbs every 12 to 18 months, as that ongoing cost can narrow the price gap over time.
Is it ever okay to start the light before the inline fan is fully pulling air?
If you run the lamp without the planned airflow, the risk is glass stress cracking and possible safety hazards, even if it is “only a few minutes.” Also avoid powering up before ducting and fan are confirmed. A practical setup is to wire the fan to run continuously during lamp on time, and never bypass the fan interlock if your system includes one.
What’s the most common setup mistake that ruins cool tube performance?
Most “fits” problems come from duct diameter and how hard you can push CFM through restricted ducting. Measure the duct runs, avoid sharp kinks, and use the correct adapter size so you do not choke airflow at transitions. When sizing, choose a larger tube diameter (like 8-inch) if you plan to run higher wattage or if your duct route has extra resistance.
How do I decide whether a cool tube is the right choice for my specific grow situation?
A practical decision aid is to prioritize your dominant constraint. If heat management in a warm room or small tent is the main issue and you already have or plan to buy HID bulbs and ballasts, a cool tube is a strong match. If your goal is maximum PAR per watt with minimal maintenance, LEDs are often the better long-term bet. If you are doing a hot-climate or retrofit build, cool tube value tends to be higher because you are extracting useful performance from existing HID gear.