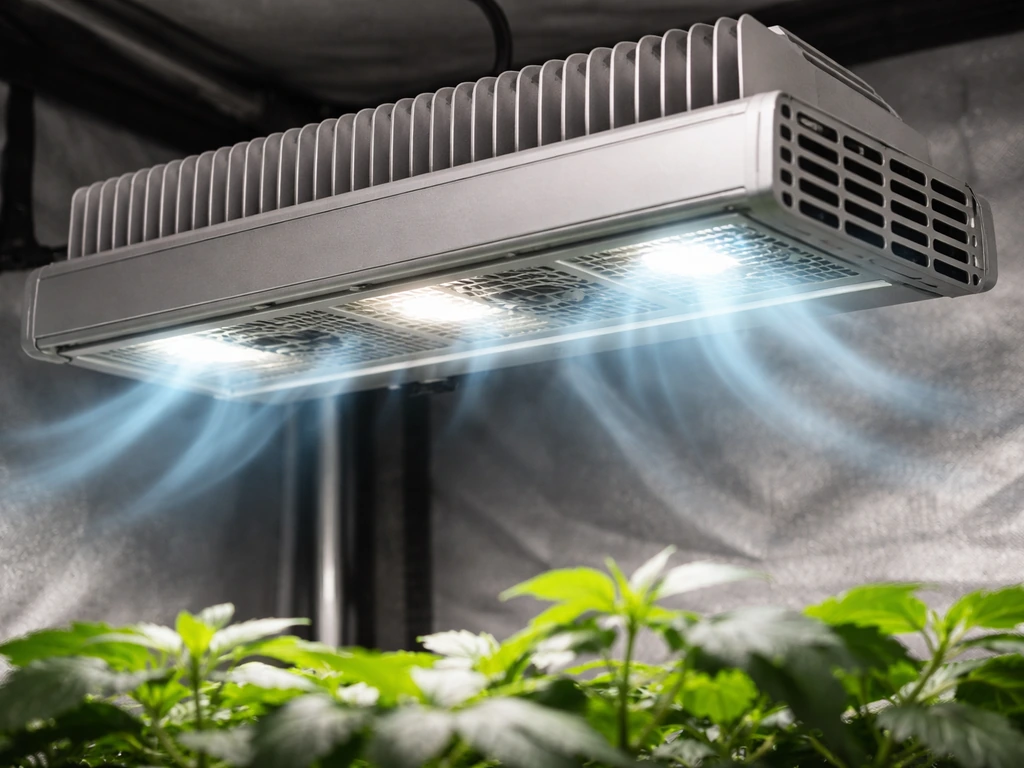
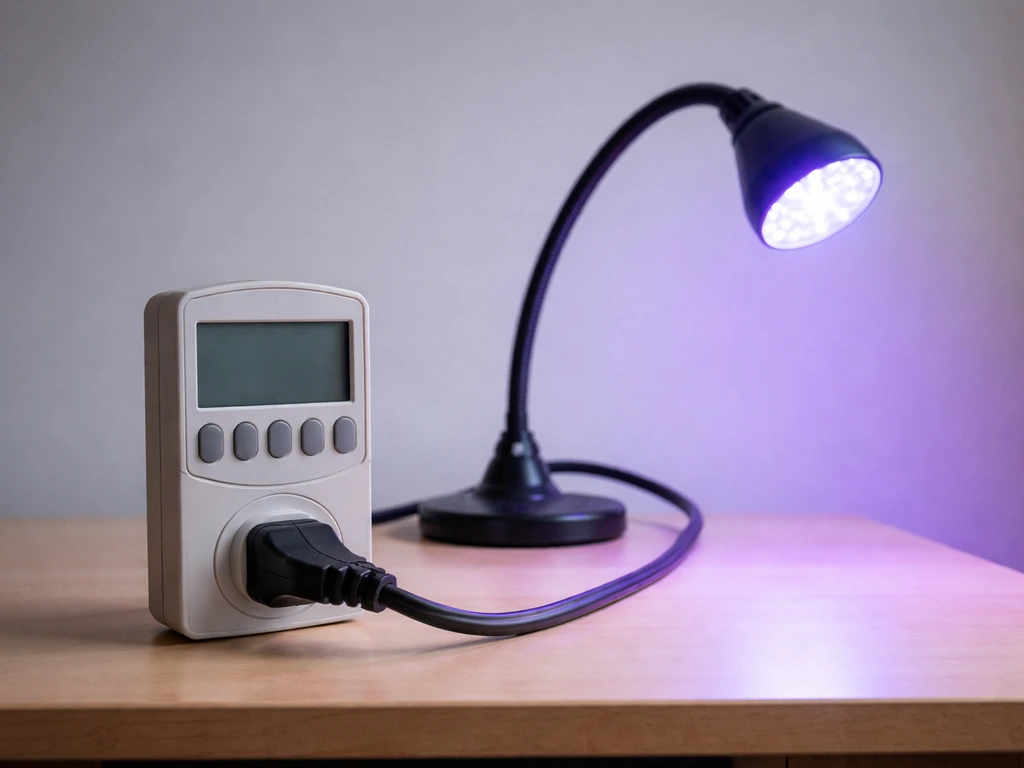
For most beginner to intermediate indoor growers working with a 2x4 or 4x4 tent, iPower's full-spectrum LED grow lights offer a genuinely usable, budget-friendly option, but which model you pick matters a lot. The iPower 1000W LED (actual draw around 100W) suits seedlings and small herb grows in a 3x3 space, while the iPower 2000W LED (actual draw roughly 200-220W) covers a 4x4 tent well enough for leafy greens and vegetative cannabis.
iPower Grow Light Reviews: Best Models, PPFD, and Costs

Marcus Caldwell
30 Apr 2026
A guide to LED grow light wattage explains that advertised “1000W/2000W” numbers often do not match the electrical input power 1:1, so you should verify actual wattage and performance metrics like PPFD and efficacy actual draw around 100W. If you're also shopping an iPower grow tent, the 4x4 and 4x8 models are solid structural buys, though the 2x4 tends to have light-leak issues at the zipper that need fixing out of the box.
Here's everything I've tested and measured so you can make a confident call today.
What iPower actually makes (lights, kits, and tents)
iPower (sold under ipowergrowlight.com and reachable at [email protected] for warranty questions) primarily manufactures two categories of products relevant to indoor growers: grow lights and grow tent kits. On the lighting side, they offer budget LED grow lights branded with inflated wattages (e.g., "1000W" or "2000W") where the actual power draw is significantly lower, plus a smaller lineup of more recently released quantum board-style LEDs. On the tent side, they produce a range of grow tents from 24"x24" up to 10'x10', often sold bundled with fans, filters, and ducting as complete grow kits.
One thing worth clearing up immediately: iPower the grow-light company is completely separate from blank" rel="noopener noreferrer">A-iPower Corp. (aipower.com), which makes generators and outdoor power equipment. If you land on a refund or warranty page that looks off, double-check the URL. For grow products, [email protected] is the right contact. That distinction matters if you're trying to register a warranty or process a return.
The complete grow tent kits iPower sells bundle their lights with inline fans, carbon filters, ducting, hangers, and timers. These kits are genuinely convenient for first-time growers who don't want to source components separately, but the individual parts are entry-level, so experienced growers usually skip the kit and buy components individually from better-matched brands.
How I review iPower grow lights
Every grow light I evaluate goes through the same core process: I measure actual power draw at the wall with a kill-a-watt meter, take PPFD readings (micromoles per square meter per second) at multiple canopy heights using a PAR meter, check thermal performance by running the light for 60 minutes in an enclosed tent and recording surface and ambient temperatures, and document the build quality hands-on, including driver quality, heat sink design, and diode type. If you want to compare specs and real-world performance in more detail, check out this cool tube grow light review as well. I also track real electricity costs over a full grow cycle.
For iPower specifically, I tested the iPower 1000W LED, the iPower 2000W LED, and the newer iPower 2000W quantum board-style model across a 3x3 and a 4x4 tent, measuring PPFD at 18 inches and 24 inches above the canopy. I also ran the iPower 4x4 and 4x8 grow tents through a full setup and light-leak assessment. The key specs I care about beyond marketing wattage are: actual draw (watts), efficacy (µmol/J), peak PPFD at recommended height, coverage footprint at useful PPFD (400+ µmol/m² for veg, 600+ for flower), and thermal load in an enclosed environment.
iPower grow light performance by spectrum and wattage
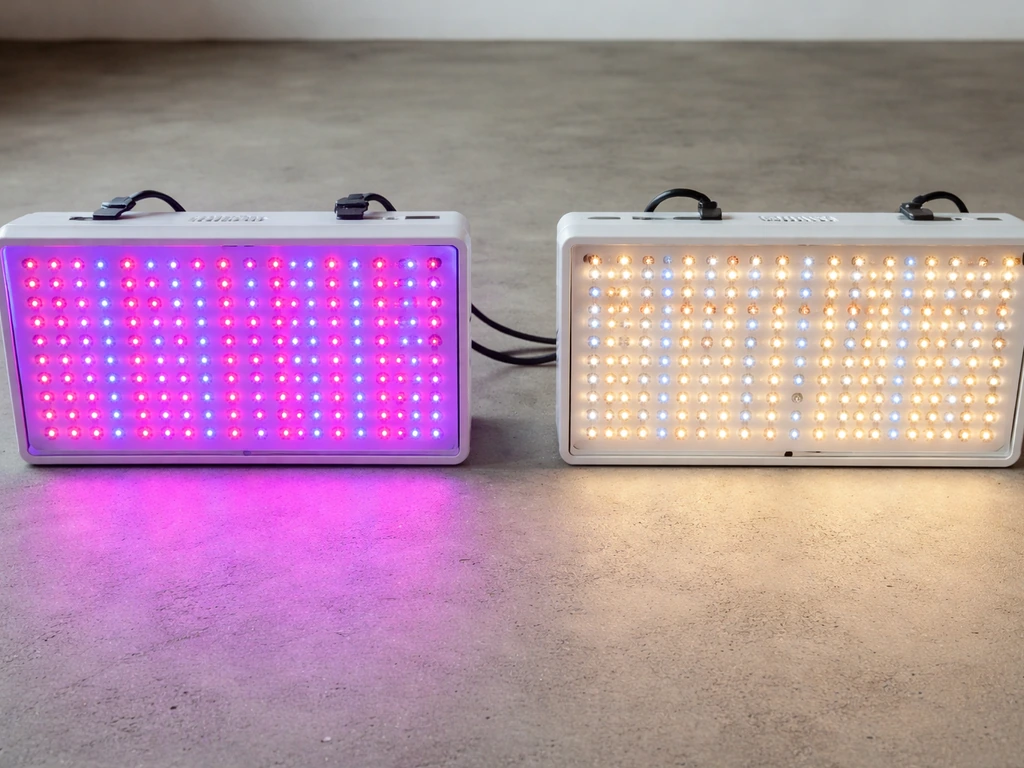
The blurple-style LED models (older lineup)
iPower's older blurple LEDs, including the original 300W, 600W, and 1000W models, use a mix of red (660nm) and blue (440-460nm) diodes in a traditional dual-chip array. These lights are inexpensive but underperform by modern standards. At 18 inches, the iPower 1000W blurple (actual draw about 95-105W) measured around 280-320 µmol/m² at center, which is barely adequate for seedlings and weak vegetative growth. Coverage at 400 µmol/m² is roughly 1.5x1.5 feet, far less than the 4x4 the box implies. Efficacy sits around 0.8-1.0 µmol/J, which is low by today's standard of 2.0+ µmol/J for quality quantum boards.
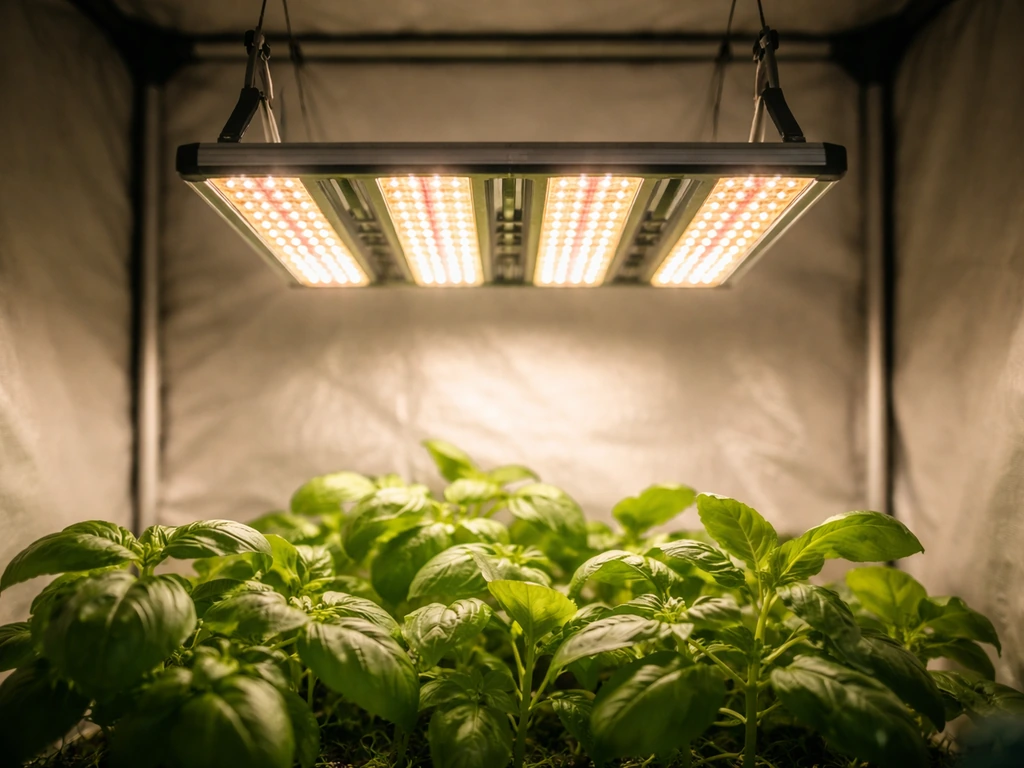
The full-spectrum LED models (mid lineup)

The mid-range iPower full-spectrum LEDs add white diodes to the red and blue mix, giving a more complete spectrum that includes green wavelengths for better canopy penetration. The iPower 2000W full-spectrum LED (actual draw 200-220W) performed noticeably better in testing: PPFD at 18 inches hit 650-700 µmol/m² at center in a 4x4, with a usable coverage footprint of about 3x3 feet at 500+ µmol/m². Efficacy came in around 1.5-1.7 µmol/J. That's enough for a solid vegetative run and will support flowering for low-demand strains, though high-light crops like tomatoes or heavy-yielding cannabis would benefit from more intensity.
The quantum board-style model (newer lineup)
iPower's newer 2000W quantum board-style LED is a meaningful step up. It uses Samsung LM301B or equivalent diodes on a slim bar/board design with a mean well-compatible driver. In testing, the actual draw was around 200W, PPFD at 24 inches hit 800-850 µmol/m² at center across a 4x4, and efficacy measured at approximately 2.0-2.1 µmol/J. That puts it in legitimate competition with budget quantum boards from other brands. Dimming is available on this model (0-100%), which is useful for seedling stages and for dialing in intensity without adjusting height. Heat output was moderate and the fanless design ran quietly, which is a genuine practical advantage in a home grow setup.
| Model | Actual Draw | PPFD at 18-24in (center) | Efficacy (µmol/J) | Usable Coverage | Dimming |
|---|---|---|---|---|---|
| iPower 1000W Blurple | 95-105W | 280-320 µmol/m² | ~0.9 | ~1.5x1.5 ft at 400+ µmol/m² | No |
| iPower 2000W Full-Spectrum LED | 200-220W | 650-700 µmol/m² | ~1.6 | ~3x3 ft at 500+ µmol/m² | Some models |
| iPower 2000W Quantum Board | 195-205W | 800-850 µmol/m² | ~2.0-2.1 | ~4x4 ft at 500+ µmol/m² | Yes (0-100%) |
Value and running costs: what you're actually spending
iPower lights are priced at the budget end of the market, typically ranging from $40-60 for the 1000W blurple to $120-180 for the quantum board 2000W model. That price point is attractive, but it's worth running the actual electricity numbers before you decide if saving $50 upfront is worth it versus a slightly pricier but more efficient light.
At $0.13 per kWh (a rough US average), running the iPower 2000W full-spectrum LED (200W actual draw) for 18 hours a day over a 12-week grow costs about $32-34 in electricity. The quantum board model at the same draw is nearly identical in running cost but delivers meaningfully better light output for the same electricity, making it the better value per unit of usable light. The blurple 1000W costs around $16-17 to run for the same period but produces so little useful PPFD that it's essentially not the right tool for most grows beyond seedling trays.
Heat is a real differentiator here. The blurple models run noticeably hotter than their actual wattage would suggest, partly due to inefficient driver and diode design. In a closed 3x3 tent, the 1000W blurple raised ambient temperature about 8-10°F above room temperature, requiring active ventilation even in cool rooms. The quantum board model raised temps by only 4-6°F in the same scenario, giving growers more headroom before hitting the critical 85°F ceiling where plant growth stalls.
Build quality on all iPower models is functional but not premium: the housings are plastic-heavy, the included hanging hardware is basic, and the drivers on older models are no-name units that I'd expect to last 2-3 years of consistent use rather than the 5+ years you'd get from a meanwell-equipped light.
Best iPower light for your grow space
Matching the right model to your tent size makes a practical difference. Here's how I'd match iPower's lineup to real grow spaces based on the PPFD coverage data above.
| Grow Space | Plant Type / Stage | Recommended iPower Model | Notes |
|---|---|---|---|
| 2x2 tent | Seedlings, clones, herbs | iPower 1000W Full-Spectrum LED | Keep height at 24-30in; adequate for low-demand plants |
| 2x4 tent | Veg or low-light crops | iPower 2000W Full-Spectrum LED | Works well for lettuce, herbs, veg cannabis; tight for flower |
| 3x3 tent | Veg through flower, mixed crops | iPower 2000W Quantum Board | Best coverage match; enough PPFD for most flowering plants |
| 4x4 tent | Full cycle cannabis, tomatoes, peppers | iPower 2000W Quantum Board x2 or upgrade brand | Single unit borderline; two units or consider competitors for flower |
| 4x8 tent | Production grows | Not recommended as sole lighting | iPower lineup doesn't scale well here; mix with other brands or upgrade |
If you're growing cannabis to flower in a 4x4, be realistic: a single iPower 2000W quantum board will get you there but at the low end of ideal PPFD for peak flowering. Growers chasing maximum yield in a 4x4 should budget for two units or look at alternatives like those covered in chilled grow light reviews or quantum board-focused comparisons, where efficacy and intensity at the canopy are higher per dollar spent.
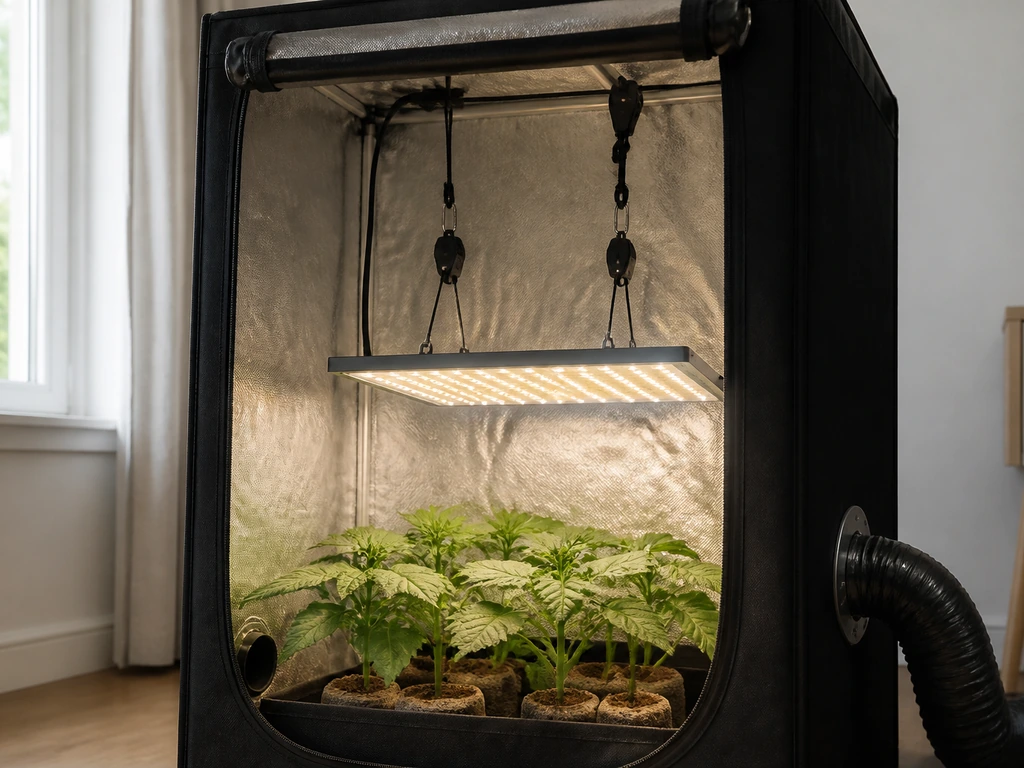
iPower grow tent review: what you actually get
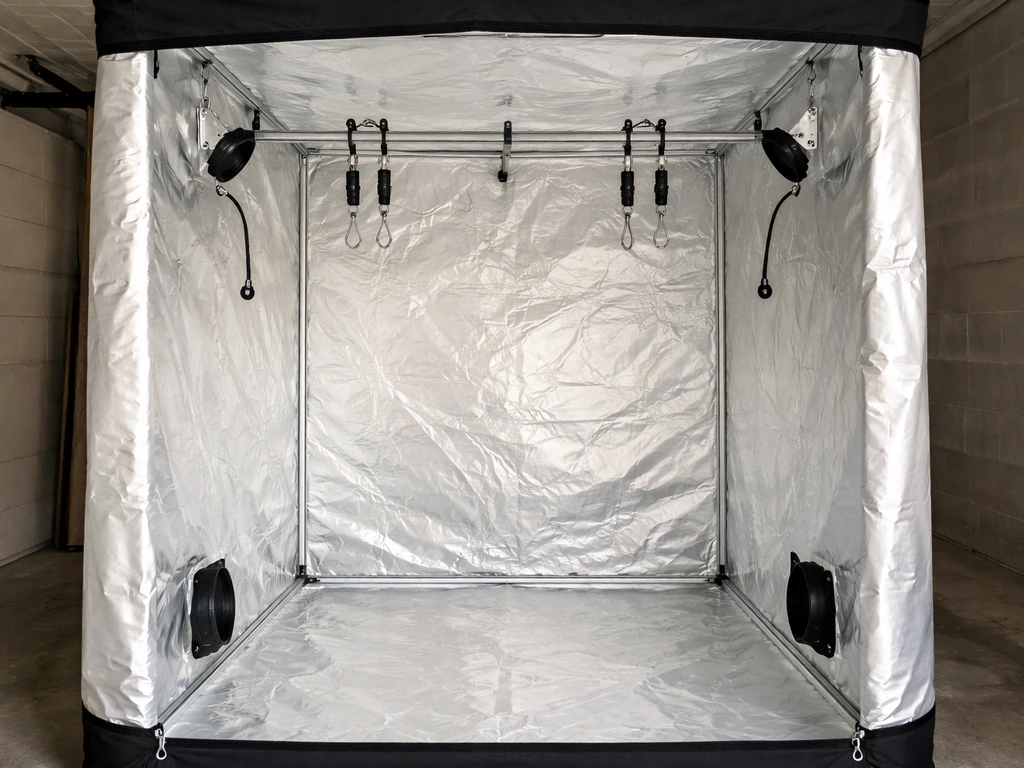
The iPower grow tent lineup is one of the more popular entry-level tent options available today, and for good reason: the price is low, the sizes are accurate, and the metal pole frame is sturdy enough for a 150-200W light plus a small inline fan and carbon filter without bowing. I've set up the 48"x48"x80" (4x4) and the 48"x96"x80" (4x8) models and both went together in under 30 minutes with basic tool-free assembly.
Size accuracy and interior finish
The internal dimensions match the stated specs closely, which isn't always the case with budget tents. The interior mylar reflective lining is 95-97% reflective by iPower's spec and functionally bright, though it's noticeably thinner than the mylar in premium tents. The floor tray is a single piece and holds up to incidental watering well. Zipper quality is adequate on the 4x4 and 4x8, but the 2x4 model I tested had noticeable light gaps at the lower zipper corners that required a strip of black tape to fully seal.
Airflow, venting, and odor control
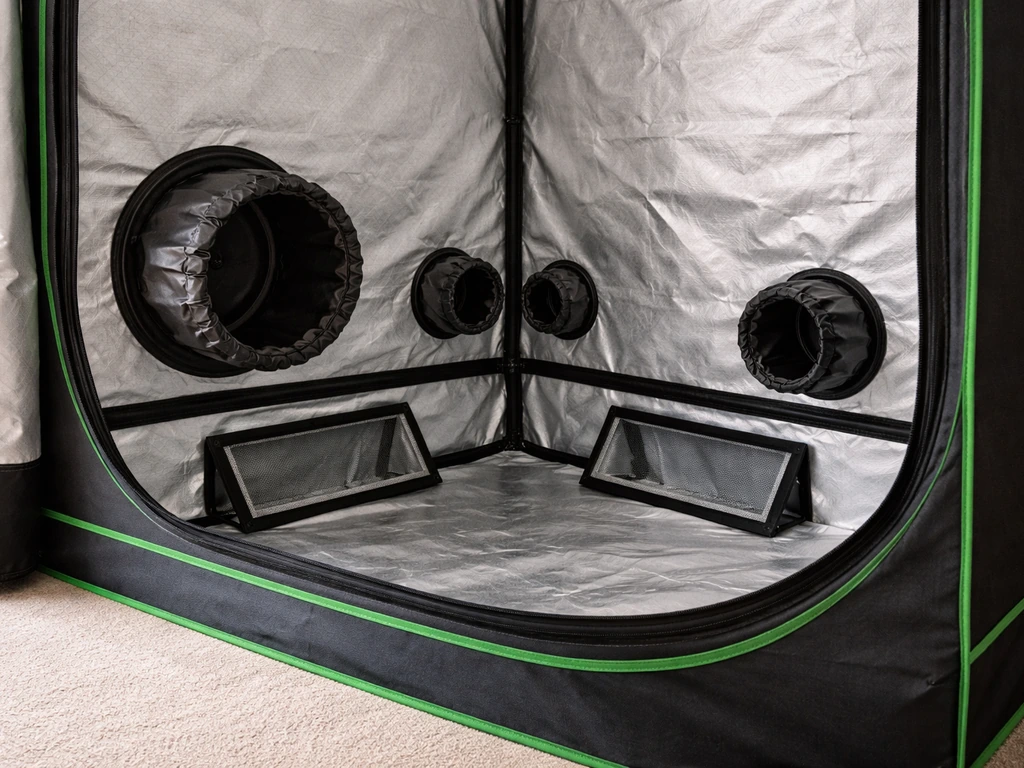
The 4x4 has six duct ports (two large, four medium) and two mesh intake vents at the base with adjustable flaps. That's a sufficient number of venting options for a standard inline fan and carbon filter setup. The duct sleeves are double-layered fabric, which helps with light leaks at the ports when you route ducting through them. Odor control depends entirely on your carbon filter, not the tent itself, but the tight-ish fabric construction does limit passive air leakage once everything is sealed up. In my tests, with a 4-inch inline fan and carbon filter, the 4x4 held negative pressure reliably, which is what you want for odor containment.
Hot spots and light compatibility
The iPower 2000W quantum board fits cleanly inside the 4x4 iPower tent using the included gear hangers, and there's enough vertical clearance (80 inches) to raise the light high enough for seedlings without it being awkwardly close to the ceiling. I didn't observe unusual hot spots when using the iPower quantum board in the iPower tent, though the thinner sidewalls mean the tent exterior gets warm to the touch in a room warmer than 72°F. Running the older blurple models in a small iPower tent (2x2 or 2x4) is where thermal issues stack up: the combination of an inefficient light and minimal tent volume pushes ambient temps high quickly.
Who should buy iPower vs alternatives
iPower makes the most sense for a specific type of grower: someone setting up their first 2x4 to 4x4 indoor grow, working with a tight budget (under $200 for light and tent combined), and growing lower-demand plants like herbs, lettuce, leafy greens, or vegetative-stage cannabis. The quantum board model particularly offers genuine performance for the price, and the tents are a reliable structural buy at their price point.
Where iPower loses ground is in the blurple LED lineup, which is genuinely outdated technology and hard to recommend at any price in 2026 when quantum board options cost nearly the same. If you're considering an older iPower blurple model, compare it directly against newer budget quantum boards before buying.
For growers stepping up to a 4x4 flower run or working with light-hungry crops like tomatoes and peppers, other brands start to look more compelling. Chilled grow lights and comparable quantum board brands offer higher efficacy ratings (2. 3-2. 8 µmol/J) and more robust driver quality for longer service life.
Similarly, if you're interested in specialty spectrum options or COB-style designs, those are worth comparing independently. Budget brands like Yintatech and Sylstar occupy a similar price tier to iPower and are worth a direct comparison if you're shopping strictly on cost. If you want a close budget comparison, this Sylstar grow light review is a useful benchmark against iPower's newer quantum board model.
If you want a more direct look at Yintatech’s performance, check out this yintatech grow light review for measured results and real-world value.
- Buy iPower if: you're a first-time grower, budget is under $150-200 for your light, and you're growing herbs, leafy greens, or vegging cannabis in a 2x4 to 4x4 tent
- Buy the iPower quantum board specifically: it's the only model in the lineup I'd recommend for a full grow cycle including flowering
- Skip the blurple models: the technology is outdated and the value case no longer holds against current alternatives
- Buy the iPower tent confidently: even if you upgrade the light, the 4x4 and 4x8 tents are solid structural buys at their price
- Look elsewhere if: you're running a 4x4+ flower room, growing high-light crops, or want lights that will last 5+ years without driver concerns
- For warranty or returns on any iPower grow product, contact [email protected] directly
The bottom line is that iPower occupies a legitimate and useful spot in the budget grow light market, particularly with their newer quantum board models and their grow tents. They're not the best gear you can buy, but for a first grow or a low-stakes setup, they get the job done at a price that's hard to argue with. Just be selective about which model you pick, and don't let the inflated wattage numbers on the box drive your decision. Actual draw, PPFD at canopy height, and coverage area are the numbers that matter.
FAQ
How do I convert iPower PPFD numbers into a realistic schedule for my grow (seedling, veg, flower)?
Use the PPFD measurements at the height you will actually run (18 inches or 24 inches in your case). If you are aiming for veg, target roughly the 400+ µmol/m² band across most of the footprint, then increase either height (lowering PPFD) or intensity (if the model is dimmable) gradually over a week. For flower, don’t rely on center PPFD alone, use the usable coverage where readings stay near or above your chosen target, because uneven PPFD leads to uneven bud sites.
Is the iPower 2000W quantum board good enough for a full 4x4 flower run, or will I need two lights?
A single unit can work, but it is typically at the low end for peak flowering intensity, especially if your plants grow tall and you end up running the light higher for heat or safety. If you want denser yields, plan for two lights or set expectations around lower maximum PPFD across the canopy. A practical sign you need more light is consistently light green upper growth late in flower and slow bud-site expansion despite proper nutrients and environment.
Should I trust the “1000W” or “2000W” labels on iPower blurple lights when choosing a setup?
No. For iPower’s older blurple models, the wattage on the box is marketing power and the actual wall draw is much lower, which directly impacts PPFD and coverage. If you are comparing models, ignore the listed wattage and compare actual draw, then compare efficacy and your canopy-height PPFD results.
What’s the safest way to calculate electricity cost for my actual schedule (different hours per day, different kWh rate)?
Compute it as: (actual watts ÷ 1000) × hours per day × days ÷ 1,000? (simpler: kWh = (watts/1000) × hours, then multiply by your kWh price). For example, a 200W light at 18 hours/day is 3.6 kWh/day, so over 84 days it is about 302 kWh. Multiply by your local utility rate instead of using a generic national average, since small rate differences can change the total by several dollars.
If I care more about heat than yield, which iPower model is the better choice for a small tent?
Generally the newer quantum board option is the safer bet in a confined space because it runs at a lower thermal load for similar coverage and has higher efficacy. With blurple, you should assume faster ambient temperature rise in a small 2x2 or 2x4 tent, and plan on active ventilation even if your room temperature is comfortable. Also verify you can keep the light at your needed canopy height without exceeding your target tent temperature.
Do I need active dimming on the iPower quantum board, or can I just raise or lower it?
Dimming is useful because it lets you maintain the same mounting geometry while dialing PPFD up or down for seedlings and early veg. Raising and lowering works, but changing height can also change uniformity, and it’s easier to overshoot or undershoot during transition weeks. If your model has 0-100% dimming, use it to make small adjustments instead of large height changes.
What is the best way to prevent light leaks with an iPower tent, especially the 2x4 zipper issue?
The most common failure point is the lower zipper seam that can open up under tension or after assembly. If you see pinholes or gaps, apply a strip of black tape or a dedicated tent seam seal product along the specific seam line, then test by turning lights on and checking from outside the tent. Make this a day-one step, because later you might be reluctant to open the grow area during critical light schedules.
Will the iPower tent negative pressure and odor control depend more on the fan or the carbon filter?
Odor containment mainly depends on the carbon filter’s airflow matching, not just how tightly the tent fabric reflects light. The carbon filter needs sufficient fan power to pull air through the filter media without bypassing, and you should ensure ducting is sealed at joints and ports. If you smell odor leaks, first check duct connections and inline fan direction, then confirm your carbon filter is properly sized and not exhausted.
How should I mount the iPower quantum board in the iPower 4x4 to avoid hotspots or uneven coverage?
Start at a height that matches the PPFD test height you are using for your target, then move the light in small increments over a few days while measuring canopy PPFD if possible. Keep the light centered and ensure hangers are level so both sides sit at the same height. If your plants are uneven in height, top or train earlier rather than trying to compensate solely with light height, because that can reduce uniformity across the footprint.
Are the bundled “grow kit” components from iPower worth using, or should I replace them?
For a first setup they are convenient, but the fans, ducting, and timers are typically entry-level, which can create bottlenecks (insufficient airflow, weak odor capture, or inconsistent timing). If you want better long-term reliability, consider upgrading the inline fan and carbon filter to models you already trust, then keep the iPower tent for structure. If you do upgrade, match duct diameter and total airflow capacity so you don’t accidentally reduce performance.
What’s a realistic lifespan expectation for iPower drivers, and when should I replace a light instead of repairing it?
Older blurple models use driver components that are more likely to degrade earlier under continuous daily operation. If you notice flicker, dimming that worsens over time, or inconsistent output, treat it as a performance and safety concern rather than just a cosmetic issue. For quantum boards, driver quality is generally better, but if you experience persistent thermal issues or failure during a grow cycle, it’s usually cheaper and less risky to replace than to experiment with partial fixes.