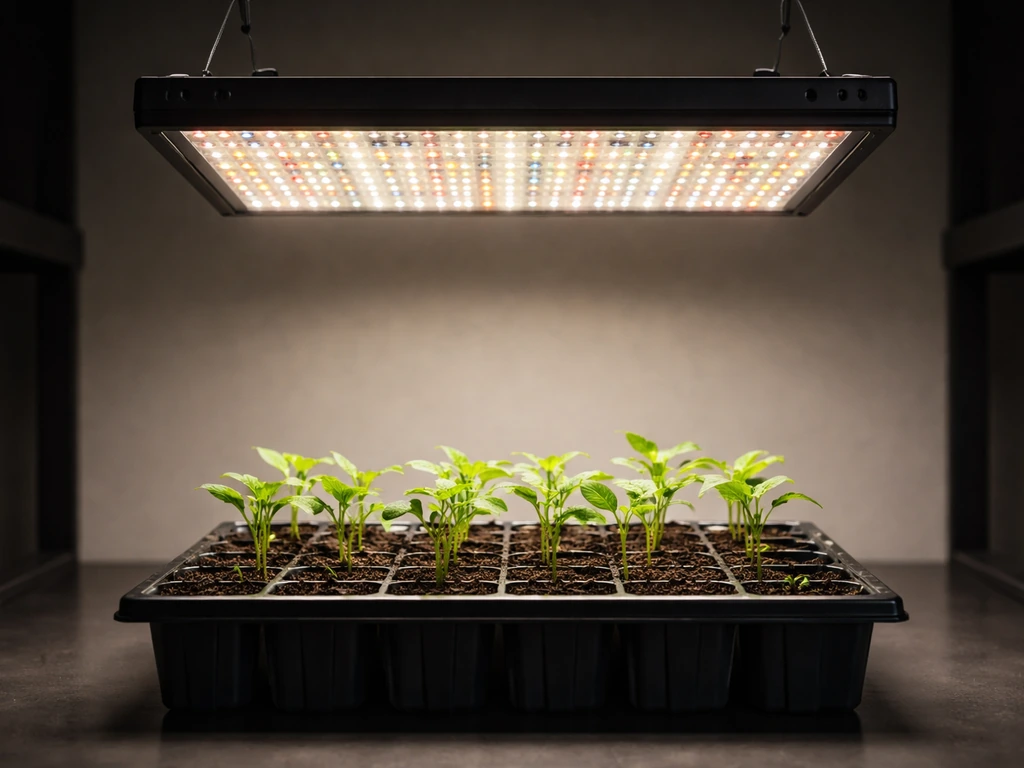
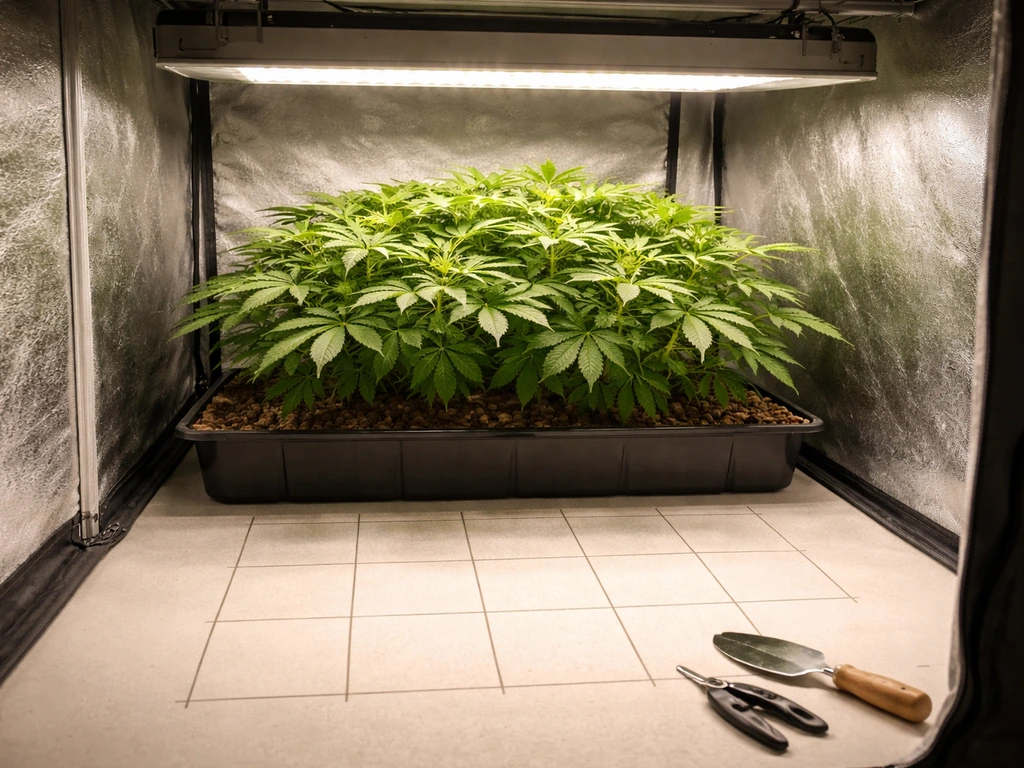
For most dorm setups, a compact LED panel in the 20 to 45 watt range with a full-spectrum output, built-in dimmer, and low heat emission is what you actually need. Something like a bar-style or small quantum board that pulls under 50 watts, hangs or clips easily, and won't cook your roommate out of the room. The catch is that most grow light marketing is aimed at 4x4 tent growers, so filtering out what actually makes sense for a 1 to 2 square foot desk or shelf grow takes some real-world calibration. That's what this guide is for.
Dorm Grow LED Light Review: Best Picks for Small Spaces

Marcus Caldwell
29 Apr 2026
Dorm constraints and what makes a grow LED actually dorm-friendly
A dorm room is not a grow tent. You're dealing with a shared space, fixed electrical outlets (often on a 15-amp shared circuit), no overhead mounting points, limited floor area, and an RA who may not appreciate a blinding purple glow bleeding under your door at 2 AM. Any grow light you're considering needs to clear a few non-negotiable dorm-specific hurdles before specs even matter.
- Power limits: Most campus dorms restrict high-draw appliances. A grow light pulling 45 watts continuous is fine. One pulling 200 watts may trigger a conversation or a policy violation. Check your residence handbook.
- Mounting without damage: Screws and hooks in walls or ceilings are usually prohibited. You need a light that works with a clip-on arm, a tension rod, a shelf bracket, or a freestanding adjustable stand.
- Light spill and noise: Full-intensity broad-spectrum LEDs are bright. White-spectrum lights are less intrusive than purple blurple panels. Cooling fans in some fixtures run audibly — in a small quiet room, that matters.
- Heat output: A well-made LED at 45 watts will run warm but not hot enough to be a fire concern. Cheap fixtures with inadequate heatsinking are a different story, especially if you're leaving them on 16+ hours a day unattended.
- Safety certification: Look for UL listing on the fixture. UL 8800 is the specific standard for horticultural luminaires — it covers fire, electrical shock, and photobiological safety per IEC 62471. NEC Article 410.172 actually requires that lighting equipment identified for horticultural use be Listed, so a certified fixture isn't just a nice-to-have.
Beyond policy, think practically. You're growing in a space you also sleep and study in. A light that runs cool, looks reasonable (white light over purple), and can be switched or dimmed without waking your roommate is genuinely more useful than a higher-output fixture you're afraid to run.
Key spec checklist: PPFD, spectrum, dimming, efficiency, and build
Once you know what dorm-appropriate means, here's how to read a spec sheet without getting misled by manufacturer numbers.
PPFD and coverage area
PPFD (photosynthetic photon flux density) is measured in micromoles per square meter per second (μmol/m²/s) and tells you how much usable light your plants are actually receiving. Seedlings and leafy greens need roughly 150 to 300 μmol/m²/s. Herbs like basil and mint do well in the 200 to 400 range. Fruiting plants and anything flowering wants 400 to 600+ μmol/m²/s to perform properly. The number manufacturers advertise is almost always the peak at the center of the beam at a specific hang height, typically 12 to 18 inches. Always ask: what's the PPFD at 18 inches across a 1x1 or 2x2 foot area, not just at the dead center?
Spectrum
Full-spectrum white LEDs (typically in the 3000K to 6500K range, sometimes blended) cover the complete photosynthetic range and are what most reputable compact grow lights use now. Blurple lights (heavy red/blue LEDs with little green) still exist in the budget segment and technically work, but they're harsh on the eyes, look awful in a dorm setting, and tend to give you less uniform canopy coverage. For dorm use, a warm-to-neutral white full-spectrum board is the right call every time.
Dimming
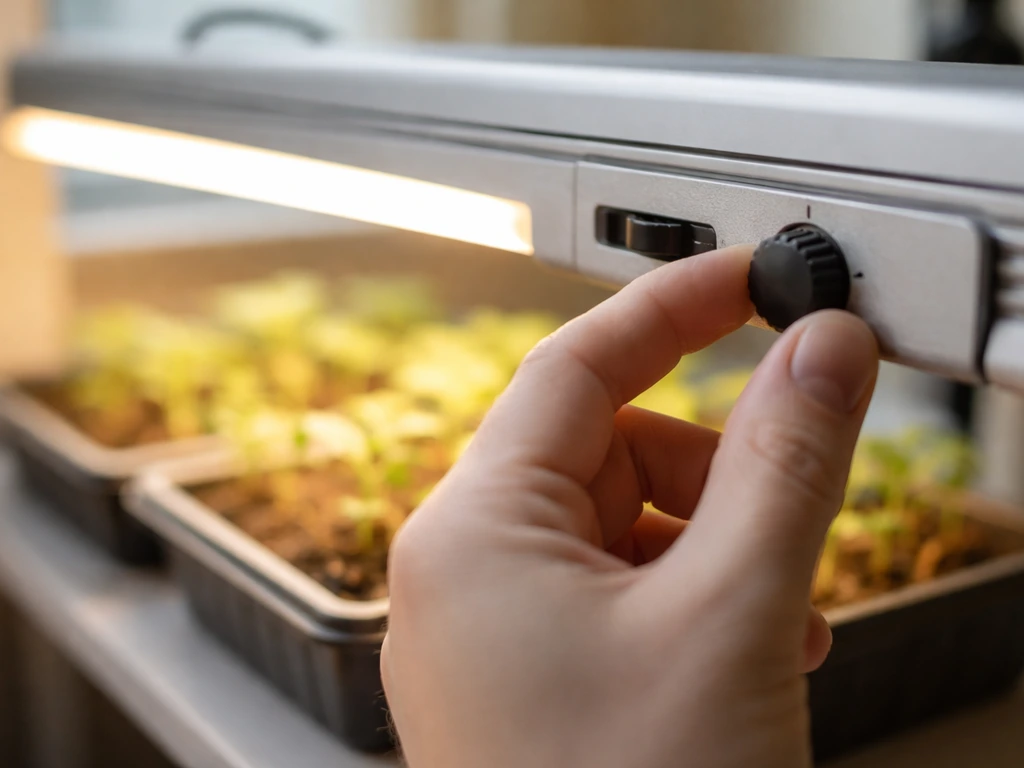
A dimmer is non-negotiable for a dorm light. Young seedlings can't handle full intensity. You'll also want to dial it back during the day when the room is lit and you're in it. Look for a stepless knob or at minimum a multi-stage switch. Some lights in the 30 to 60 watt range offer 0 to 100% continuous dimming; others step between 25%, 50%, 75%, and 100%. Continuous is better, but stepped works fine for most plant types.
Efficiency
Efficiency is expressed in μmol/J (micromoles of photons per joule of energy). Better fixtures are hitting 2.5 to 3.0 μmol/J or above at full power as of 2025 to 2026. Budget fixtures often land in the 1.5 to 2.0 range. Higher efficiency means more light per watt, less heat for a given output, and a lower electricity bill, all meaningful in a dorm context.
Build quality
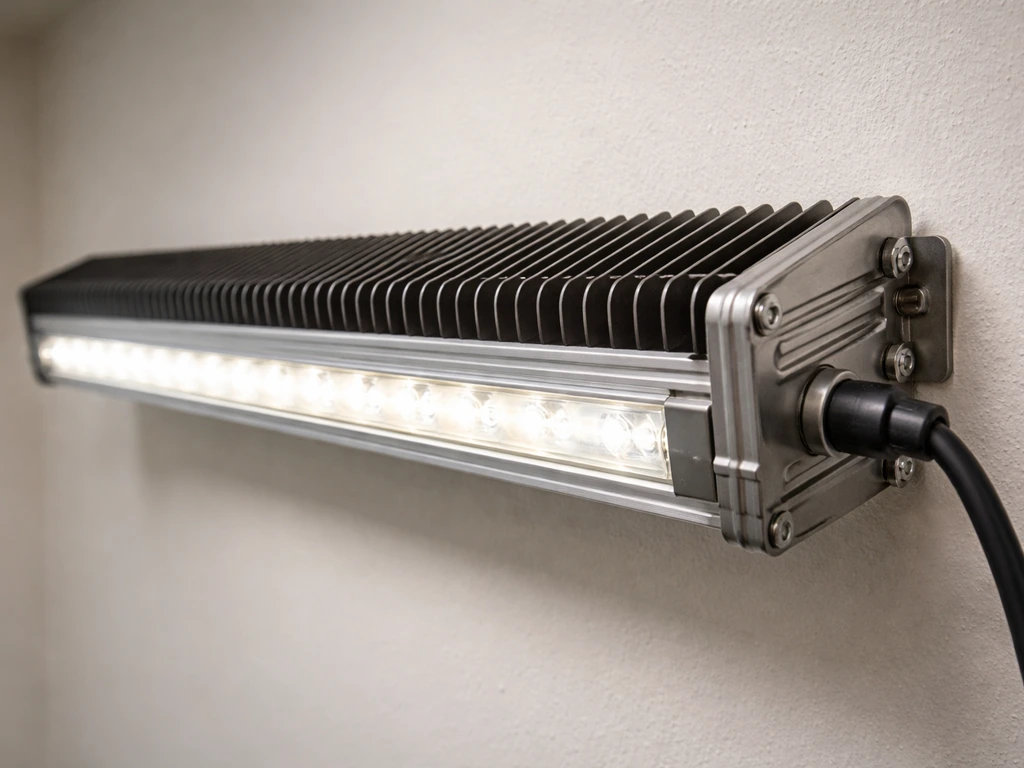
For a fixture you're running 12 to 18 hours a day in a small room, build matters. Aluminum housing with proper heatsink fins is the baseline. Look for passive cooling if possible (no fan noise). If a fan is present, check the noise spec, anything above 30 dB is noticeable in a quiet room. Cord length matters too: a 6-foot power cord gives you more placement flexibility than a 3-footer.
How to choose wattage and coverage for your plant and space
Start by measuring your actual grow footprint, not the room. Are you growing in a single pot on a 12x12 inch corner of your desk? A small shelf tray that's 24x12 inches? That's your coverage target. Then match wattage to that target at the PPFD level your plants need.
| Plant Type | Target PPFD (μmol/m²/s) | Suggested Wattage (real draw) | Coverage Area |
|---|---|---|---|
| Seedlings / propagation | 150 to 250 | 15 to 25W | Up to 1x1 ft |
| Lettuce, spinach, herbs | 200 to 400 | 25 to 45W | 1x1 to 2x1 ft |
| Basil, mint, green onions | 300 to 450 | 30 to 50W | 1x1 to 2x2 ft |
| Small flowering plants / chilis | 400 to 600 | 45 to 80W | 2x2 ft max |
| Tomatoes / cannabis (small plant) | 500 to 800+ | 75 to 120W | 2x2 to 2x4 ft |
For most dorm growers, the 30 to 50 watt real-draw range is the sweet spot. It's enough to grow leafy greens and herbs well, keep seedlings healthy, and even push a small flowering plant through vegetative growth. If you're trying to flower tomatoes or chilis to fruiting in a dorm, be realistic: you'll need closer to 75 to 100 true watts, which is still manageable electrically but generates more heat and light spill to manage.
Safety and practicality: heat, noise, mounting, and light spill
Heat
A quality 40-watt LED running passively shouldn't exceed 50 to 60°C at the heatsink surface under normal operation. That's warm to the touch but nowhere near dangerous. What creates actual risk is a cheap fixture with inadequate thermal management running 16 hours a day in a confined space, especially if it's placed near fabric, paper, or other flammables. Keep at least 6 inches of clearance around any fixture, and never run one inside an enclosed shelf unit without ventilation.
Noise
Passive cooled (fanless) LEDs are your best option for a dorm. Bar-style fixtures and small quantum boards in the sub-50 watt range are almost all passive. Some budget panels in the 45 to 80 watt range include small cooling fans that are barely audible; a few are genuinely annoying. If a product listing doesn't mention fanless or passive cooling, check user reviews specifically for fan noise comments.
Mounting
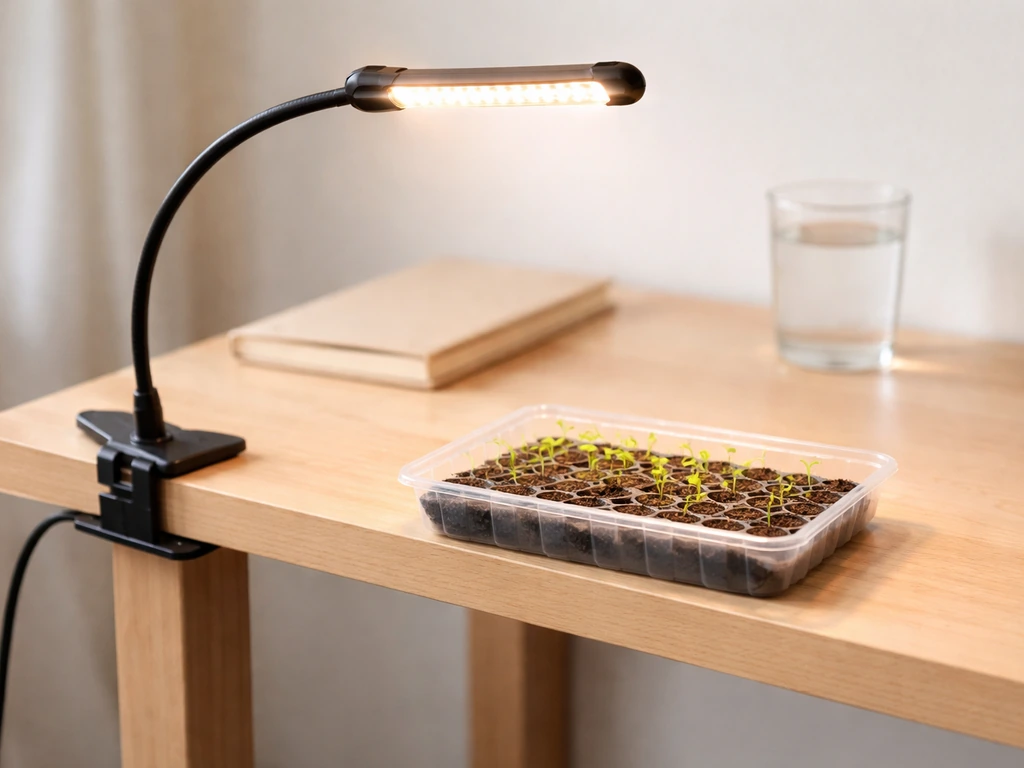
Without the ability to drill into walls or ceilings, your options are: clip-on gooseneck arms (great for single-pot setups), tension rods across a window alcove or shelf unit, adjustable grow light stands that sit on the floor, or overhead pegboard/grid panels with hooks. Most quality small panels include hanging hardware; make sure you have a surface to attach it to before buying. A free-standing adjustable-arm floor stand in the 20 to 30 dollar range is a solid universal solution.
Light spill and eye safety
White-spectrum lights are far less disruptive than purple blurple panels. Even so, a 40-watt white LED at 18 inches is genuinely bright, comparable to a strong desk lamp pointed at your face. Use blackout fabric, mylar panels, or even a cardboard enclosure if you want to contain the light footprint and keep the grow off your roommate's radar. On the photobiological safety side, fixtures certified to UL 8800 have passed IEC 62471 photobiological exposure limits, meaning the manufacturers have at least assessed the risk. Avoid staring directly into any running grow light regardless of certification.
Extension cords and electrical safety
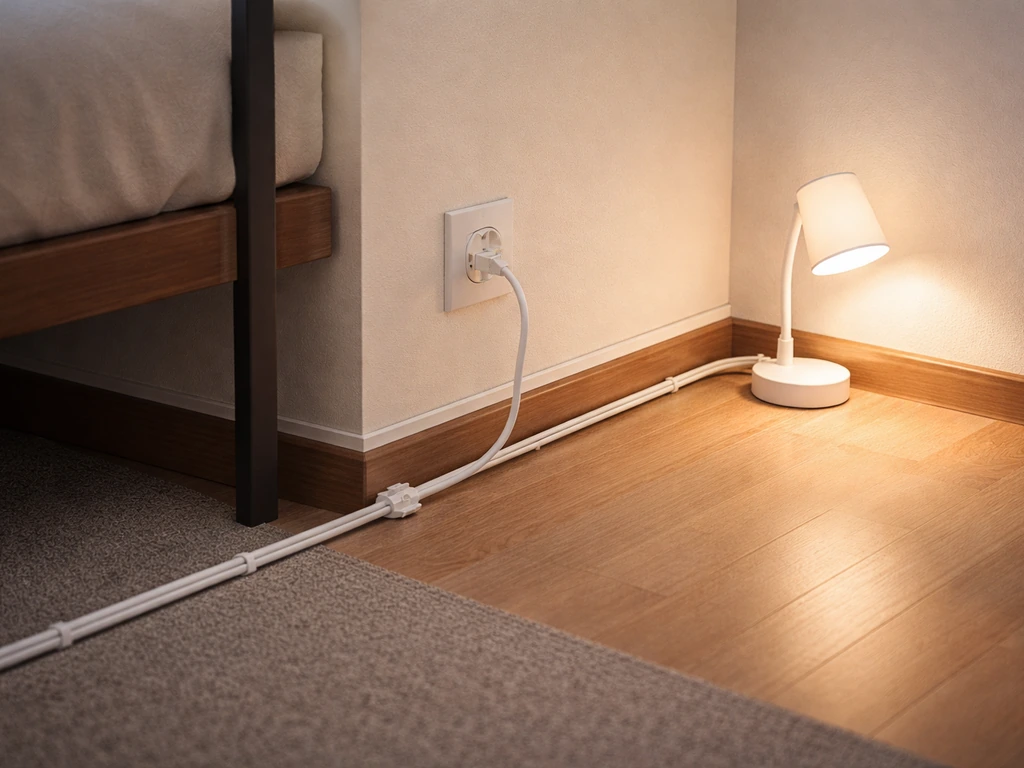
If you need an extension cord, use a properly rated one and blank" rel="noopener noreferrer">don't run it under rugs or through doorways where it can be pinched or covered. The CPSC specifically flags blank" rel="noopener noreferrer">cord-under-rug scenarios as fire risks because covered cords can't dissipate heat. A short, heavy-gauge (14 AWG) extension cord or a quality power strip with a surge protector is the right setup for a grow light in a dorm.
Performance expectations vs claims: what to test and how to judge
Manufacturer PPFD charts are almost universally optimistic. They measure at ideal conditions: perfectly centered, no obstructions, brand-new LEDs, often at close hang distances. Here's how to sanity-check performance yourself without a quantum sensor.
- Use a free PAR meter app (like Photone on iOS or Android) as a rough reference. These aren't lab-accurate, but they'll tell you if you're in the right ballpark and whether intensity is falling off sharply toward the edges of your canopy.
- Observe plant behavior over 2 to 3 weeks. Healthy growth rate, compact internodal spacing, and good leaf color are positive signs. Stretching (long, spindly stems) means not enough light. Bleaching or upward leaf curl usually means too much intensity or the light is too close.
- Check heat at plant canopy level. Hold your hand at plant height for 30 seconds. If it's uncomfortably warm, the light is either too close or too powerful for that height.
- Compare coverage uniformity by placing your hand (or a light meter app) at the center and at each corner of your grow area. A good fixture should deliver at least 70% of center intensity at the edges of the claimed coverage area.
- Monitor growth milestones. Lettuce should show true leaves within 7 to 10 days from sprout under adequate light. Herbs should establish within 2 to 3 weeks. If you're significantly behind these windows with adequate watering and temperature, light quality or intensity is likely the issue.
Brands like Dorm Grow, Spider Farmer, Mars Hydro, and several others in the compact panel space have varying track records on honest spec reporting. Some independent reviews of fixtures in the 20 to 60 watt segment (including those from Lonwon, Tmlapy, and similar brands targeting small-space growers) find that claimed PPFD numbers at the fixture's listed height can be overstated by 20 to 40%.
If you are considering a specific model, a Delponting grow light review can help you confirm whether the published PPFD and dimming behavior match real dorm use independent reviews. This doesn't always mean the light doesn't work, it just means you should hang it a bit closer or accept a smaller effective coverage area than marketed. For a practical example of how these specs play out in real use, see this gn telos 0010 led grow light review.
Value and reliability: price, warranty, longevity, and best buys
The compact grow light segment has gotten very competitive in the 25 to 100 dollar range. Here's what the price tiers actually get you in 2026.
| Price Range | What You Get | Watch Out For | Best For |
|---|---|---|---|
| Under $25 | Basic blurple or low-wattage white panel, minimal dimming, often no certification | No UL listing, poor heatsinking, inaccurate PPFD claims, short lifespan | Casual herb growing, very low stakes |
| $25 to $60 | Full-spectrum white LEDs, passive cooling, basic dimming, some with timers | Inconsistent quality control across batches, minimal warranty support | Leafy greens, seedlings, herbs on a tight budget |
| $60 to $120 | Better efficiency (2.0+ μmol/J), more consistent PPFD, better build, UL or CE listed | Some brands over-claim wattage; verify real draw | Most dorm growers, herbs through small flowering plants |
| $120 to $200 | Quantum board or bar-style, 2.5+ μmol/J efficiency, full dimming, solid warranty (3+ years) | Overkill for a single pot; justify with larger grow area | Serious small-space growing, fruiting plants, multi-plant setups |
For longevity, look for an L70 rating (the point at which LEDs drop to 70% of initial output) of at least 30,000 hours. Quality fixtures from brands using Samsung LM301H or similar top-bin diodes often carry 50,000-hour L70 ratings. At 16 hours per day, 30,000 hours is about 5 years of continuous use, more than enough for a dorm run.
Warranty terms vary wildly. Budget lights often carry 1-year coverage with unclear return policies. Mid-range and premium brands are increasingly offering 3 to 5-year warranties, which tells you something about their confidence in build quality. A light with a 3-year warranty at $90 is a better value than a $40 light with a 6-month warranty if you're planning to use it consistently.
Best-fit scenario shortlist
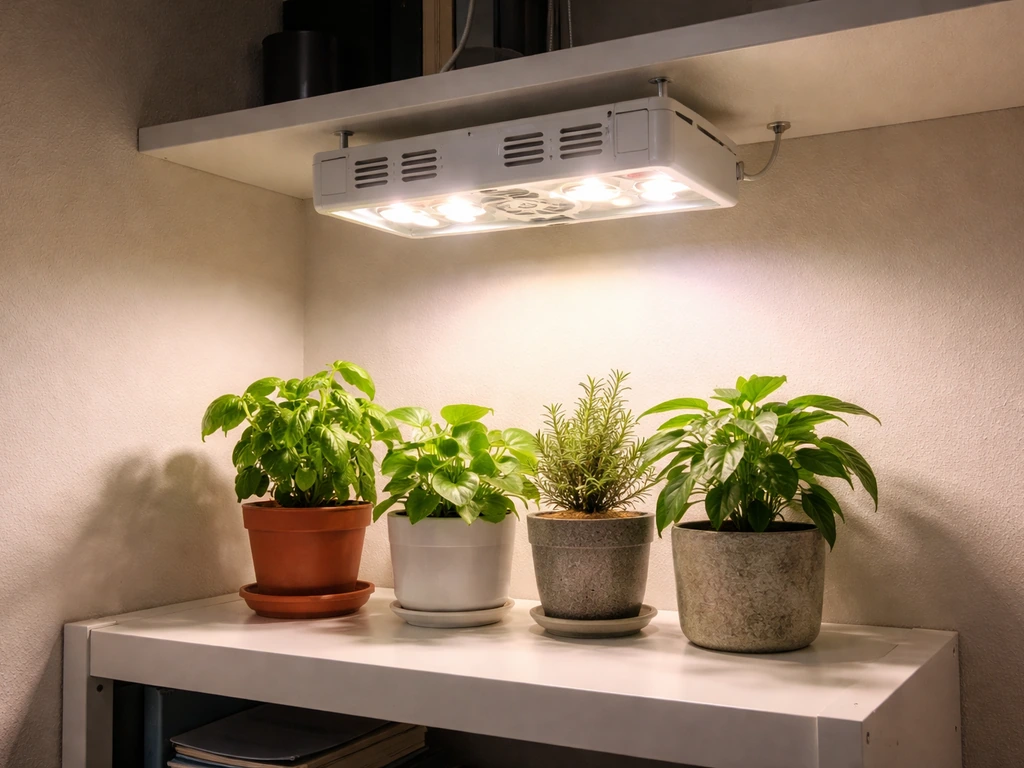
- Seedlings or propagation only: A 15 to 25 watt clip-on bar light with dimming, hung at 12 to 18 inches. Keep it simple and cheap — seeds and cuttings don't demand much.
- Herbs and leafy greens (most common dorm grow): A 30 to 50 watt full-spectrum white panel with stepless dimming, passive cooling, and at least a 1-year warranty. This is the category where mid-range options from brands like Spider Farmer (SF series small panels), Mars Hydro (TS 600/1000), or comparable alternatives deliver real results without drama.
- Small flowering plants or chilis: Step up to 60 to 80 true watts with a fixture that covers a genuine 2x2 foot footprint at 400+ μmol/m²/s. Expect more heat to manage and light spill to contain.
- Maximum yield, minimal footprint: A bar-style quantum board in the 60 to 100 watt range at 2.5+ μmol/J efficiency. More expensive upfront but genuinely better output per watt and per dollar over time.
- Absolute budget, low stakes: Any white-spectrum full-spectrum panel with a dial dimmer in the $25 to $40 range will grow herbs. Don't overthink it if you're just keeping basil alive on a windowsill with a supplement light.
Your next steps before you buy
- Measure your grow area in inches. Write it down. This is the single most important input for every decision that follows.
- Decide what you're growing and what growth stage matters most — seedlings need less intensity than fruiting plants, and your light choice should reflect that.
- Check your dorm's electrical policy. If there's a wattage limit on personal appliances, stay well under it. A 45-watt LED running 16 hours a day adds about 22 kWh per month — negligible on most circuits.
- Verify mounting options before purchasing. Confirm whether you can use a floor stand, tension rod, or clip arm, and check that the light you're buying ships with compatible hardware or that you're budgeting for a stand.
- Look up the specific fixture's real wattage draw (not the equivalent or advertised wattage), the PPFD at your intended hang height over your measured grow area, and whether it carries UL 8800 or equivalent safety certification.
- Read user reviews specifically for heat, noise, and long-term reliability — not just first-impression star ratings. Fixtures from brands reviewed in the compact LED segment (including options like those from Lonwon, Tmlapy, and similar small-space-focused lines) often show their real-world strengths and weaknesses in the 3 to 6 month owner reviews more than anywhere else.
The right dorm grow light is almost always a modest, well-built, full-spectrum white LED in the 30 to 60 watt range with a dimmer and passive cooling. Spend more if you're serious about fruiting plants; spend less if you just want to keep herbs alive. Either way, measure your space first, verify the PPFD at your actual hang height, and don't run anything without a UL listing in a space you share with other people. If you want a quick example of how this plays out in real life, a Tmlapy grow light review is a useful way to compare performance, dimming behavior, and heat.
FAQ
Do I need a grow light controller, or is the built-in dimmer enough for a dorm schedule?
For most dorm grows, the built-in dimmer plus a plug-in timer is enough. Use the timer to set your on/off window, then use the dimmer to fine-tune intensity (for example, lower at night or during seedling stages). If the dimmer only works while the light is receiving power, avoid flipping it on and off from the wall constantly, since some cheap drivers dim poorly on power cycling.
How close should I hang a dorm LED without overheating my plants or the fixture?
A safe starting point is 12 to 18 inches, then adjust based on plant response and heatsink temperature. The key dorm check is the fixture surface temperature during a full session, especially if you have it near a shelf or behind fabric. If the heatsink feels unusually hot to the touch or your surrounding shelf is warm, raise the light or improve clearance (aim for at least 6 inches of air space around the fixture body).
What if the manufacturer lists PPFD at 18 inches but my setup uses a different height?
Don’t rely on the headline PPFD number. PPFD drops with distance, and the pattern depends on whether the fixture uses a lens, reflector, or board layout. If your height differs from the spec height, assume performance will be lower and may be less uniform, so plan to either shorten the distance or reduce the planting area to match the effective beam footprint.
Can I use a grow light for seedlings and then switch to flowering later, or do I need a separate light?
You can often keep the same light for seedlings and leafy greens, as long as it can reach the needed PPFD when run at full power and you have enough coverage area. For true flowering and fruiting in small spaces, it may require higher watts, better efficiency, or a closer hang that increases heat and spill. If you see slow flowering despite adequate dimming, the likely limitation is intensity and uniform coverage, not the color spectrum alone.
Is it safer to run the grow light on a power strip with a surge protector or should I use a wall outlet directly?
Wall outlets are best for continuous dorm runs, but a quality surge-protected power strip is acceptable if the strip and plugs fit securely and the cord is not strained. Avoid any power strip setup where the strip or light block vents, and never bury cables under rugs or pin them under doors, since blocked airflow can increase heat at both the light and the strip.
How do I tell if my grow light is too bright or potentially unsafe for eyes in a dorm?
Even with safety certifications, staring into the LEDs is a bad habit. In practice, if the light is visible directly from your study spot or from where you sit, it is probably too exposed. Use shielding like a blackout fabric panel or a cardboard enclosure with ventilation gaps to reduce glare and light spill, and position the beam so it hits the plants, not your face.
What’s the best way to manage light spill in a shared dorm room without hurting plant performance?
Contain glare by using a reflective barrier behind or around the setup (mylar or blackout fabric panels) rather than flattening the light output by covering the front. Keep the barrier close to the fixture or plant to reduce stray beams, but do not obstruct the heatsink or create a sealed box around the driver and cooling area.
Do I need to worry about fanless versus fan-cooled models if the fan is labeled quiet?
Yes, because “quiet” is subjective and can vary by room conditions. If you are sensitive to noise or the light is near your desk or bed, treat fanless as the priority. If the product includes a fan, verify from user reviews whether the fan ramps up, clicks, or becomes noticeable during nighttime hours, since thermal cycles often change fan behavior over a long run.
What should I buy if I only have space for one pot, like a small tray or corner of a desk?
For a single pot or small tray, choose a narrow footprint coverage rather than a wide-panel light. Focus on matching PPFD at your actual hang height to your plant area, and consider a clip-on gooseneck or an adjustable arm so you can fine-tune distance. A common mistake is buying a larger fixture meant for tents, then keeping it high, which spreads light thinly and forces you to run it longer at higher power.
How can I sanity-check real performance without a quantum sensor?
You can do a practical “response check” instead of trying to recreate exact PPFD. Start seedlings at a lower dimmer setting, run a consistent photoperiod, and watch for leaf color changes and stretching. If plants are stretching toward the light or remain pale after a week, either increase intensity or lower the fixture, but monitor heatsink temperature and avoid pinning the light too close to fabrics.
How do I choose wattage if I’m trying to grow herbs versus anything that fruits?
For leafy greens and most herbs, a 30 to 50 watt class fixture running near full output often works in a small area. For chili or tomato fruiting, plan for substantially more intensity, typically closer to the 75 to 100 true-watt range described in the article, or accept reduced yields and slower development. If you go with a higher wattage, prioritize efficiency (μmol/J) and consider heat and spill management as a first-class requirement, not an afterthought.
What longevity indicators matter most for dorm use, and can I ignore L70 numbers?
Don’t ignore them, especially if you run lights 12 to 18 hours daily. L70 is more useful than marketing “lifespan” claims because it ties to output decline. Also check warranty length and what’s covered, since some budget fixtures have short coverage and unclear return handling, which can be a bigger issue than the LED chip itself in a long dorm run.
Is it ever okay to operate a grow light inside an enclosed shelf or under a desk lip?
Only if there is real ventilation and the heatsink is not trapped. Enclosed spaces can overheat both the fixture and nearby materials, and dust can compound the thermal load. If you must use an enclosure, keep the fixture positioned so the heatsink has airflow clearance, and avoid placing any flammable items within a few inches of the hottest surfaces.