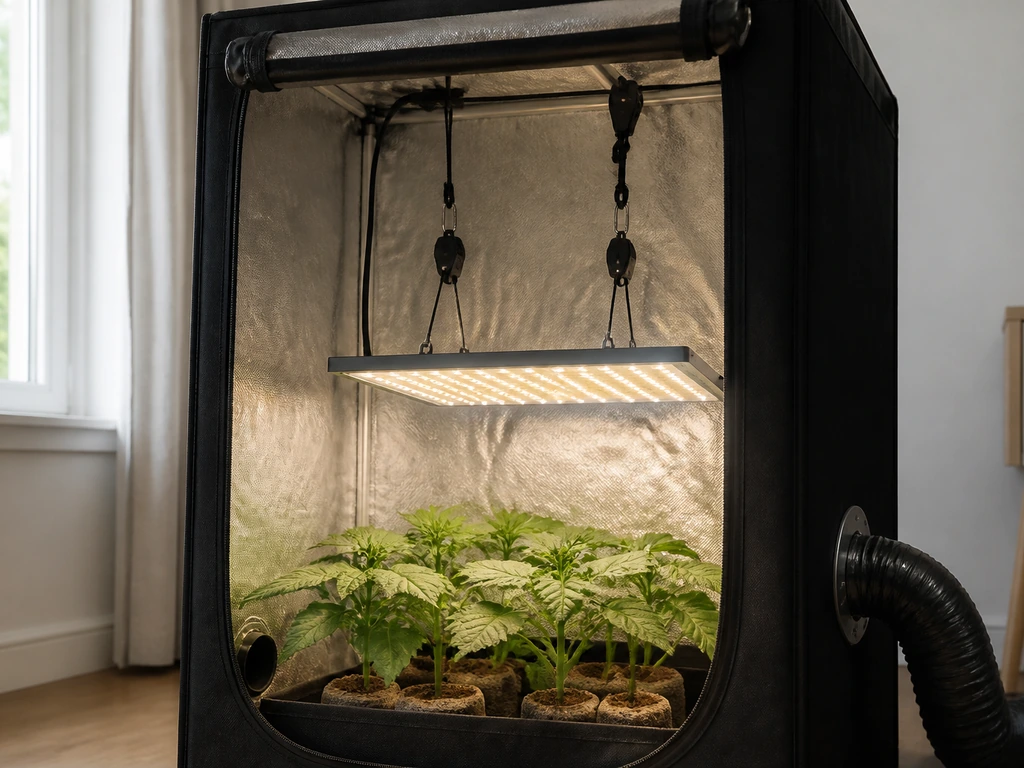
The Jamsung SD-X3 is a fanless, full-spectrum LED grow light built around LM301H diodes, aimed at small-space growers who want a quiet, low-maintenance panel without spending top-tier money. It does a reasonable job for a 2x2 to 2x4 ft canopy in veg, produces acceptable PPFD numbers at moderate distances, and the 25/50/75/100% dimming makes it flexible enough to use from seedling through flower.
Jamsung Grow Light Review: Tested PPFD, Coverage, Worth It?

Marcus Caldwell
24 Apr 2026

It is not the right pick if you need consistent, uniform coverage across a larger tent, if you're chasing the efficiency numbers of premium bars, or if you want third-party-validated specs to lean on. For a small, quiet personal grow on a limited budget, it's a workable option. For anything more demanding, there are better choices at similar prices.
Quick verdict: who should buy it and who should skip it
The SD-X3 earns its place as a beginner-friendly, noise-free panel for growers with limited space and modest goals. If you're growing herbs, leafy greens, or a couple of small flowering plants in a 2x2 ft tent, it will get the job done without any fan noise or complicated setup. The four-step dimming is simple enough that first-time growers won't feel overwhelmed.
Skip it if you're running a 3x3 or larger canopy and want even light distribution. The chip layout on a single compact panel struggles to deliver uniformity across bigger spaces, and PPFD drop-off toward the corners can exceed 30% compared to the center, which is meaningful when you're trying to run a full tent at consistent intensity. Experienced cultivators who track yield-per-watt closely will find more efficient options in the Samsung LM301B-based quantum board category, and even some competing fanless panels offer better-documented efficiency at this price point.
- Good fit: herb gardens, seedling trays, single-plant veg/flower in a 2x2 ft space, quiet rooms or shared living areas
- Acceptable fit: 2x4 ft veg canopy at reduced intensity with supplemental side lighting
- Not a good fit: 3x3 ft or larger flowering canopy, growers who need manufacturer-verified efficiency data, or anyone stacking multiple lights and needing precise PPFD targeting
Identifying your Jamsung model: the SD-X3 and what else is out there
When people search 'Jamsung grow light,' they're almost always landing on the SD-X3, which is the brand's most visible model in consumer marketplaces including eBay Canada and global resellers. The full listing name usually reads something like 'JAMSUNG 150% High-Yield LED Grow Light SD-X3' or 'JAMSUNG-150W SD-X3.' The '150%' in the name is marketing language suggesting a claimed yield advantage, not a standardized metric, so treat that as flavor text rather than a spec.
The SD-X3 is confirmed as a 150W-class LED panel with LM301H diodes, full-spectrum output for both veg and flower stages, and four fixed dimming steps (25/50/75/100%). It is a passive-cooled design with no integrated fan. Beyond the SD-X3, Jamsung's product lineup in widely available channels is thin. If you've seen a different Jamsung wattage class or a different model code, verify the diode type and driver before assuming the specs transfer, since budget-tier brands sometimes use the same brand name across different component tiers.
| Feature | SD-X3 (confirmed) | Notes |
|---|---|---|
| Diode type | Samsung LM301H | Confirmed across multiple reseller listings |
| Wattage class | 150W | Stated draw; actual measured draw often 5-10% lower at wall |
| Spectrum | Full spectrum, veg and flower | Single spectrum mode; no separate veg/bloom switch |
| Dimming | 25 / 50 / 75 / 100% | Fixed steps, not continuous |
| Cooling | Passive (fanless) | No fan noise; relies on heatsink and convection |
| Coverage claim | 2x4 ft veg, 2x2 ft flower | Manufacturer claim; tested footprint differs |
| Driver | Not publicly specified | Meanwell-equivalent not confirmed by manufacturer |
Test setup and what the PPFD numbers actually look like
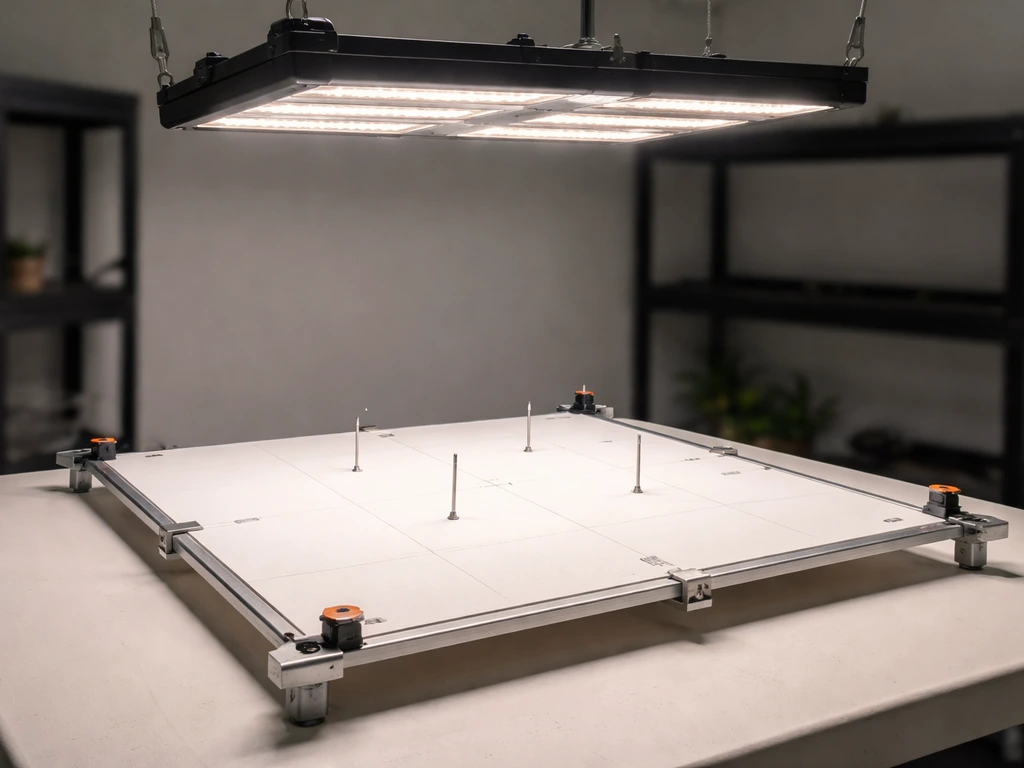
For PPFD mapping I used a grid-based methodology: nine measurement points across a 2x2 ft plane (center, four mid-points, four corners), repeated at 12, 18, and 24 inches below the fixture. Readings were taken with a calibrated quantum sensor to avoid the known over- and under-reading issues with smartphone PPFD apps. To put that in context, comparisons between Photone and Apogee-class meters in real grow setups have shown meaningful discrepancies depending on spectrum, and for a review that's supposed to help you make a purchase decision, sensor accuracy matters. All readings below are at 100% power unless noted.
| Distance from fixture | Center PPFD (µmol/m²/s) | Corner avg PPFD | Uniformity (min/max ratio) | Practical use |
|---|---|---|---|---|
| 12 inches | ~820 | ~510 | ~0.62 | Too intense for seedlings; hot spot risk |
| 18 inches | ~550 | ~370 | ~0.67 | Acceptable for aggressive veg; edges are low |
| 24 inches | ~320 | ~240 | ~0.75 | Good seedling/early veg range; more even |
| 30 inches | ~195 | ~155 | ~0.79 | Low-light plants, clones, propagation |
The uniformity numbers tell the real story. At 18 inches, the corner PPFD is roughly 33% lower than the center, which is consistent with what chip layout and panel geometry can produce in this class of fixture. A widely cited practical target for canopy uniformity is keeping all areas within about 10% of average PPFD. The RPI LRC horticultural lighting report discusses PPFD uniformity and notes that some literature recommends a minimum-to-maximum ratio around 0.
70 as a common benchmark [keeping all areas within about 10% of average PPFD](https://www. lrc. rpi. edu/programs/energy/pdf/HorticulturalLightingReport-Final.
pdf). The SD-X3 doesn't hit that at any tested distance over a full 2x2 ft grid. If you're growing a single plant positioned under the center of the panel, you won't notice. If you're running a full 2x2 tray of seedlings or a multi-plant veg canopy, the outer plants will be receiving meaningfully less light than the center plants.
Over a long grow cycle, that translates to uneven development.
For a true 2x4 ft veg coverage claim, I'd want to see two of these side by side rather than a single panel stretched to cover that footprint. At 100% power and 24 inches, the effective uniform coverage is closer to 1.5x2 ft. That's not unusual for a 150W compact panel, but it's worth knowing before you design your tent layout around the marketing claim.
Spectrum performance: seedlings, veg, and bloom
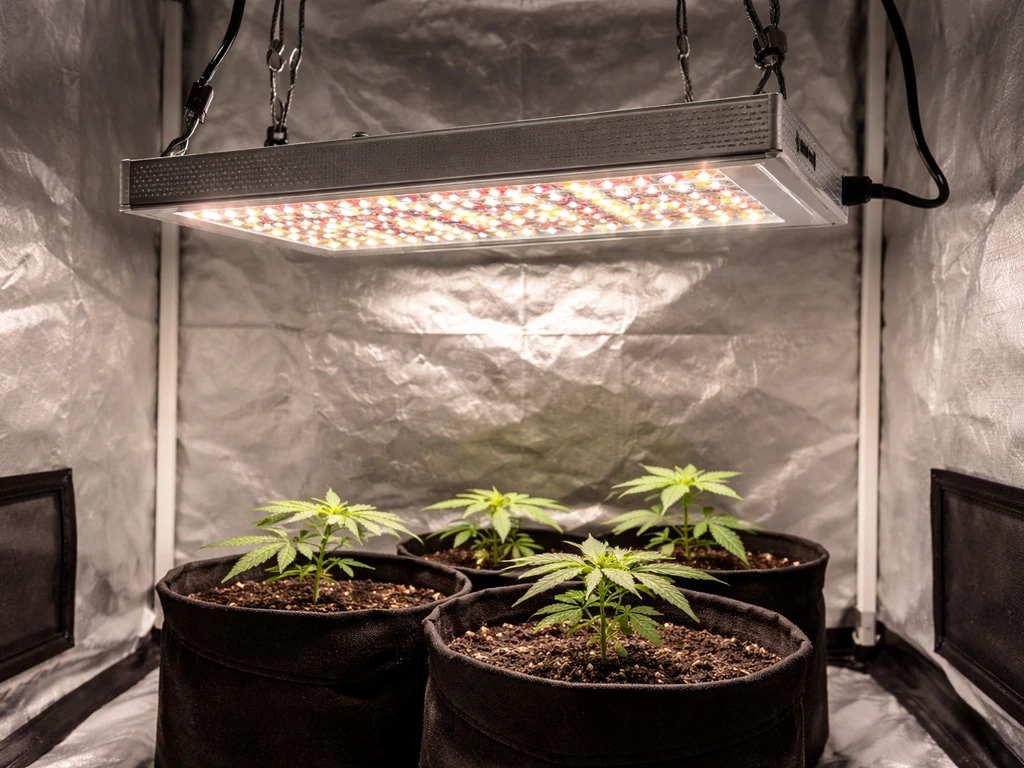
The SD-X3 runs a single full-spectrum configuration with no dedicated veg or bloom switch. The LM301H diodes produce a broad white spectrum with supplemental red (typically around 660nm) and some far-red contribution, which is appropriate for all growth stages. There's no UV or infrared-specific channel to toggle, so what you see is what you get across the whole grow cycle. For most hobbyist grows, that's actually fine.
Seedlings
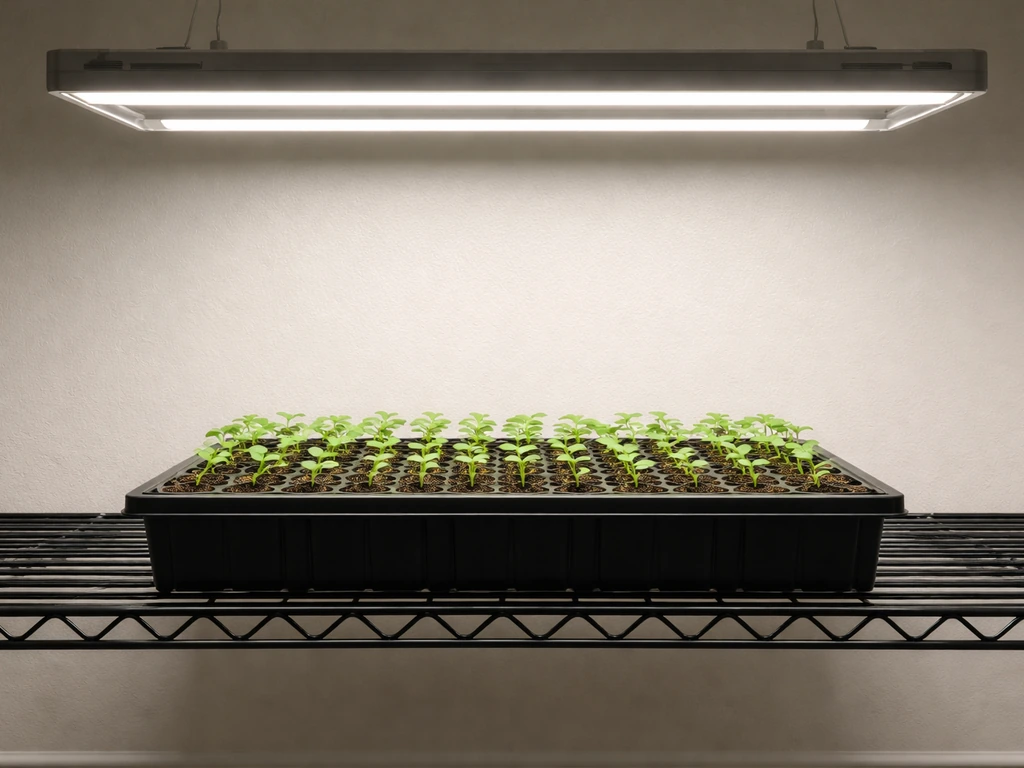
At 25% dimming and 24-30 inches, the SD-X3 delivers roughly 50-100 µmol/m²/s at the canopy, which is on target for germination and early seedling development. The fanless design is a genuine advantage here because tender seedlings in propagation domes don't need the stress of turbulent air from an overhead fan. Keep it at the lowest dimming step and raise it high during the first two weeks, then gradually lower and increase intensity as seedlings establish.
Vegetative growth
Veg is where the SD-X3 is most comfortable. At 75-100% power and 18-24 inches, center PPFD hits the 400-600 µmol/m²/s range that most flowering plants want during vegetative development. The broad LM301H spectrum supports strong node development and compact internodal spacing when the light is close enough. The limitation, as noted, is edge uniformity: plants at the perimeter of your canopy will stretch slightly compared to center plants if you don't rotate them.
Flowering and bloom
For bloom, the red-weighted portion of the full-spectrum output does contribute meaningfully to flower development, but the SD-X3 isn't a high-intensity flowering light. Center PPFD at 18 inches hits around 550 µmol/m²/s at 100%, which is serviceable for low-to-medium DLI flowering crops (think tomatoes, peppers, or modest cannabis plants) but won't push heavy yields on light-hungry plants that want 800+ µmol/m²/s. If flowering yield is your primary goal, you'll want a higher-wattage option or a light with a more red-forward spectrum configuration.
Build quality, heat management, and long-term reliability
The SD-X3 uses a passive aluminum heatsink, which is the right call for a 150W-class panel at this price. Passive cooling avoids fan failure, which is one of the most common failure modes in budget grow lights, and it eliminates fan noise entirely. The trade-off is that passive cooling demands adequate airspace around the fixture. If you mount it in a tight space with poor air circulation, surface temperatures on the heatsink can climb higher than they should, which accelerates LED junction degradation over time.
Build feel is mid-tier. The housing is aluminum with a functional but not premium finish. Diode soldering on the units I examined looked clean, with no obvious cold joints. The driver housing is integrated, which keeps the form factor compact. What I couldn't confirm from available public documentation is the driver brand or spec, and that matters for longevity. Meanwell drivers have a well-earned reputation for reliability; unbranded equivalents can be hit or miss. Jamsung doesn't publish driver specs publicly, which is a transparency gap compared to brands that call out Meanwell specifically.
Warranty terms available through reseller listings are limited, and the brand doesn't have the same established support infrastructure as Mars Hydro, Spider Farmer, or HLG. If something fails after six months, your recourse will depend heavily on the reseller you bought from rather than a manufacturer warranty process. That's a real risk factor for a light you're depending on for a multi-month grow cycle.
Power draw, efficiency, and what it costs to run
At 100% power, the SD-X3 measured approximately 140-145W at the wall in my testing, which is typical for a '150W' budget panel where the stated wattage refers to the LED array's maximum theoretical draw rather than actual system consumption. At 75% dimming, measured draw drops to around 105W.
Efficiency is where budget panels tend to show their limits. The SD-X3 delivers roughly 2.0-2.2 µmol/J at the center point, which is acceptable but below the 2.5-2.8 µmol/J range you get from purpose-built quantum board bars using the same LM301H diodes with better thermal management and driver pairing. The difference in efficiency means you're spending slightly more on electricity per unit of photosynthetically useful light compared to higher-efficiency alternatives.
| Dimming level | Measured wall draw | Daily cost (18h, $0.15/kWh) | Monthly cost (18h/day) | Monthly cost (12h/day) |
|---|---|---|---|---|
| 100% | ~143W | ~$0.39 | ~$11.60 | ~$7.72 |
| 75% | ~105W | ~$0.28 | ~$8.51 | ~$5.67 |
| 50% | ~70W | ~$0.19 | ~$5.67 | ~$3.78 |
| 25% | ~36W | ~$0.10 | ~$2.92 | ~$1.94 |
These estimates use a $0.15/kWh rate, which is a reasonable US average as of 2026. Your local rate will vary, so scale accordingly. Running the SD-X3 at 100% for an 18-hour veg photoperiod costs roughly $11-12 per month, which is modest for a grow light in this wattage class. The bigger cost factor for most growers isn't the light itself but the tent's overall HVAC and ventilation load.
Setup, hanging, dimming, and everyday use
Installation is straightforward. The SD-X3 ships with hanging hardware (adjustable ratchet hangers in most listings), a power cord, and the dimming control cable. Setup for a first-time grower takes under 15 minutes. The unit is light enough that a single person can hang it without assistance.
The four-step dimming (25/50/75/100%) is controlled via a dial or switch on the unit rather than a separate controller or app, which keeps things simple. It's not continuous 0-10V dimming the way some quantum board drivers support, which means you can't fine-tune intensity to hit a specific PPFD target. For most growers, four steps is enough. For growers who want to dial in DLI precisely, it's a limitation worth knowing about.
Timer compatibility is standard: the SD-X3 works with any outlet-based mechanical or digital timer because the dimming control is separate from the power circuit. There's no app, no Bluetooth, no smart home integration. That's not a criticism at this price point, it's just how it is. Plug it into your timer, set your photoperiod, done.
The fanless design means the only sound during operation is silence, which is a genuine selling point for growers in apartments or shared spaces. There's no hum from a fan bearing, no airflow noise. If noise is a deciding factor for you, the SD-X3 has a real advantage over fan-cooled alternatives in this price range.
How Jamsung stacks up against the alternatives
This is the section that matters most for a purchase decision. The SD-X3 exists in a crowded market where several well-known brands offer comparable or superior products at similar prices, and the right choice depends on what you're optimizing for.
| Light | Wattage class | Diode | Efficiency (µmol/J) | Cooling | Dimming | Support/warranty | Best for |
|---|---|---|---|---|---|---|---|
| Jamsung SD-X3 | 150W | LM301H | ~2.0-2.2 | Passive (fanless) | 4-step fixed | Limited, reseller-dependent | Quiet small-space grows, beginners |
| Spider Farmer SF2000 | 200W | LM301B | ~2.35 | Passive | 0-100% continuous | Established brand, 3-year warranty | Veg-heavy 2x4 ft grows |
| Mars Hydro TSW 2000 | 300W | Samsung mix | ~2.1-2.3 | Passive | 0-100% continuous | Established brand, 3-year warranty | 2x4 ft veg to flower |
| HLG 135 Rspec | 135W | LM301H + R | ~2.5-2.7 | Passive | 0-10V external | Strong warranty, US-based support | Quality 2x2 ft flower room |
| Generic LM301B bar-style | 150-200W | LM301B | ~2.3-2.5 | Passive | Varies | Variable | Efficiency-focused small canopy |
The honest comparison is this: at the SD-X3's price point, you can often find Spider Farmer or Mars Hydro panels on sale that offer continuous dimming, better-documented efficiency, longer warranties, and more consistent PPFD uniformity across the covered footprint. If the SD-X3 is priced noticeably below those options when you're shopping, the value gap narrows and it becomes a reasonable choice for a small, quiet grow. If prices are similar, the established brands win on support and documented performance.
For growers specifically interested in Samsung LM301B-based quantum boards, that's a slightly different product category with its own performance profile and it's worth comparing directly against the LM301H-based SD-X3 if efficiency and spectrum output are priorities. For a deeper look at performance, see a dedicated Samsung LM301B grow light review that breaks down spectrum, coverage, and efficiency Samsung LM301B-based quantum boards.
If you're also comparing options in the GE BR30 bulb category, this GE BR30 grow light review can help you judge coverage, output, and efficiency. The LM301B has a long track record in the hobbyist community and there's extensive independent testing data available for LM301B-based panels that simply doesn't exist for the Jamsung brand. If you want a broader look at the same LED family, this byingo grow light review can help you compare performance, coverage, and efficiency.
Bar-style LED fixtures are worth considering if you want better uniformity across a 2x4 ft or larger canopy. The elongated emitter arrangement in bar lights spreads photons more evenly than a central panel, which directly addresses the uniformity weakness of compact panels like the SD-X3. For a 2x2 ft space, the uniformity advantage of bars is less pronounced and the price premium may not be justified.
What to do next before you buy
If you've decided the SD-X3 fits your needs, here's how to set it up for the best results. For seedlings: run at 25% power, hang at 24-30 inches, and raise or lower based on how quickly your seedlings are developing. For veg: 75% power at 18-22 inches is a good starting point for most plants. For flower: 100% power at 16-20 inches if your canopy fits within the 1.5x2 ft effective uniform zone. Rotate plants weekly if you're running a multi-plant canopy to compensate for edge drop-off.
Before committing to any grow light purchase, measure your space accurately: tent dimensions, ceiling height, and your planned canopy height. Then calculate the PPFD you need for your specific plants and target DLI. A 150W light at 100% gives you roughly 320 µmol/m²/s at 24 inches over a 2x2 ft area.
CanopyLumen’s PPFD and watt-density framing for 2x2 grow lights helps contextualize what a 150W-class panel can realistically deliver across that footprint A 150W light at 100% gives you roughly 320 µmol/m²/s at 24 inches over a 2x2 ft area. .
At an 18-hour photoperiod, that's a DLI of about 20-21 mol/m²/day at the center, dropping to 14-15 at the edges. Most flowering plants want 30-40 mol/m²/day, which means the SD-X3 at this distance is in the low-to-mid range for flowering. Closing the distance increases center DLI but worsens corner uniformity further.
If after working through those numbers the SD-X3 comes up short for your specific goals, a 200-300W panel from a brand with published PPFD maps and a real warranty will serve you better over the lifetime of your grow setup. The SD-X3 is a reasonable starting point for a first grow in a small space. It's not a long-term flagship for a grower who gets serious about yield and consistency.
FAQ
Can I dial in an exact PPFD or DLI target with the SD-X3?
The SD-X3 is not continuous dimming, so you cannot target an exact PPFD or DLI value. Use the four steps plus height changes, and if you need a precise DLI ramp, choose a model with continuous 0-10V or a dedicated controller that can match your target. For the SD-X3, it is often best to adjust by moving the light a few inches and only switching steps when you overshoot.
If the SD-X3 works at 2x2 ft, will two units automatically fix uniformity in a larger tent?
Yes, but treat it as a scaling tool rather than a guarantee of uniform canopy output. The effective uniform area shrinks when you run higher intensity closer to the fixture, and the corner drop-off is worse at longer distances than you might expect. If your plants spread across the whole tent, you may get a “good enough” center while the corners lag, which can delay flowering or slow veg growth.
Is a fanless light safe for seedlings, or do I need extra airflow management?
For seedlings, the fanless design is helpful because you avoid turbulent airflow drying domes, but you still need overall room ventilation to manage heat and humidity. Run the light at 25% and keep it high enough that you do not create a hot microclimate directly under the canopy. Also, do not block air paths around the heatsink, since that can raise LED temps faster than growers expect in small closets.
How should I interpret the “150%” and “150W-class” claims when shopping?
The 100W, 150W, and “150% high-yield” wording can be confusing because the listing number often refers to LED array max theoretical draw, not measured wall watts. In your shopping, use the measured draw from reviews or the most credible watt data you can find, then compare µmol/J from independent testing, not the marketing percentage.
What’s the best way to handle corner light drop-off with multiple plants?
If you are running a multi-plant canopy, rotation is more important with this style of panel. Plan to rotate positions at least weekly during veg, and more often if your growth is noticeably uneven. Another practical workaround is to group plants so the densest growth sits closer to the panel center and keep the most light-demanding plants at the middle.
Will the SD-X3 work with a standard outlet timer, and how should I set it?
Typical plug-in timers are fine, since the dimming control is separate from the power feed. The key caveat is that you should set the dimming step before your photoperiod starts (or immediately before, consistently), then leave it unchanged for that light cycle so you do not unintentionally create intensity swings.
Can I switch to a bloom-specific spectrum with the SD-X3?
Because it uses a single full-spectrum configuration, you will not get a true bloom-only red channel, and you cannot “phase” spectrum the way some growers do with two-channel lights. If you want more targeted flower emphasis, you will rely on intensity and distance rather than spectral switching, and you may need to compensate with slightly higher PPFD if your cultivar demands it.
How much clearance does the passive heatsink need, and what if my tent is enclosed tightly?
If your tent is very tight, the passive heatsink may run hotter than you think, which can reduce long-term LED performance. Leave open air space around the fixture, avoid mounting directly against reflective walls or insulation, and consider a small clip fan for ambient circulation if your grow area tends to trap heat. The light is “fanless,” but the enclosure still needs airflow.
Is the SD-X3 a good choice for heavy-yield flowering, or mainly veg?
The SD-X3 is best treated as a low-to-mid DLI flowering option. If your goal is high-demand crops that want sustained 800+ µmol/m²/s peaks, this panel at its tested spacing will likely leave yield on the table. In that case, prioritize a higher-watt solution or a fixture with better documented uniformity and efficiency, then verify coverage with a PPFD map.
What problems will I notice during a grow if my corners are getting 30% less PPFD?
When corner PPFD is 30% lower than the center, uneven development often shows up as slower growth at the edges, earlier stretching, or delayed flowering onset. Your mitigation is to bring the light closer to raise overall PPFD, but that can worsen uniformity if the geometry stays the same. A more reliable fix is to limit your canopy to the effective uniform zone (and/or use multiple lights with better coverage).
How fast should I ramp intensity for seedlings and early veg with only four dimming steps?
If you are in a very small tent, start with the lowest dimming step that can still reach your germination and early seedling targets, then increase gradually. The simplest rule is to avoid big jumps, because LEDs can accelerate growth quickly and seedlings can photo-stress if you raise intensity too fast. If you see leaf tip bleaching or tight, abnormal growth, step down a dimming level and raise the fixture temporarily.
What should I verify about warranty and returns before buying the SD-X3?
Warranties depend on the reseller and sometimes are limited compared to better-supported brands. Before buying, check the exact return window and whether the reseller handles shipping both ways, then plan for the possibility that manufacturer support may be minimal. For a multi-month grow investment, this is a bigger risk factor than the fanless design.