The Vander 2000W LED grow light is a budget-tier fixture that draws roughly 40W to 220W from the wall depending on the variant you receive, covers about 2 x 2 ft at flower height, and retails around $129. It is not a 2000W light in any real sense. If you have a small tent, a tight budget, and modest expectations, it can get seedlings and leafy greens growing. But if you need reliable flowering output, documented PPFD numbers, or consistent manufacturer support, this fixture will let you down.
Vander 2000W LED Grow Light Review Tested Results and Fit

Marcus Caldwell
3 May 2026
What the Vander 2000W actually is
The '2000W' label is a marketing number, not an electrical measurement. Vander sells several variants under similar branding, and the specs across resellers are inconsistent enough to be genuinely confusing. One listing specifies 220W actual draw (plus or minus 5%), while another lists the same '2000W' model at just 40W actual draw. That gap matters enormously for anyone trying to evaluate real light output.
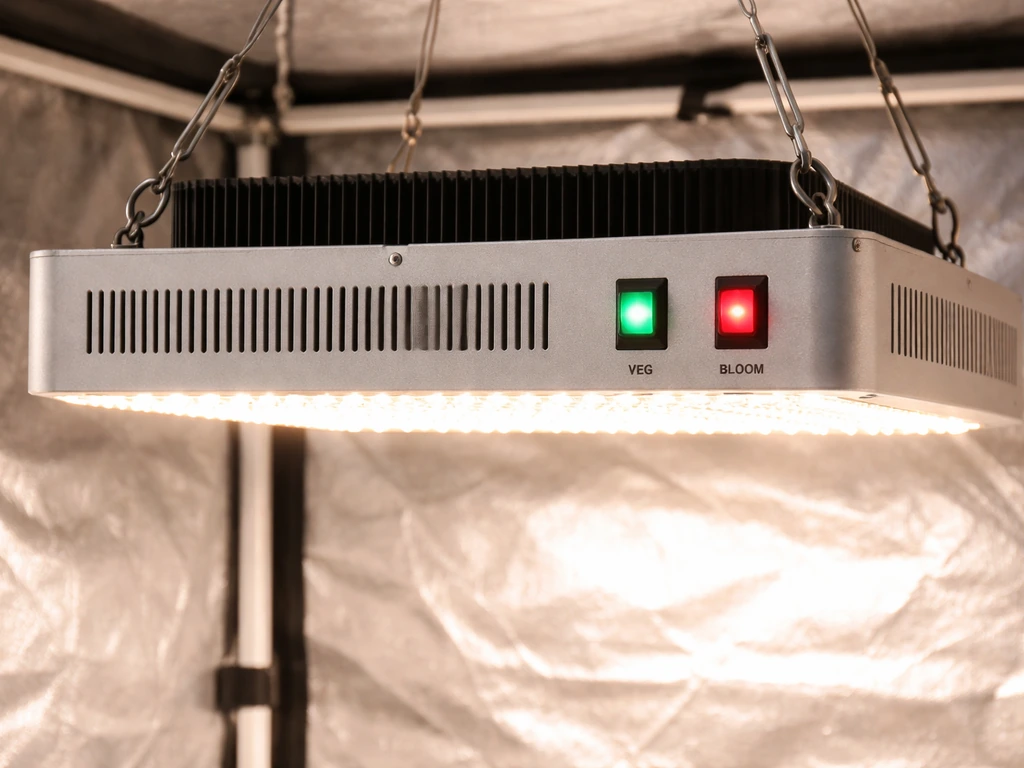
What the listings do agree on is the broad feature set. The fixture uses 252 SMD LEDs (224 yellow, 28 red), claims a full spectrum covering blue, red, IR, UV, and white wavelengths, and includes a dual-switch 'VEG/BLOOM' design that lets you toggle channels independently. Daisy-chain support lets you connect up to two units. The listed lifespan is 50,000 hours, and the noise level is rated at 0 dB, which suggests a passive cooling design on at least one variant. Coverage is rated at 2.5 x 2.5 ft for veg at 18 inches and 2 x 2 ft for flower at 14 inches.
| Spec | Listing A (vvander.com) | Listing B (Fruugo reseller) |
|---|---|---|
| Marketed wattage | 2000W | 2000W |
| Actual wall draw | 220W ±5% | 40W ±5% |
| LED count | 252 SMD | 252 SMD |
| Veg coverage (18") | Not specified | 2.5 x 2.5 ft |
| Flower coverage (14") | Not specified | 2 x 2 ft |
| Switches | VEG + BLOOM | VEG + BLOOM |
| Daisy chain | Up to 2 units | Up to 2 units |
| Price | ~$129 | Varies by reseller |
The spec inconsistency between a 40W and a 220W variant is a red flag worth highlighting before you buy. Always check the actual wattage on the specific listing you are purchasing from, not a spec sheet you found elsewhere.
Unboxing, setup, and getting it installed
Setup is physically simple: ratchet hangers or included hooks, a power cable, and the fixture itself. Most buyers report the hardware is minimal and the light goes up in under ten minutes. The problem is documentation. Multiple buyers noted they did not receive any manual, which creates real confusion around the dual-switch operation and daisy-chain wiring. Without clear instructions, figuring out whether to run VEG-only, BLOOM-only, or both switches during different stages becomes guesswork.
The daisy-chain connector is physically present on the unit, but without a manual, several buyers could not figure out how to use it correctly. If you buy this light, assume the manual may not be in the box and search for the product online before you need it. The controls themselves are straightforward once you understand them: one switch activates the blue-leaning veg channel, the other the red-heavy bloom channel, and you can run both simultaneously.
The recommended hang height range listed is 12 to 50 inches above the canopy, which is an unusually wide range and suggests the manufacturer is not being precise about where light intensity is actually useful. In practice, buyers settle around 18 inches for veg and 14 to 16 inches for flower, which aligns with the coverage specs.
Real-world performance: coverage, intensity, and spectrum
Coverage is modest but honest when you look past the '2000W' label. A 2 x 2 ft flower footprint and a 2.5 x 2.5 ft veg footprint are realistic for a light in this actual wattage class. If you are growing in a 2x2 tent, this is borderline workable. Do not expect it to cover a 3x3 or 4x4.
The PPFD output is where grower expectations get mismanaged most often. One buyer with measurable experience noted that at three feet, the Vander 2000W produced PPFD roughly equivalent to their 1200W-class fixture, which tells you the light punches at a much lower weight than its name suggests. For seedlings and leafy greens, that intensity level is fine. For heavy-feeding flowering plants that want 600 to 900+ micromoles per square meter per second, this fixture will likely underperform.
The spectrum includes UV and IR diodes alongside the standard blue and red mix, which is a genuine bonus at this price point. UV can support trichome development and IR supports flowering transitions. The VEG switch leans blue-heavy, the BLOOM switch leans red-heavy, and running both gives you a blended full-spectrum output. Whether the diode count and quality actually deliver meaningful UV and IR at useful intensities is unclear without independent PAR/spectrum measurements, which Vander has not published.
Build quality, heat, and long-term reliability
The physical build is lightweight and clearly cost-optimized. The reflector panel and housing feel thin compared to fixtures from more established brands. That is not unusual at this price point, but it does affect heat management. Reviews consistently mention that heat does come off the fixture and that adequate airflow in the grow space is necessary. The passive heatsink design (on the fan-free variant) means the ambient temperature of your grow tent matters more than it would with an active-cooled fixture.
Reliability is the biggest concern this light raises. One reviewer reported that the unit stopped working entirely after five weeks. Another described abnormal electrical behavior where the light stayed on after power was cut during the flowering stage, which is a genuine safety concern for light-sensitive photoperiod plants. Attempting to get support or a replacement from Vander proved difficult for at least one affected buyer. At $129, a failure at five weeks is a poor return, and warranty resolution appearing difficult makes it worse.
The fixture is also listed as not waterproof, so placement in humid grow environments needs to account for that. Keep it away from direct humidity sources like misters or humidifier outputs.
How it performs across plant stages
Seedlings
This is where the Vander 2000W is most appropriate. Seedlings need lower intensity, and the VEG switch alone at 24 to 30 inches gives a gentle blue-spectrum light that encourages compact, healthy early growth without burning young plants. Run 18 hours on, 6 off. This stage is where the light earns its keep.
Vegetative growth
During veg, run both switches together and drop to around 18 inches. The 2.5 x 2.5 ft coverage footprint is adequate for a compact veg cycle. Plants should show normal internodal spacing and leaf development. If you notice excessive stretching, the intensity may be too low for your specific plant; try dropping the height to 14 to 16 inches and monitor for heat stress.
Flowering
Flowering is where the limits show up clearly. High-demand flowering plants like cannabis or tomatoes want significantly more intensity than this fixture reliably delivers at its actual wattage. The BLOOM switch adds red-heavy output that does support flowering responses, but the PPFD ceiling is low. Expect adequate results on low-to-medium demand flowering plants like herbs going to seed, small pepper plants, or compact autoflowers in a 2x2 space. For anything more demanding, the light will be a limiting factor.
Value, cost comparison, and who should buy (or skip) this
At $129 for a light that pulls 40W to 220W depending on the variant, the cost-per-watt math is tricky precisely because the wattage is uncertain. If your unit draws 220W, you are paying about $0.59 per actual watt, which is reasonable for budget LED. If your unit draws 40W, you are paying $3.22 per actual watt, which is a poor deal by any measure. The inconsistency in what arrives is itself a reason to be cautious.
Compared to similar budget-tier fixtures, the Vander 2000W sits in a crowded field. If you are considering other budget panels, an Excelvan 1200W LED grow light review can help you compare real-world output, heat, and reliability side by side Excelvan 1200W-class. Other brands reviewed on this site, including Excelvan and Vogek in comparable wattage classes, offer similar SMD panel designs at comparable prices. The Excelvan 1200W-class, for example, carries similar spec caveats and budget construction, making the Vander's main differentiator its dual-switch design rather than raw output superiority. The Excelvan grow light review covers similar wattage and construction realities for that budget 1200W-class panel Excelvan 1200W-class. Vander's own broader lineup (covered separately in the general Vander grow light review) shows the same branding conventions across wattage tiers. For more detail on the pros, cons, and real-world results of this panel across growth stages, see the rest of our Vander grow light review. For more background on how well this model performs versus other options, see the full Vevor grow light review. If you want the full picture before buying, see the complete vander grow light review for performance, setup, and reliability details.
Buy this light if you are growing seedlings, herbs, or leafy greens in a 2x2 or smaller space, you are on a tight budget, and you understand you are getting a budget panel, not a professional fixture. Skip it if you need reliable flowering output for medium-to-large plants, if you depend on warranty support, or if consistency in specs matters to you.
Practical buyer tips: hang height, timers, and fixing common problems
Recommended settings for common grow scenarios
| Stage | Switch setting | Hang height | Photoperiod |
|---|---|---|---|
| Seedling | VEG only | 24–30 inches | 18h on / 6h off |
| Vegetative | VEG + BLOOM | 18 inches | 18h on / 6h off |
| Flowering | VEG + BLOOM | 14–16 inches | 12h on / 12h off |
Airflow and heat
Run a small oscillating fan in the tent regardless of whether your unit has an active cooling fan. Heat does build under the fixture, and adequate airflow protects both the canopy and the driver components. If the fixture feels hot to the touch on the housing after a few hours of operation, increase airflow before increasing hang height.
Timer setup
The light does not include a built-in timer, so use an external plug-in or smart-outlet timer. Set your timer before plugging in the light and verify the schedule by checking the light is off during dark periods. There are documented reports of units staying on after power interruption, so verify your timer is working correctly with a manual check during the first few cycles, especially when transitioning to a 12/12 flowering schedule.
Troubleshooting common issues
- Light stays on after power cuts: This is a known issue reported by buyers. Check the power supply connection and try a different outlet or surge protector. If it persists, the driver may be failing.
- No manual in box: Search the product name plus 'manual' or 'setup guide' online before assuming the switches are intuitive. VEG switch = blue channel, BLOOM switch = red channel, both on = full spectrum.
- Plants stretching toward the light: The intensity may be too low at your current height. Lower the fixture by 2 to 4 inches and reassess after 48 hours.
- Unit stops working: Document the failure with photos and timestamps. Contact the seller (not just Vander) through the platform you purchased from for the fastest resolution path.
- Unsure if your unit is the 40W or 220W variant: Plug it into a smart outlet or kill-a-watt meter and measure actual draw. This tells you what you actually received and what coverage to realistically expect.
Before you finalize your settings for a specific grow area, measure the actual wattage your unit pulls and compare it to the coverage footprint listed for that wattage class. If your light draws 40W but you have a 3x3 tent, you will need a second unit or a different fixture entirely. The '2000W' label should play no role in your planning; the wall-draw number and the verified coverage footprint are the only figures that matter.
FAQ
How can I verify whether my Vander 2000W unit is the 40W or 220W variant before I rely on it for a grow?
Use an in-line power meter or a plug-in watt meter at the wall, then record watt draw for both switch modes (VEG only, BLOOM only, and both). Note that “full spectrum” running both channels may draw more than either channel alone, so measure each mode separately and compare to the wattage stated on the exact listing you ordered from.
If my box did not include a manual, what is the safest way to figure out the VEG/BLOOM switch settings?
Test with low-risk plants first (seedlings or a single small tray), run VEG only for a short period, then switch to BLOOM only, and finally both together. Observe canopy temperature and plant response over several days, and do not assume a switch-to-color mapping until you confirm which one increases red-heavy output (typically the BLOOM side) by watching stretching or leaf color changes.
Can I use a timer, and what should I watch for given reports of the light staying on after power interruptions?
Yes, but verify your timer works reliably by testing a full on-off cycle, then doing a brief power interruption while the schedule is active. If your unit resumes unexpectedly after outages, add a smart plug with power-loss recovery settings or use a controller that explicitly enforces the off state during the dark window.
Is it okay to run the light at the upper end of the stated hang-height range (up to 50 inches)?
It is not recommended for most uses, because the wide range likely reflects marketing tolerance rather than usable intensity. Start near the article’s practical targets (about 18 inches veg, 14 to 16 inches flower), then adjust based on stretching and heat, since a too-high setup can drop PPFD enough to slow or stunt flowering.
What is the best target footprint if I’m trying to fit this in a 2x2 tent, and what if my tent is slightly larger (like 2x2.5)?
Aim to place the fixture centered and treat the flower coverage as approximately 2x2 at workable heights. If your tent is 2x2.5, expect uneven intensity at the extra 3 to 6 inches of width, so either keep plants in the denser center zone or add a second light or a different fixture for the edges.
Should I run both switches during veg, or is VEG-only usually better?
VEG-only is often better for early compact growth because it emphasizes the blue-leaning channel. Use both switches when you want a more balanced “full” spectrum and do not mind slightly less compact growth, but only after seedlings are established and you have enough airflow to manage heat from the combined mode.
How do I know if my plants are getting too little light rather than other issues like nutrients or watering?
Look for consistent patterns tied to photoperiod and proximity: slow growth, persistent stretching, and delayed flowering initiation often point to insufficient PPFD. If you adjust hang height down by a few inches and you see faster recovery over 1 to 2 weeks, that supports “light too weak” as the cause rather than watering or nutrient imbalance.
Is this fixture safe to use in humid environments like a propagation dome or high-humidity flower room?
The light is listed as not waterproof, so avoid direct mist exposure and keep humidifier output from pointing at the fixture. In practice, maintain humidity through air management and ventilation rather than wetting the housing, and consider relocating the driver side away from the most humid air if possible.
What airflow setup should I plan for, especially on fan-free or passive-cooled variants?
Use an oscillating fan to move air across the canopy and toward the fixture, and ensure the tent exhaust removes warm air instead of trapping it. If the housing feels hot after a few hours, increase airflow immediately, because passive cooling makes performance and reliability more dependent on your ambient tent temperature.
If the fixture fails early, what can I do to reduce risk before it becomes a warranty problem?
Reduce variables that can stress components, use a proper grounded outlet, avoid power cycling frequently during the first week, and monitor temperature during the first few runs. If you suspect a defect, document watt draw behavior and symptoms right away (including photos of switch states and any abnormal staying-on behavior) before contacting support.