Garpsen makes a small lineup of budget-tier clip and stand-style grow lights aimed at houseplant growers and small herb setups, not serious flowering tents. The most commonly shopped models are the BL-G20A (276 LEDs, ~24W draw), the BL-B20A-2 dual-head clip light (80 LEDs, ~30W per head claimed), the BL-C100G five-arm stand light (100 LEDs), and the 4-head upgraded version (80 LEDs, 40W max). If you need a compact, low-cost supplemental light for a windowsill, propagation tray, or small herb collection, Garpsen can work. If you're trying to flower cannabis, grow tomatoes to harvest in a tent, or cover more than about 2–3 square feet reliably, you'll want to look elsewhere.
Garpsen Grow Light Review: Best Models, Coverage, Setup Tips

Marcus Caldwell
7 May 2026
Which Garpsen model you're probably looking at
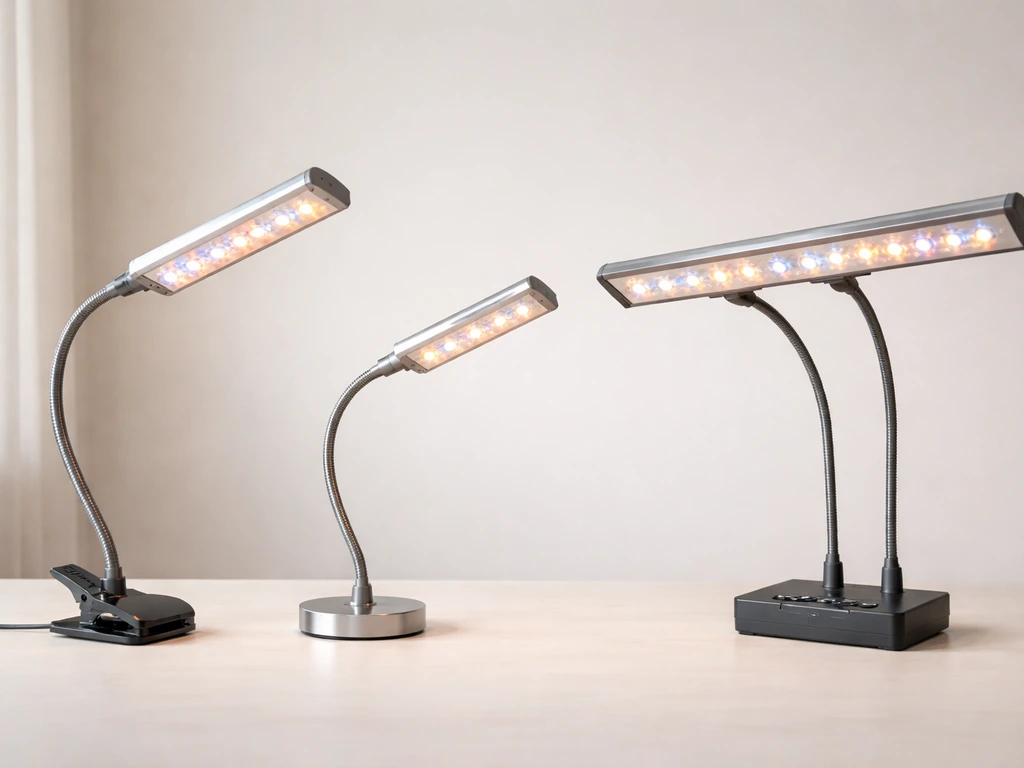
Garpsen doesn't have a flagship product in the way that brands like HLG or Hipargero do. Instead, they sell several rebranded/OEM clip and gooseneck-style fixtures at different head counts and LED totals. Here's a quick breakdown of the main options you'll find listed today.
| Model | Form Factor | LED Count | Actual Draw (approx.) | Color Modes | Dimming | Timer |
|---|---|---|---|---|---|---|
| BL-G20A | Single clip/panel | 276 LEDs | ~24W | 6000K cool white, 3500K warm, 660nm red | 5 levels (20–100%) | 6/12/16H auto |
| BL-B20A-2 | Dual-head clip | 80 LEDs (per unit) | ~30W per head (claimed) | 3 color temps incl. 660nm | 5 levels (20–100%) | 6/12/16H auto |
| BL-C100G | 5-arm stand/tripod | 100 LEDs | Not clearly stated | Red/blue/warm white mix | 10 levels | Not confirmed |
| 4-head upgraded version | 4-arm clip/stand | 80 LEDs | ~40W max | 3000K, 5000K, 660nm | 10 levels | 6/12/16H auto |
| T5 2FT | Bar/tube style | 96 LEDs | Not clearly stated | 3000K, 5000K, 660nm | Not confirmed | Not confirmed |
| 2-head clip (2-pack) | Gooseneck clip | 80 LEDs (total) | ~24W or less | Red/blue/warm white; 380–850nm claimed | 5 levels (20–100%) | 6/12/16H auto |
A few things worth flagging upfront: LED count is not wattage. A fixture claiming 276 LEDs sounds impressive, but if the actual system draw is 24 watts, those are very small, low-power diodes. Always look for the actual wattage consumed from the wall, not the LED count. Garpsen listings sometimes bury this, so check the product specs carefully before ordering.
Specs on paper: LED type, spectrum, driver, and dimming
Across the lineup, Garpsen uses what the industry calls SMD (surface-mount device) LEDs rather than the high-efficiency quantum board chips (like Samsung LM301H or similar) used by premium brands. SMD arrays at these power levels produce decent visible light but lower photosynthetically active radiation (PAR) per watt compared to top-tier diodes. The spectrum approach is consistent across models: a mix of cool white (5000–6500K), warm white (3000–3500K), and blank" rel="noopener noreferrer">a 660nm red channel. This is a broadly useful full-spectrum approach that covers the wavelengths plants actually use, so the spectrum itself isn't the problem. The problem is intensity, which we'll get to.
Dimming is a genuine feature here. Most models offer 5 discrete brightness steps (20%, 40%, 60%, 80%, 100%), and the upgraded 4-head and BL-C100G models step up to 10 levels. The 3-mode color switching lets you run warm white for seedlings/early veg, cool white for general veg, or boost the 660nm red channel for flowering support. In practice, for plants at this light intensity, you'll likely just run all channels at 100% all the time. The timer (6/12/16 hour cycles with auto on/off) is genuinely useful and works reliably based on user reports. The driver on these units is passively cooled (no fan), which is good for noise but means the fixture can get warm during long runs.
Setting it up: mounting height, coverage, and photoperiod
Garpsen doesn't publish PPFD maps, so there are no manufacturer distance recommendations grounded in PAR data. Based on the actual wattage of these units, here's a practical guide to placement. You can also think in terms of Daily Light Integral, which is daily delivery of photosynthetically active photons (400, 700 nm) using a formula that relates PPFD and light hours Daily Light Integral (DLI).
| Plant Stage | Recommended Distance from Canopy | Photoperiod | Notes |
|---|---|---|---|
| Seedlings / propagation | 4–8 inches | 16–18 hours on | Low intensity is fine here; closer = more usable light |
| Vegetative herbs / houseplants | 6–12 inches | 14–16 hours on | Keep as close as canopy shape allows |
| Early flowering (small plants) | 4–8 inches | 12 hours on / 12 off | Only realistic for very small, low-demand plants |
| Succulents / cacti (supplemental) | 8–14 inches | 12–14 hours on | Works well as supplement to natural light |
Coverage is the other critical variable. At 24W actual draw, the BL-G20A covers roughly 1–1.5 square feet of usable growing area. The 4-head 40W version might stretch to 2 square feet. These are honest numbers for meaningful light intensity, not the inflated coverage claims you sometimes see in product listings. If you're trying to light a 2x2 foot tent (4 square feet), you'd need multiple units and still likely wouldn't hit the PPFD targets needed for flowering. For a single large pot or a windowsill propagation tray, one unit is enough.
The gooseneck/clip mounting system is flexible but can be frustrating with heavy pots or plants that get tall. The 360-degree flexible arm is convenient for angling the light exactly where you want it, but make sure whatever you're clipping it to is sturdy enough to handle the leverage. The stand/tripod version (BL-C100G) is more stable for floor-level plants.
Real-world performance: what to actually expect
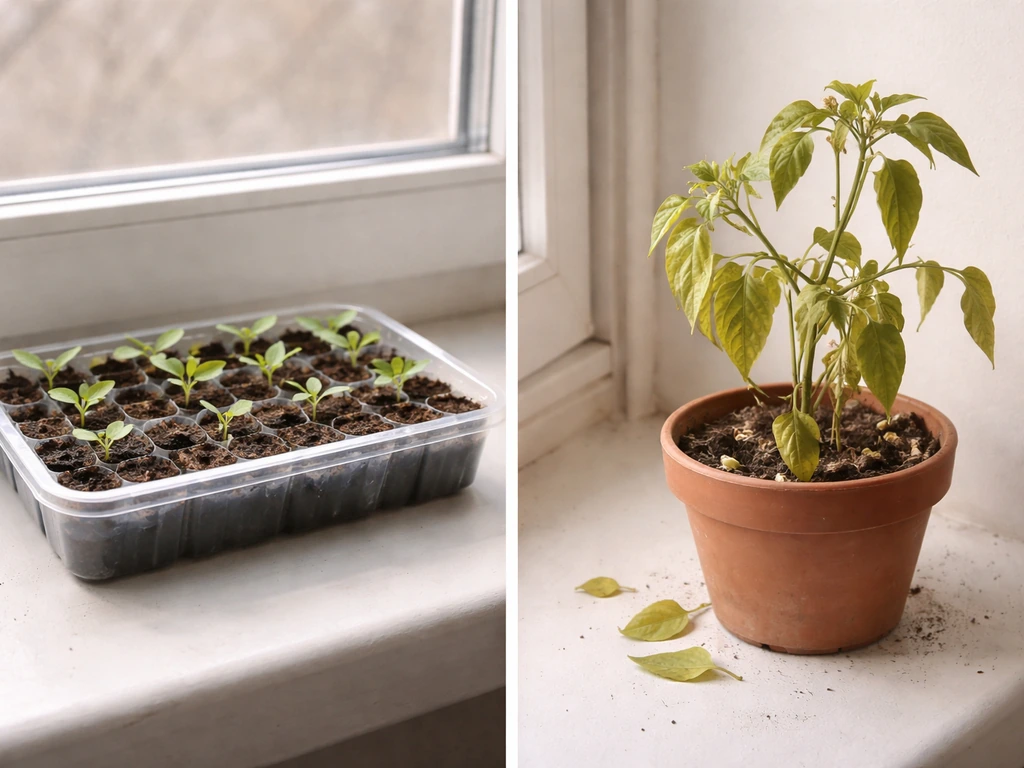
At 24–40W actual consumption with SMD LEDs, Garpsen lights will not produce the PPFD levels needed for high-demand fruiting or flowering crops. For context, most vegetative crops want 200–400 µmol/m²/s PPFD, and flowering crops want 400–600+. A 24W SMD fixture at 6–8 inches might realistically deliver 150–250 µmol/m²/s in its hotspot, dropping off quickly toward the edges. You'll see adequate vegetative growth in low-to-medium demand plants like herbs (basil, parsley, mint), leafy greens, and most common houseplants. You won't see robust flowering from tomatoes, peppers, or cannabis.
Light uniformity is a known limitation with multi-arm and gooseneck designs. Each arm creates its own hotspot, and unless you position them very deliberately, you'll have uneven coverage across the canopy. This shows up as slightly faster growth in plants directly under a head and slower growth at the edges. Rotating pots every few days helps. The 276-LED panel-style BL-G20A has somewhat more even distribution, but still has noticeable center-heavy intensity at close distances.
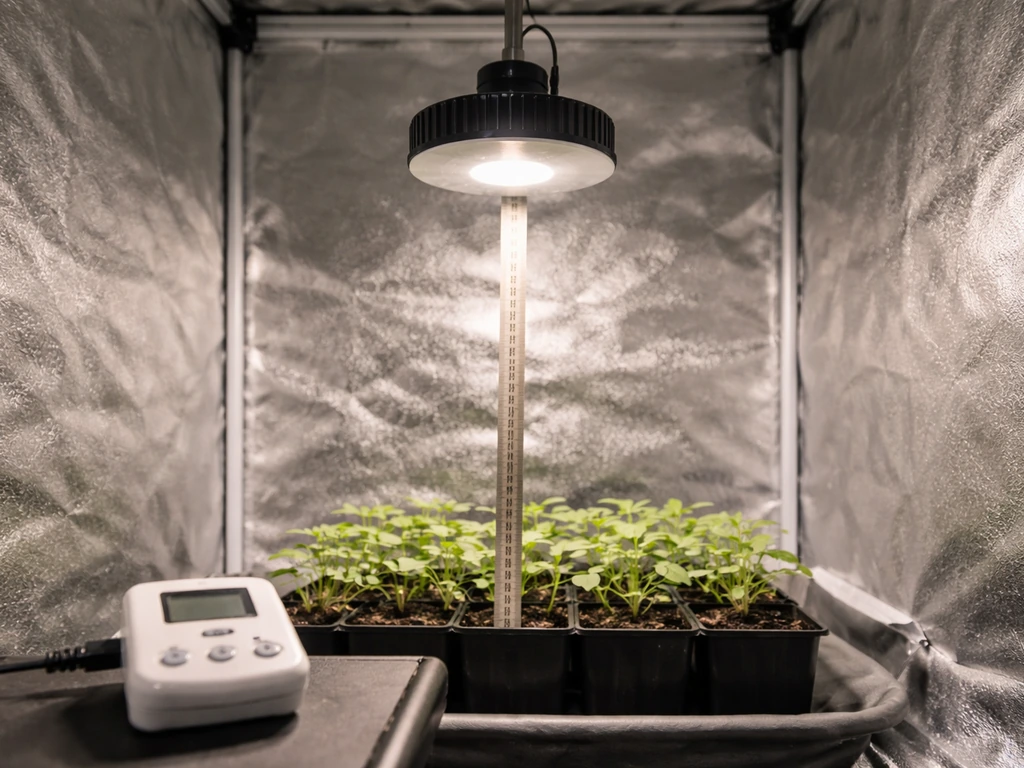
For seedlings and cuttings, the story is better. Low-demand propagation responds well to these lights, and the 18-hour photoperiod option via the built-in timer is genuinely useful for that stage. Many growers use budget clip lights like these specifically for seedling trays before moving plants under a more powerful fixture for veg and flower, and Garpsen works fine in that workflow.
Best uses and where it falls short
Garpsen is a solid match for a narrow set of use cases. Where it works well:
- Windowsill herb gardens (basil, mint, cilantro, chives) as a supplement to ambient light
- Propagation and seedling trays where low-to-moderate intensity is acceptable
- Houseplants that prefer indirect or moderate light (pothos, snake plants, ferns, peace lily)
- Small succulents or cacti in rooms with limited natural light
- Office or indoor decorative plant setups where aesthetics matter and intense light isn't needed
Where it won't deliver what you're hoping for:
- Cannabis flowering (needs 400–600+ µmol/m²/s PPFD — Garpsen won't get there)
- Fruiting vegetables like tomatoes, peppers, cucumbers (high light demand)
- Covering any grow tent larger than about 1.5–2 square feet with adequate intensity
- Full-cycle indoor growing without any natural light supplement
- High-light orchids or other demanding flowering plants
Build quality, heat, and long-term reliability
Garpsen fixtures are made with plastic housings and lightweight flexible arms. The build quality is consistent with the price point: fine for occasional use, less reassuring for 16-hour daily operation over multiple years. The main concern with long run times is heat management. These units are passively cooled, meaning no fan, which is great for silence but means the fixture body and LED array can run warm during extended sessions. At 24–40W, thermal runaway isn't a real risk, but running at 100% brightness for 16+ hours daily over months can accelerate LED degradation. Running at 80% brightness during long photoperiods is a reasonable precaution to extend lifespan.
The cord quality and clip mechanisms are where budget units often fail first. The gooseneck arms can lose tension over time and start drooping, especially if they're extended fully or holding any angle for months. Check that the clip base has firm, consistent grip before trusting it on a shelf edge. The timers are consistently reported to work reliably, which is genuinely the most failure-prone component in clip lights generally, so that's a positive.
One thing to verify in your specific listing before buying: Garpsen fixtures appear across multiple rebranded versions (the Wolezek BL-B20A-2 is structurally and spec-wise nearly identical to the Garpsen version, for example). This means quality control can vary by batch. Check recent reviews on your specific purchase channel for reports of DOA units or early failures. Buying from a channel with easy returns is wise with this brand.
Value and what else to consider at this price
Garpsen lights typically sell in the $15–$40 range depending on model and retailer. At that price, you're not expecting HLG-level efficiency, and Garpsen delivers exactly what the price suggests: a usable, feature-complete (timer, dimming, spectrum modes) entry-level light for low-to-moderate intensity applications. The built-in timer alone saves you the cost of a separate outlet timer, which is a genuine practical upside.
For comparison, here's how Garpsen stacks up against alternatives in the same general category and against a step-up option:
| Brand/Model | Approx. Price | Actual Wattage | Best For | Notable Advantage | Notable Limitation |
|---|---|---|---|---|---|
| Garpsen BL-G20A | $20–$30 | ~24W | Herbs, seedlings, houseplants | Built-in timer + dimming at low price | Low intensity, limited coverage |
| Garpsen 4-head 40W | $30–$45 | ~40W | Small mixed herb/plant shelf | More heads = better coverage spread | Still limited to ~2 sq ft effective |
| Mars Hydro TS600 | $50–$70 | ~100W actual | 2x2 tent veg/light flower | Much higher PAR, better efficiency | No built-in timer, more expensive |
| Spider Farmer SF-1000 | $80–$110 | ~100W actual | 2x2 tent veg/flower | Samsung LM301 diodes, excellent efficiency | Overkill and overpriced for houseplants |
| Hipargero clip-style | $25–$45 | ~25–45W | Herbs, seedlings | Similar niche, comparable performance | Same intensity limitations as Garpsen |
If your goals are strictly windowsill herbs or propagation, Garpsen is a reasonable buy. If you’re specifically comparing options, you may also want to read the HLG 600H grow light review to see how a quantum board fixture performs for real flowering demands. If you're planning any sort of dedicated grow tent or want to flower anything, spend the extra money on a proper quantum board fixture.
If you want an HLG grow light review to see how those higher-efficiency fixtures compare in real use, it helps to start there before buying dedicated grow tent. Brands like HLG produce lights that deliver several times the usable light per dollar over the fixture's lifespan once you account for efficiency and plant output. The Diamond Series LED lineup is another tier worth exploring if you're between budget and mid-range.
The Diamond Series LED lineup is built for growers who want noticeably stronger performance than entry-level budget clip lights. A Hipargero grow light is a fair direct comparison if you want to cross-shop at essentially the same price and use-case level. If you are comparing options, a Hipargero grow light review can help you judge whether their efficiency and coverage are a better fit for your goals Hipargero grow lights.
What to do before you buy
Before clicking purchase, take a few minutes to clarify what you actually need. Measure your grow area in square feet. If it's under 2 square feet and you're growing herbs or houseplants, Garpsen is fine. If it's 4 square feet or more, or if you want to flower anything, skip it.
- Measure your grow area (length x width in feet) and identify your target plant stage (seedling, veg, or flower).
- Find the actual wattage consumed (not LED count) in the product listing. For Garpsen, this is 24W for the BL-G20A and up to 40W for the 4-head version.
- Check the seller's return policy. Garpsen units have enough quality variation that you want easy returns.
- Look at reviews dated within the last 6 months on your specific retailer for reports of DOA units, drooping arms, or timer failures.
- If you find the intensity isn't enough after setup, run the light at 100% brightness and reduce the mounting height to 4–6 inches before deciding to return it.
- If your needs are beyond what Garpsen can deliver, cross-shop against Mars Hydro TS600 or Spider Farmer SF-1000 for a 2x2 tent, or look at the HLG 600H for a larger footprint.
Garpsen isn't a brand that changes the game, but for the right use case at the right price, it does what it advertises. Go in with accurate expectations about intensity and coverage, use the timer feature, keep the light close, and it'll serve a modest herb or houseplant setup reliably. Just don't ask it to do more than its wattage can physically deliver.
FAQ
How close should I hang a Garpsen light for best results, and what’s the first distance to try?
Because Garpsen does not publish PPFD, start with a practical rule: keep the light close enough that leaves are not bleaching or curling upward, but far enough to avoid heat stress. As a first pass for the 24–40W models, try about 6 to 10 inches above the canopy, then adjust after 3 to 7 days based on leaf color and stretching. If growth is very slow and stems are elongating, move it down slightly (or raise brightness), and if leaves show pale, bleached areas, move it up.
Do the dimming levels actually help, or is 100% always best?
Dimming can help in two ways: it reduces heat buildup during long runs, and it slows LED degradation by lowering operating stress. For these low-power fixtures, 100% is often only necessary when plants are small, or when you are intentionally trying to maximize hotspot intensity for seedlings or cuttings. If you are running 12 to 16 hours daily for weeks, consider 80% as a lifespan-friendly middle ground, then fine-tune by watching whether plants stretch or darken.
What photoperiod settings should I use for seedlings versus herbs versus flowering plants?
A common workflow is using the timer’s 18-hour mode for propagation and early seedlings, then switching to a longer but not extreme schedule for herbs and leafy greens. For adult vegetative herbs, many people run 12 to 16 hours. These fixtures are not reliable for flowering targets, so if you attempt flowering anyway, treat it as supplemental, not primary, lighting and expect limited results compared with a higher-output grow light.
Will Garpsen work for a 2x2 tent if I use multiple units?
It will improve coverage, but it still struggles with intensity. Even with two lights, the total wattage stays in the budget range for SMD diodes, and the light will likely be uneven due to the multi-arm or hotspot pattern. If your goal is meaningful flowering in a 2x2 tent, plan on a higher-output fixture rather than relying on stacking multiple budget clip lights.
Why do my plants under one arm look bigger than the rest, and how do I fix uneven coverage?
Gooseneck and multi-arm designs create hotspots directly under each head, so plants in those zones get stronger intensity while edge plants lag. Fix it by rotating the pots or trays every few days, and by keeping the arms adjusted so they cover the entire canopy rather than pointing at a narrow center. For trays, try to center the fixture so the hotspot overlap covers the planting area instead of concentrating only on one side.
Is the timer enough, or should I buy an external outlet timer instead?
The built-in timer is generally reported as reliable, and it can save money and reduce wiring clutter. Only consider an external outlet timer if you need tighter control, want to change schedules frequently, or are using multiple lights with synchronized on off times. If your plants are sensitive, verify the timer behavior by testing once with a stopwatch before relying on it for daily cycles.
What heat issues should I watch for, given these lights are passively cooled?
No-fan designs are quiet but can run warm at the housing and near the LED array during long sessions. With 24–40W output, thermal runaway is unlikely, but you should still check that the fixture surface feels comfortably warm, not hot to the touch. If the light is mounted very close to plastic shelves, fabric covers, or tightly enclosed spaces, improve airflow and consider running at 80% instead of 100% for long photoperiods.
How can I tell if my specific Garpsen model is actually the wattage it claims?
If the listing is vague, the most reliable approach is to measure power draw with a plug in watt meter. Set your light to 100% first, then compare the meter reading to the claimed wattage. This helps you avoid buying a unit that says “high LED count” but draws much less power in practice, which directly affects intensity and coverage.
Are rebranded or OEM Garpsen versions consistent, or should I expect differences?
Expect some variation. The article notes near-identical structures across rebranded listings, but batch-to-batch differences can affect clip grip, cord stiffness, and overall component quality. Before committing, prefer listings with easy returns and scan recent customer feedback specifically for dead on arrival units and early drooping of the gooseneck arms.
What’s the most common failure point on clip and stand grow lights, and how do I prevent it?
Inexpensive clip lights often fail first at the mechanical parts, especially the clip mechanism and the gooseneck tension, which can lead to drooping and angle drift. Prevent it by ensuring the clip base grips firmly before trusting it, avoiding fully extended positions for months, and checking alignment every week. Keeping the unit at a stable, less extreme angle also reduces stress on the arm joints.
Can I use Garpsen over soil, hydro, or propagation trays, and does the mounting method matter?
Yes for basic propagation trays and potted herbs, but mounting matters for safety and consistency. With clip styles, confirm the support surface can hold the leverage of the arms, and avoid clipping to thin shelving that flexes. For humid propagation, keep the electrical body and cord away from splashes, and position the fixture so condensation does not drip onto the housing.
Is it safe to use the Garpsen light inside a greenhouse tent or near high humidity?
It’s not inherently unsafe, but humidity increases the consequences of water contact and corrosion. Keep the connection points and cord ends protected from condensation, and ensure the fixture is mounted so it cannot fall into wet trays. If you grow in consistently high humidity, raise the fixture slightly and improve airflow around it to reduce warm humid air pooling near the housing.