For most indoor gardeners spending under $100, the best budget grow lights right now are quantum board LED panels from brands like Mars Hydro, Spider Farmer, and Viparspectra. For seedlings and small herb gardens, a simple LED strip or T5-style bar light in the $20–$40 range does the job cleanly. For veg and flowering in a 2x2 to 3x3 footprint, a mid-range quantum board in the $60–$90 range (Mars Hydro TS 1000, Spider Farmer SF-1000, Viparspectra P1000) gives you genuinely usable light output without misleading specs. That kind of real-world PPFD measurement for the Spider Farmer SF-1000, including values at specified distances, is reported in this SF-1000 review. What you give up at the budget end is mostly uniformity, dimming precision, and long-term build quality, not the ability to grow real plants.
Budget Grow Lights Review: Best Value Picks and Setup Tips

What to actually expect from a budget grow light
Budget grow lights have gotten dramatically better in the last few years, mostly because the same Samsung LM301-series LEDs used in premium fixtures started appearing in cheaper panels. But there are still real trade-offs, and pretending otherwise sets you up for disappointment.
The biggest gap between a $70 panel and a $400 one isn't the diodes, it's driver quality, thermal management, uniformity across the coverage area, and whether the specs are actually verified. A budget light might list a PPFD of 800 µmol/m²/s at 18 inches, but that number is often measured dead center in a reflective white tent, not across your actual canopy. As Treegers has documented, manufacturers routinely test inside highly reflective enclosures, which inflates the average PPFD reading significantly compared to what you'll actually measure in a real grow space.
What you can realistically expect from a quality budget LED panel in the $60–$100 range: adequate PPFD for seedlings and vegetative growth over a 2x2 to 3x3 ft area, a full-spectrum output that includes both blue and red wavelengths, and a lifespan of 30,000–50,000 hours if you don't stress the driver with continuous maximum output. What you should not expect: consistent PPFD across the full advertised footprint, a third-party verified test report, precise dimming control, or a warranty that's easy to actually use.
The price-to-performance reality
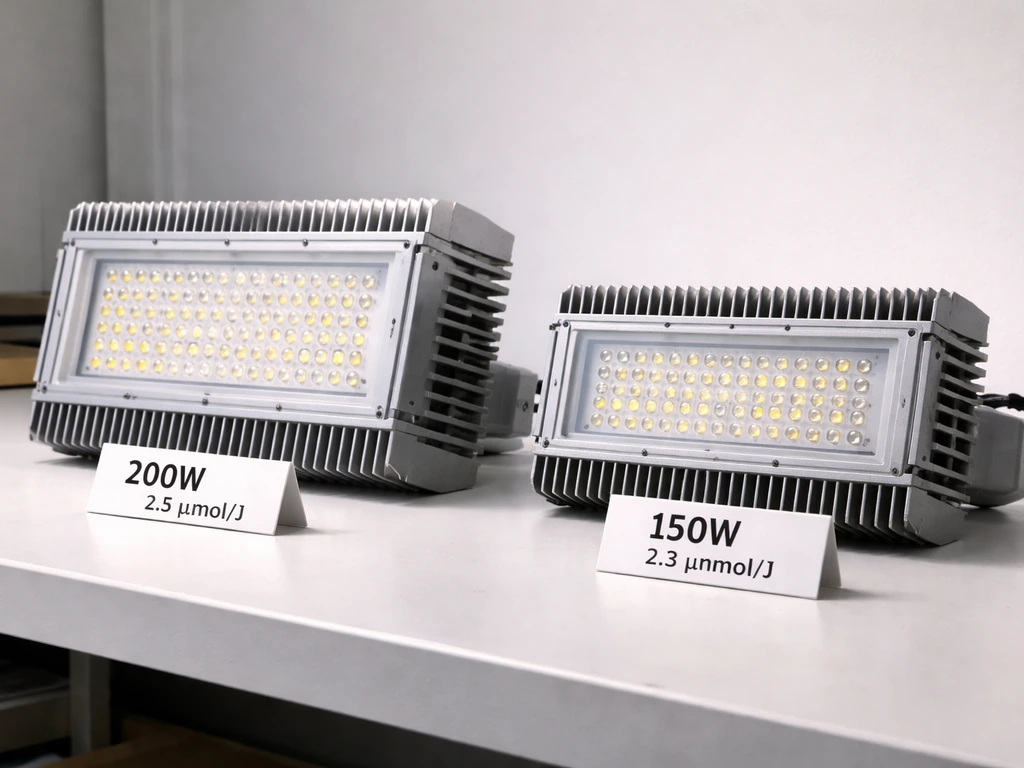
Photon efficacy is the number that matters most for comparing budget lights on equal terms. It's measured in µmol/J, meaning how many photons you get per watt of electricity consumed. Premium fixtures from Fluence or HLG regularly hit 2.8–3.1 µmol/J, and HLG's Universal Supplement Light is documented at 3.07 µmol/J. Budget panels from reputable brands like Spider Farmer and Mars Hydro typically land between 2.0 and 2.6 µmol/J. Off-brand panels from unknown Amazon sellers often don't publish efficacy at all, which is itself a red flag. The practical implication: a less efficient light costs more to run per photon delivered, which eats into the money you saved upfront over time.
Best budget picks by use case
Seedlings and clones
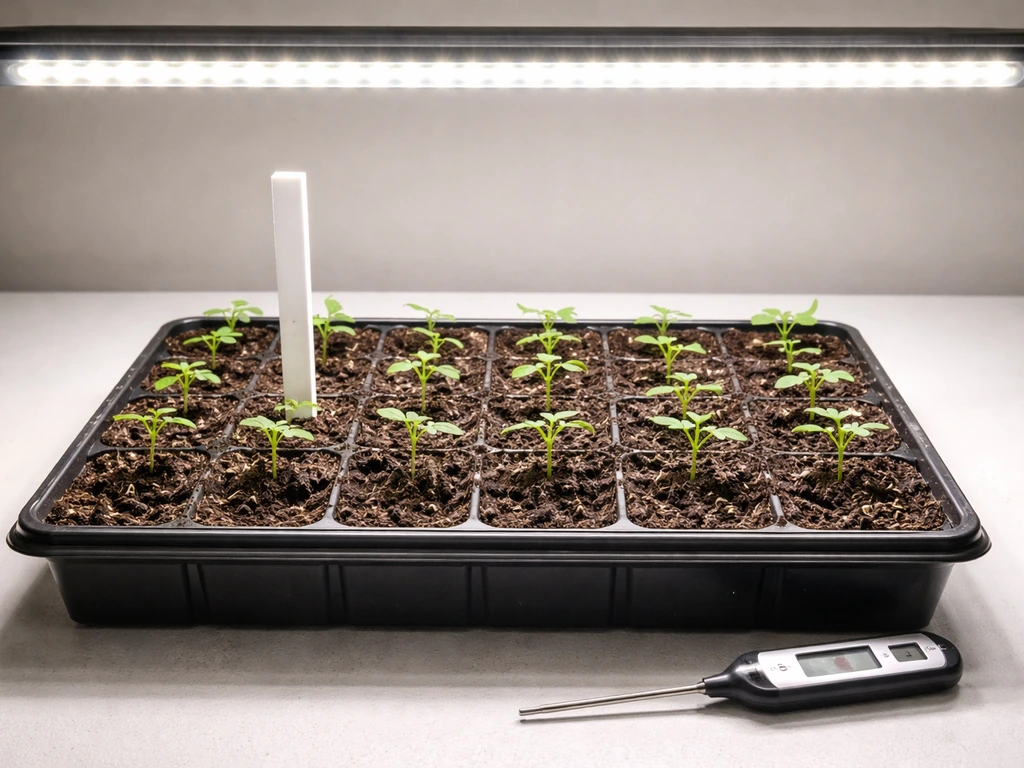
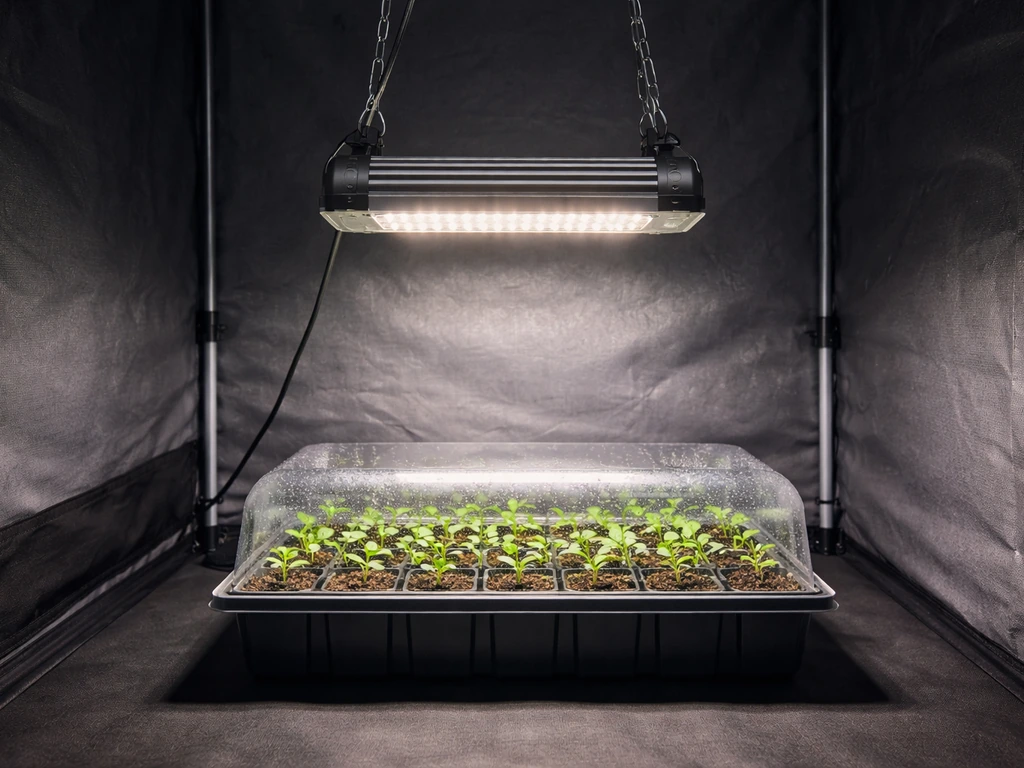
Seedlings and clones need low to moderate PPFD, roughly 100–300 µmol/m²/s, and they're sensitive to heat stress. A $20–$35 LED strip bar light or T5-style fixture handles this well. The Barrina T5 LED grow light (a 4-pack runs about $30–$40) is a practical, zero-waste choice here. You don't need a full panel for seedlings, and running a high-powered panel at 20% capacity to avoid burning seedlings is inefficient. If you're already planning to scale up, a dimmable panel like the Mars Hydro TS 600 (around $35–$45) gives you the flexibility to start low and ramp up.
Vegetative growth
Veg plants want more light, 400–600 µmol/m²/s is a reasonable target for most leafy plants and herbs, and higher (up to 800+) for cannabis and tomatoes. For a 2x2 space, the Spider Farmer SF-1000 (~$80) and Mars Hydro TS 1000 (~$75) are the two I'd point most readers toward. Both use Samsung LM301B diodes, draw around 100W actual wattage, and deliver usable PPFD across the 2x2 footprint. The Viparspectra P1000 is a close third and occasionally goes on sale for under $65. For a 3x3, you'll need to step up to the SF-2000 or TS 2000 range (around $140–$160), which is technically above the strict budget range but still excellent value.
Flowering
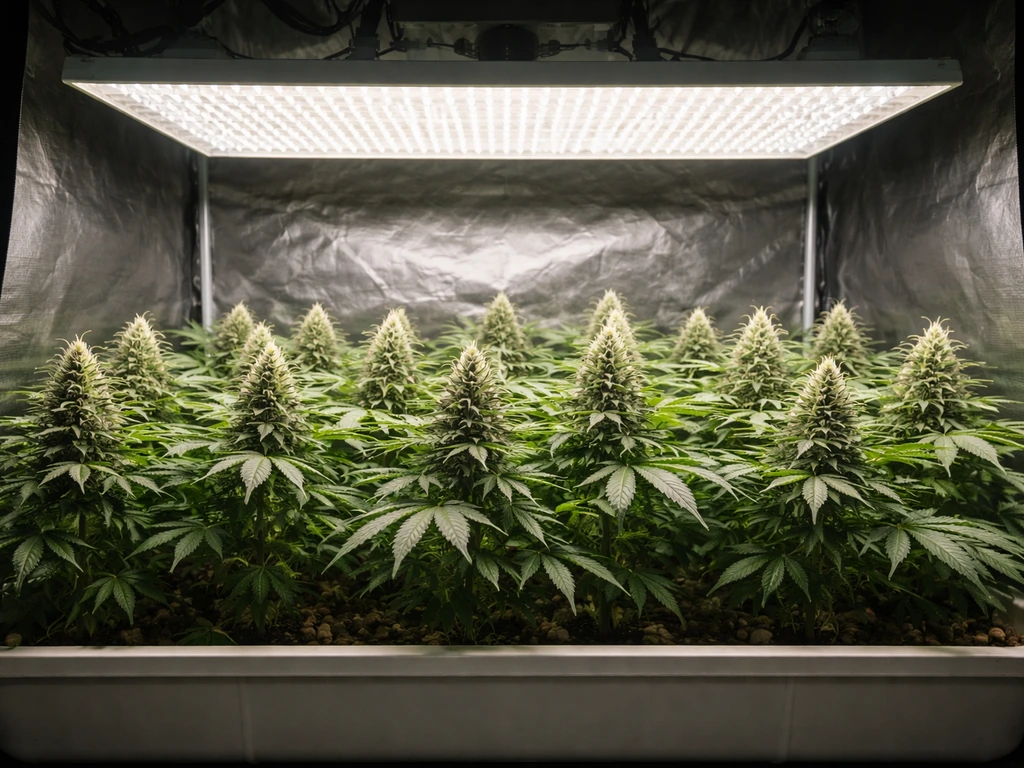
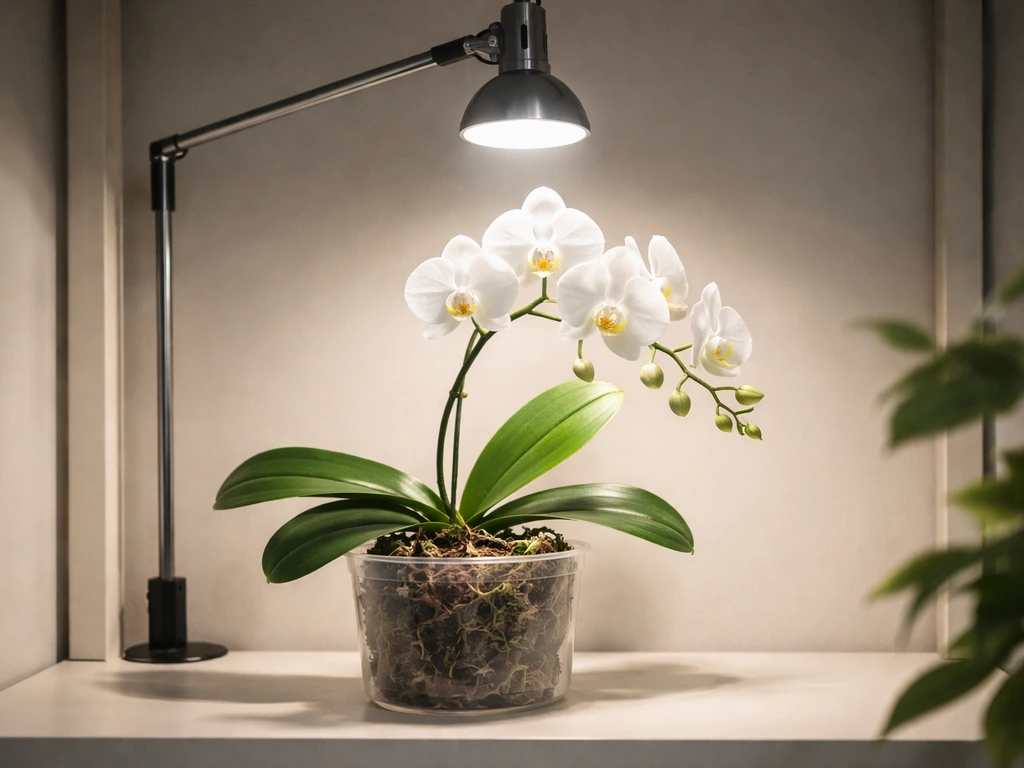
Flowering is where budget lights get genuinely tested, because you want 600–900+ µmol/m²/s across a larger footprint, and uniformity matters more. The honest answer: a single $80 panel cannot flower a 3x3 effectively. It can flower a 2x2 adequately. If you're trying to flower in a 3x3 on a strict budget, consider running two Spider Farmer SF-1000 units side by side, which gives you more uniform coverage than one underpowered panel trying to stretch. If you're shopping for orchids specifically, orchids-focused grow light reviews are a useful comparison point because they help validate coverage and uniformity claims in real-world flowering setups. Alternatively, the Mars Hydro FC-E3000 (around $160–$180 during sales) is a bar-style fixture that covers a 3x3 with significantly better uniformity than a single panel, it's worth the stretch if flowering quality is your priority.
Spectrum and wattage: what actually works on a budget
Most budget LEDs sold today are labeled 'full spectrum' and produce a white light with peaks in blue (around 440–470 nm) and red (around 650–670 nm). This is genuinely adequate for the full plant life cycle. What you're not getting in most budget fixtures is precise spectrum tuning, the ability to shift more toward blue for veg or more toward red/far-red for flowering. That level of control costs more, and for most growers, it's not necessary.
On wattage: ignore the inflated 'equivalent' wattage claims. A light listed as '1000W equivalent' that actually draws 100W at the wall is a 100W light. Always look for the actual power draw (watts consumed), not the LED chip wattage or the marketing equivalent. Budget panels between 100W and 200W actual draw cover a 2x2 to 3x3 space acceptably for veg; flowering in the same space needs at least 200W actual draw for adequate intensity.
If you want to supplement an existing budget setup for flowering without buying a whole new fixture, a targeted red/far-red supplement bar (similar in concept to what HLG offers, though their price point is higher) can boost bloom response cheaply. However, for most beginners, a single full-spectrum panel is simpler and more cost-effective than managing a primary plus supplement setup.
Hands-on performance metrics that actually tell you something
When I evaluate budget grow lights, I focus on five measurable dimensions rather than marketing language. Here's what each one tells you and how budget lights typically perform.
| Metric | What to measure | Budget panel typical range | Why it matters |
|---|---|---|---|
| Actual power draw (W) | Kill-a-Watt meter at the wall | 90–200W | Determines operating cost and realistic output |
| Center PPFD (µmol/m²/s) | Quantum sensor at canopy height | 600–900 at 18 in (center) | Tells you peak intensity, not coverage |
| Edge PPFD (µmol/m²/s) | Quantum sensor at corners of footprint | 200–500 at 18 in (edges) | Reveals uniformity drop-off |
| Photon efficacy (µmol/J) | PPF ÷ actual watts | 2.0–2.6 | Efficiency proxy; higher = cheaper to run |
| Operating temperature (°C) | IR thermometer on heatsink | 35–55°C | Higher = shorter driver/LED lifespan |
| Coverage uniformity ratio | Edge PPFD ÷ center PPFD | 0.4–0.75 for budget panels | Values above 0.85 are considered good |
The uniformity ratio is where budget panels most consistently fall short. A well-documented premium fixture targets a minimum-to-average uniformity ratio of 0.85 or above across its advertised footprint. Most budget panels I've tested land between 0.4 and 0.65, meaning the edges of the coverage area can receive less than half the photons the center does. This matters most for flowering and for larger footprints. For seedlings in a small tray directly under the center of the panel, it's largely irrelevant.
It's also worth understanding the difference between PPF and PPFD, because budget manufacturers frequently conflate the two. PPF (µmol/s) measures total photons emitted by the fixture per second. PPFD (µmol/m²/s) measures photons landing on a specific area at a specific distance. As HLG's own PPFD calculator makes clear, a light's PPF tells you nothing useful about the canopy-level PPFD you'll actually achieve without knowing mounting height, coverage area, and how much light is lost to the surroundings. A number like '1265 µmol/s PPF' (similar to the documented output of a tested 509W commercial fixture) sounds impressive but doesn't tell you whether your 2x2 canopy is getting 400 or 900 µmol/m²/s.
Fixture types compared: panels, bars, strips, and bulbs
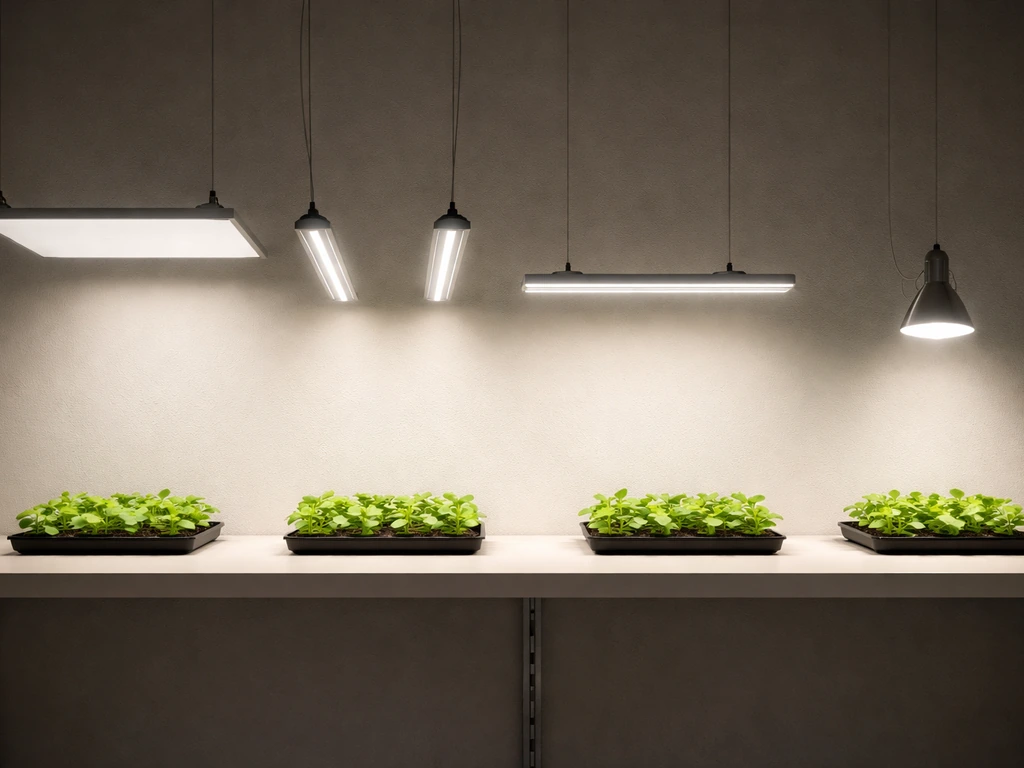
Budget grow lights come in four main physical formats, and the format affects coverage, heat distribution, and versatility more than people expect.
| Fixture type | Best use case | Price range | Coverage uniformity | Heat management | Typical limitations |
|---|---|---|---|---|---|
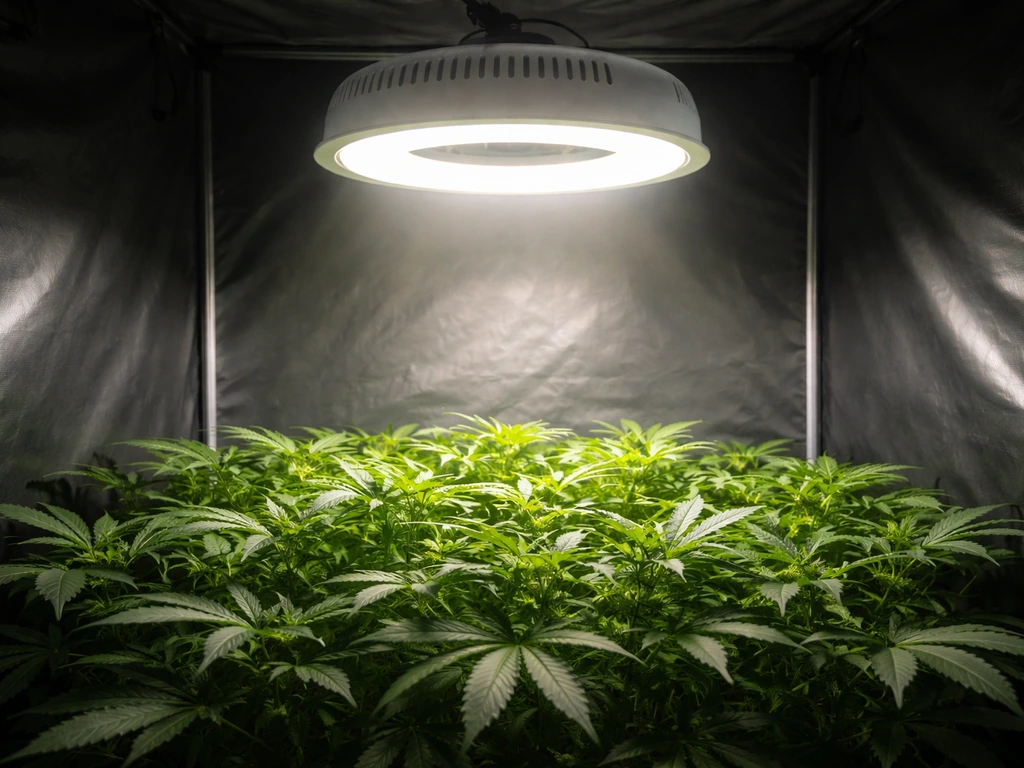
| Quantum board panel | Veg and flowering, 2x2 to 3x3 | $60–$180 | Moderate (center-heavy) | Good with quality heatsink | Center hotspot, edges weaker |
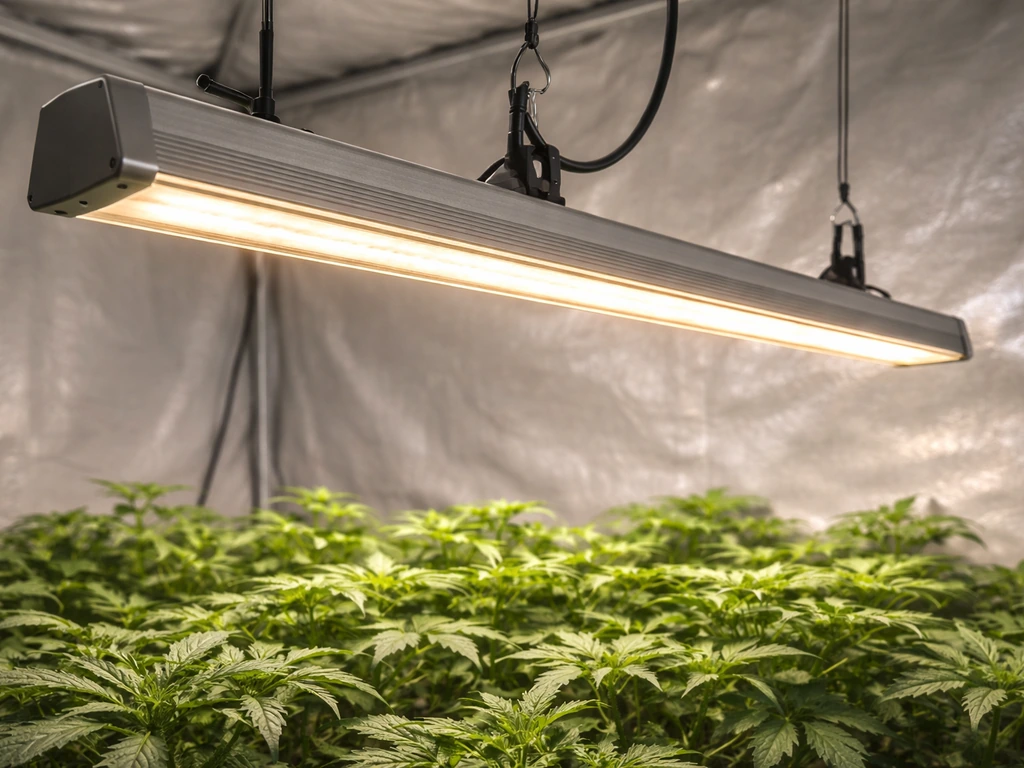
| LED bar/strip array | Seedlings, veg, uniform coverage | $30–$180 | Good to excellent | Excellent (distributed) | More complex to mount; pricier for good ones |
| LED grow strips (DIY/kit) | Seedlings, supplemental lighting | $15–$50 | Good if spaced correctly | Good | Requires more setup effort |
| Screw-in grow bulbs | Single plant, small shelf setups | $10–$25 | Poor (point source) | Moderate | Very limited footprint, low total output |
For pure value and ease of use in a tent or grow box, quantum board panels win at the budget level. Bar-style fixtures like the Mars Hydro FC-E series deliver meaningfully better uniformity (similar in concept to how commercial bar lights like the Fluence SPYDR are designed), but they cost more. If your budget is strictly under $50 and you're growing seedlings or a few herbs, LED strips or T5-style bar lights are the right call, they're the easiest to mount above a tray and the most forgiving for new growers.
Screw-in grow bulbs are mostly a last resort. A 15W grow bulb covers maybe a 6-inch diameter footprint usefully. They work for a single small plant on a windowsill but aren't a practical choice for anyone trying to grow more than one or two small herbs.
Value and cost breakdown: what you're actually paying per photon
The upfront price of a budget grow light is only part of the equation. A 100W panel running 18 hours a day costs roughly $0.18/day at $0.10/kWh, about $65/year. A less efficient panel pulling the same 100W but delivering 15% fewer photons (at 1.8 µmol/J instead of 2.1 µmol/J) costs the same to run but produces less usable light. Over a 2-year grow cycle, the operational cost often exceeds the purchase price of the fixture, which means buying the slightly more expensive $80 unit with verified 2.4 µmol/J efficacy over the $45 unit with unknown or inflated specs saves money overall.
Expected lifespan for budget panels is typically rated at 30,000–50,000 hours by manufacturers, though driver quality is usually the limiting factor. A quality driver in a $75–$90 panel from Spider Farmer or Mars Hydro is a Meanwell or Meanwell-equivalent, which is a reliable component. Unknown-brand panels in the $25–$40 range often use cheaper drivers that fail or degrade faster, reducing light output before the LEDs themselves wear out.
A practical way to compare value: calculate cost per usable watt (actual draw, not marketing wattage) and look for photon efficacy above 2.0 µmol/J as a minimum threshold. Below that, you're either running inefficiently or the specs are inflated. For reference, the documented efficacy on a properly tested commercial fixture (like the AB520, measured at 2.485 µmol/J) represents a reasonable mid-point between budget and premium performance. Good budget panels from established brands are getting close to that range.
Setting up your grow space: height, spacing, and coverage
Mounting height is the single most adjustable variable in your grow setup, and it's especially important with budget lights. Raising a panel increases coverage area but reduces PPFD at the canopy. Lowering it concentrates intensity but creates a hotspot in the center and weak edges.
For seedlings, start around 24–30 inches above the tray (roughly 60–75 cm) and watch for stretching (too far) or bleaching/curling (too close). A general starting point from practical guides places early-stage seedlings at the lower-intensity end of this range, with adjustment based on observed plant response. Budget lights with limited dimming make height adjustment your primary intensity control tool.
- Seedlings and clones: 24–30 inches above canopy, light on 18 hours/day. Watch for stretching as a sign of insufficient light.
- Vegetative growth: 18–24 inches above canopy, 18 hours/day. Adjust down if plants are stretching; raise if leaf edges show stress.
- Flowering: 12–18 inches above canopy (for high-intensity phases), 12 hours/day. Monitor canopy temperature — keep it under 28°C (82°F) at leaf level.
- Multiple plants: Space fixtures so overlapping light fields smooth out hot spots. Two smaller panels staggered across a 3x3 usually outperforms one underpowered panel centered.
- Reflective walls: Mylar or white paint on grow space walls can recover 20–30% of photons that would otherwise be lost, effectively improving your budget light's apparent coverage for free.
DLI (daily light integral) is the concept that ties PPFD and photoperiod together. You could have an adequate average PPFD but still miss DLI targets if your photoperiod is wrong or your uniformity is poor across the canopy. For leafy greens and herbs, target a DLI of 12–17 mol/m²/day. For flowering cannabis or tomatoes, 30–45 mol/m²/day is a common target. A budget panel delivering 400 µmol/m²/s on average, run for 18 hours, produces a DLI of about 26 mol/m²/day, adequate for veg but pushing the lower limit for flowering. This is why flowering on a strict budget often means running lights longer rather than buying more intensity.
If you want to verify your actual PPFD without buying a dedicated quantum sensor (which costs $100–$200+), Photone is a free smartphone app that uses the phone camera as a rough PAR meter. It's not as accurate as a calibrated sensor, but it's useful for checking relative values and spotting obvious problems like extreme hotspots or dead zones.
Red flags and a buying checklist before you order
The budget grow light market has a lot of noise, and some products are genuinely misleading. If you are comparing specific products, the grow light heaven reviews can help you spot patterns in build quality, output claims, and real-world performance. Here's what to check before you hand over your money. If you are also considering induction grow lights for your setup, induction grow lights reviews are a related option that can help you compare real-world coverage, output claims, and performance expectations. If you’re specifically looking at the Grow Light Science Grow 200, a detailed review can clarify how close its advertised output is to real-world canopy performance Grow Light Science Grow 200 review. If you're specifically deciding between models, the Grow Light Science Grow 300 review can help you judge real-world canopy output and build quality.
Red flags to walk away from
- Wattage listed as 'equivalent' or 'LED equivalent' with no actual draw spec — this almost always means the real draw is far lower than implied.
- PPFD values claimed without specifying measurement height, coverage area, or test environment (reflective tent vs. open room). Center-spot PPFD in a white tent is not your real canopy PPFD.
- No third-party test report available, and the brand doesn't respond when you ask for one. Reputable brands can at least point to a lab test document.
- No UL, CE, ETL, or equivalent safety certification listed. This matters for electrical safety, not just performance.
- Warranty under 1 year, or a warranty process that requires you to ship to China at your expense. Most credible budget brands now offer 2–3 year warranties.
- Photon efficacy not listed anywhere on the spec sheet or product page — if they can't share µmol/J, they don't want you to calculate it.
- PPFD map with only a center value and 'average' — no min/max data, no distribution grid. As documented testing practice shows, a single average PPFD hides poor uniformity.
Buying checklist
- Confirm actual wattage draw (not equivalent) — aim for at least 30–40W actual per square foot for flowering.
- Look for photon efficacy (µmol/J) on the spec sheet — 2.0 µmol/J is a minimum; 2.3+ is good for a budget fixture.
- Check for a PPFD chart that includes multiple distances and shows edge or corner values, not just center peak.
- Verify driver brand — Meanwell or stated Meanwell-equivalent is a positive signal; unknown or unstated is a risk.
- Confirm safety certification (UL, ETL, CE) is listed and not just a logo with no certification number.
- Check dimming capability — a 0–100% analog dimmer or 0–10V control gives you flexibility that's especially valuable with seedlings.
- Read the warranty terms, not just the duration — confirm what's covered, whether parts or full replacement is offered, and where warranty service is handled.
- Check actual customer reviews for heat complaints or early failure reports — a pattern of failures within 6–12 months signals driver or thermal management problems.
- If flowering is your goal, calculate DLI: (PPFD × photoperiod hours × 3600) ÷ 1,000,000. Target 30+ mol/m²/day for flowering plants.
To put it plainly: spend $70–$90 on a Samsung-diode panel from Spider Farmer, Mars Hydro, or Viparspectra for a 2x2 veg or flowering space, use a reflective tent to recover edge photons, mount it at 18–24 inches for veg and 12–18 inches for flower, and don't trust any PPFD claim that doesn't come with a distance and coverage specification. That combination gets most hobbyists where they need to be without wasting money on either junk lights or premium fixtures they don't need yet. If you want to see how specific budget models perform in real setups, reading grow light heaven reviews can help you compare what people actually report.
FAQ
Can I use a budget flowering panel for seedlings to avoid buying a second light?
Yes, but only if you can measure or control intensity well. In practice, for seedlings and clones you can run a dimmable panel lower (and keep good airflow), but if the light lacks reliable dimming, the safer approach is to raise it to your starting height and adjust based on leaf color and stretching rather than guessing at a “low mode” percentage.
Do I need to look for spectrum tuning (more blue for veg, more red/far-red for bloom) when buying a budget grow light?
Don’t. A “full spectrum” label usually means a blue/red mix, not that the spectrum is tuned. If you need more flower support, the higher value option is adding targeted red or far-red bars later, or simply extending photoperiod to reach your DLI, since budget spectrum shifts are rarely consistent.
How do I compare lights when a product page mixes up PPF, PPFD, and “equivalent watts”?
Look for actual power draw (watts at the wall), then estimate DLI using both PPFD and photoperiod. If a fixture’s listing only gives marketing wattage or only gives PPF, you can still compare, but you’ll need mounting height and area assumptions, otherwise you might end up under-lighting one zone of the canopy.
What should I assume if a budget light doesn’t provide distance and coverage specs for its PPFD claims?
If the supplier cannot tell you the measurement distance, coverage area, and method, treat the PPFD as optimistic. A quick decision rule, if you do not have a PAR map, is to plan for less uniform output than claimed and either reduce target intensity (for veg) or increase coverage (two units or a bar fixture for flowering).
Will using a reflective tent make a budget panel’s coverage uniform enough for flowering?
A reflective grow tent helps recover some light, but it does not fix edge uniformity problems from the fixture design. If your goal is flowering in a 3x3, plan around uniformity by using either a more uniform bar-style fixture or multiple panels spaced for overlap, rather than counting on the tent to make the edges equal.
Is it better to run a budget LED at full power for fewer hours or lower power for longer?
Not usually. Most budget panels are happiest when you run them at a stable set point, continuous maximum output can stress the driver and shorten useful performance. If your model has dimming, use it to set a target intensity rather than rapidly changing settings every day.
Can I use a third-party dimmer or smart plug to control a budget grow light?
Yes, wiring and dimming compatibility can bite you. Make sure the dimmer is rated for the fixture and that it uses a supported control type (for example, dedicated driver dimming rather than a generic wall dimmer). When in doubt, test with a kill-a-watt meter and observe whether the power draw changes as expected.
How much does heat management affect real-world output on budget quantum board panels?
If the room temperature is high or airflow is weak, the same panel can perform noticeably worse because the driver and LEDs heat up. For budget fixtures, this is more important, since driver quality is often the limiting factor. Improve fan/vent placement and keep the driver side unobstructed.
What’s the best troubleshooting order if my plants look underlit under a budget grow light?
If you’re seeing stretching, slow leaf development, or pale color, first adjust height, then photoperiod (to meet DLI), then consider adding a second fixture if edges still look weaker. Avoid “instant fixes” like raising intensity dramatically without checking for hotspots.
How do I know whether I’m missing DLI, or my light is just dimmer than advertised?
For leafy greens, target a DLI in the mid-teens, and for cannabis or tomatoes target roughly the 30 to 45 range. If you cannot hit DLI with reasonable photoperiod, it is usually because PPFD or uniform coverage is too low, in that case adding a second light or moving to a more uniform format helps more than changing spectrum labels.
Can I rely on Photone (phone app) readings to set my grow light intensity?
Photone is a useful sanity check, but it is not a calibrated substitute. Use it to compare “same setup, same distance” changes, not to declare exact PPFD numbers. If Photone shows a big hotspot, treat it as a uniformity red flag and adjust mounting height or arrangement.
What calculation should I use to decide between two budget lights with different specs and prices?
A “cost per usable watt” comparison works best when you use actual watt draw and a minimum efficacy threshold. If you’re choosing between two similar-looking panels, prefer the one with published efficacy (or strong third-party testing) and a known driver brand, because operational cost and early dimming loss are where low-quality models can disappoint.
What warranty details matter most when you’re buying a budget grow light?
If the warranty is hard to use, the “risk-adjusted” value drops. For budget panels, check whether the warranty covers driver failure and whether the process requires shipping the whole fixture. Also consider that driver issues can reduce output before the LEDs hit rated life.