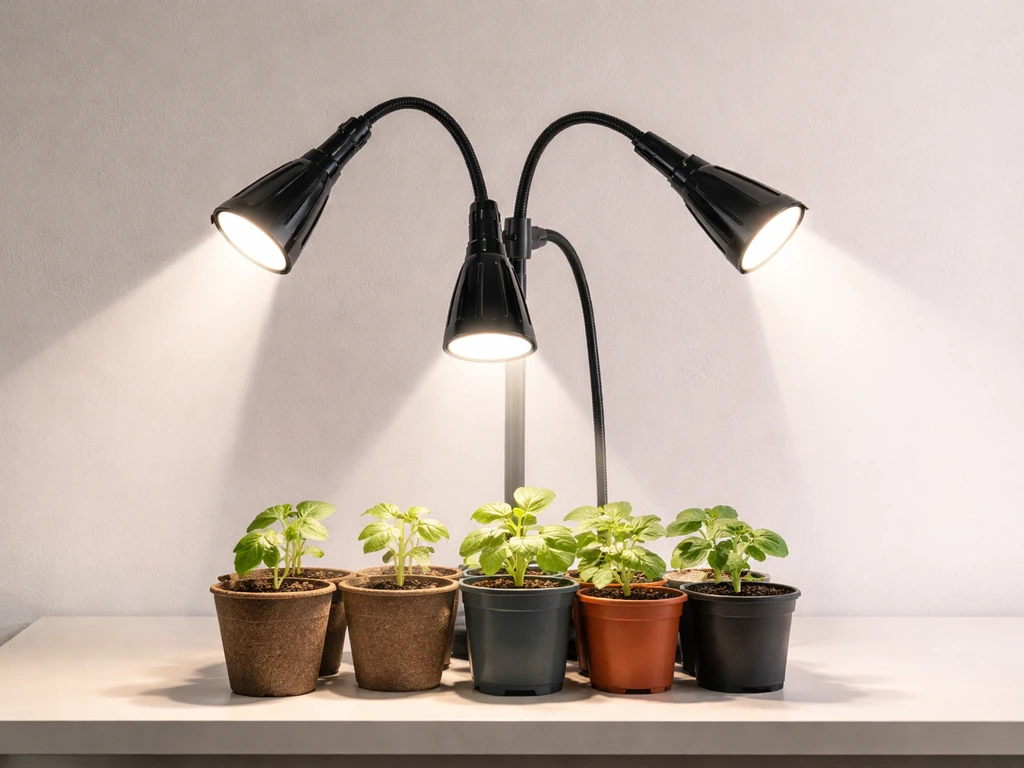
The Ankace GL06 is a clip-on, tri-head grow light aimed squarely at hobbyists who want something small, easy, and inexpensive to keep herbs, succulents, or seedling trays alive indoors. It is not a high-output panel for a 4x4 tent. If you go in with the right expectations, it genuinely delivers. If you expect it to replace a dedicated horticultural fixture, you will be disappointed. This review covers both sides of that question and then walks you through exactly how to set it up and dial it in from day one.
Ankace Grow Light Review and Setup Guide for Best Results

Marcus Caldwell
10 Apr 2026
What the Ankace GL06 actually does and who it's for

The GL06 is built around 36 LED chips spread across three adjustable heads: 24 red LEDs at 660 nm and 12 blue LEDs at 460 nm. The product listing markets it as a "60W" fixture, but that figure reflects the theoretical maximum draw of all LEDs under ideal conditions, not measured wall-draw power. In practical terms this is a low-wattage supplemental light. Ankace designed it for tabletop or shelf placement, attaching via a metal clip to surfaces up to three inches thick, with a fully flexible 360-degree gooseneck that lets you aim each head independently.
The people who get the most from this light are indoor gardeners managing a small collection: a few herb pots on a kitchen counter, a tray of seedlings on a wire rack, or a cluster of succulents on a windowsill that does not get enough winter sun. Reviewers consistently report it covering 4 to 6 small pots when each head is positioned within about 12 inches of the plants. Beyond that footprint, light intensity drops off and results suffer. It is not the right tool for a serious veg or flowering run, but for its actual target use, it is hard to beat at the price.
Quick verdict: pros, cons, and value vs. alternatives
Here is the honest summary before we get into setup details.
| Category | Assessment |
|---|---|
| Light source | 36 LEDs: 24 red (660 nm), 12 blue (460 nm) |
| Coverage | 4–6 small pots within ~12 inches per head |
| Dimming | 5 levels: 20%, 40%, 60%, 80%, 100% |
| Timer | 3, 6, or 12 hours with circular memory |
| Spectrum modes | Red only (A), blue only (B), or both |
| Mounting | Metal clip, up to 3-inch surface thickness |
| Power | USB connector plus AC adapter |
| Best for | Herbs, succulents, seedlings, small houseplants |
| Not suited for | Large tents, high-demand flowering crops, full-cycle cannabis |
- Very easy to position thanks to the flexible gooseneck and three independent heads
- Built-in timer with memory function removes the need for a separate outlet timer
- Five dimming steps give you real control over light intensity for different growth stages
- Compact and unobtrusive enough for living spaces
- Affordable entry point with minimal setup complexity
- Narrow coverage area limits it to small plant collections
- No PAR or PPFD data published, making performance comparisons difficult
- USB-to-AC power chain feels less robust than a direct-plug driver
- The '60W' marketing figure is misleading and should not be taken at face value
- Spectrum is a basic red/blue mix, not a true full-spectrum white-LED design
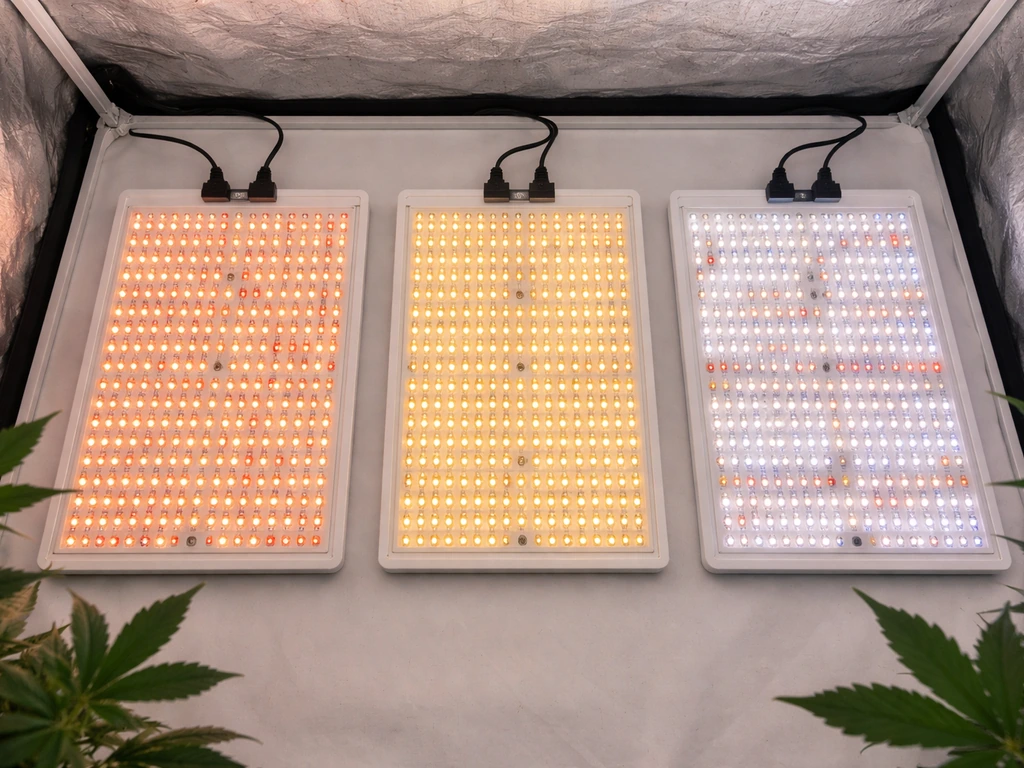
On value, the GL06 competes well within the sub-$30 clip-light category. If you want to step up to something with documented PPFD output and a broader spectrum, the Aglex grow light lineup is worth considering for small-to-medium enclosures, and it offers more transparency on light output. For shoppers who frequently browse marketplace listings, a broader look at Amazon LED grow lights will show you the full competitive landscape in this price bracket. The Ankace GL06 holds its own for casual use, but if your plants need more serious light, the upgrade cost is justified.
Unboxing to first run
What's in the box
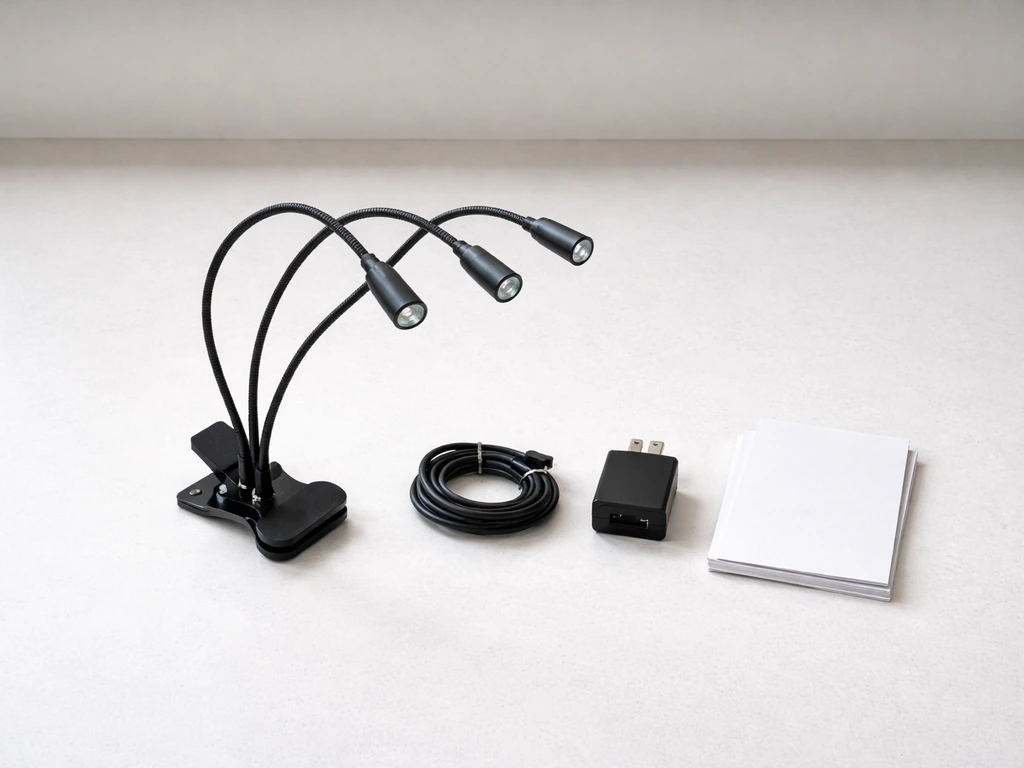
The GL06 ships with the tri-head light unit (gooseneck body with metal clip already attached), a USB cable, an AC adapter to convert the wall outlet to USB power, and a brief instruction guide. Some retail listings include a small printed quick-start card. Check that all three heads are present and articulate freely before you proceed.
First-run steps
- Attach the metal clip to your shelf edge, pot rim, desk, or grow rack. The clip accommodates surfaces up to three inches thick.
- Route the gooseneck so the three heads point generally toward your plants. Do not finalize the angle yet.
- Connect the USB cable from the light unit to the AC adapter, then plug the adapter into a wall outlet.
- Press the power button. The light should illuminate immediately on its last-used settings, or default to full brightness if it is the first use.
- Use the mode/switch button to select A (red only), B (blue only), or A+B (both) depending on your growth stage.
- Use the brightness button to select your starting intensity level (20, 40, 60, 80, or 100%).
- Use the timer button to set your photoperiod (3, 6, or 12 hours).
- Fine-tune the gooseneck angle so each head points directly at the plant canopy from the correct distance (see placement section below).
- The circular memory timer will retain your settings, so on the next power cycle it picks up where it left off.
Placement: hanging height, coverage area, and aiming

Placement makes or breaks this light. The manual explicitly calls out distance and illumination direction as the two variables you must tune to get useful results. Because the GL06 uses a clip-and-gooseneck system rather than a ceiling hang, "height" here means the distance from each head to the nearest leaf surface.
Keep each head within 6 to 12 inches of the plant canopy for meaningful light delivery. At 12 inches you get coverage across roughly one to two small pots per head. Pull the heads closer (6 to 8 inches) for higher intensity, which matters most during germination and early seedling stages. For established plants that are not light-hungry, 10 to 12 inches is fine. The three-head design is its biggest strength here: you can splay the gooseneck arms in different directions to cover a wider cluster of pots, or converge all three onto a single larger plant that needs more intensity.
Avoid angling heads at more than about 45 degrees off vertical. The further you tilt, the smaller the effective illuminated patch on the leaf surface and the more light spills around the plant rather than on it. Check for shadows: if one head is blocked by a taller plant, rotate the gooseneck so the blocked plant gets direct line of sight to at least one head. Practical user testing confirms that the "coverage area works perfectly" for 4 to 6 small pots when heads are distributed evenly and kept at the 12-inch maximum distance.
Spectrum modes and what to grow at each stage
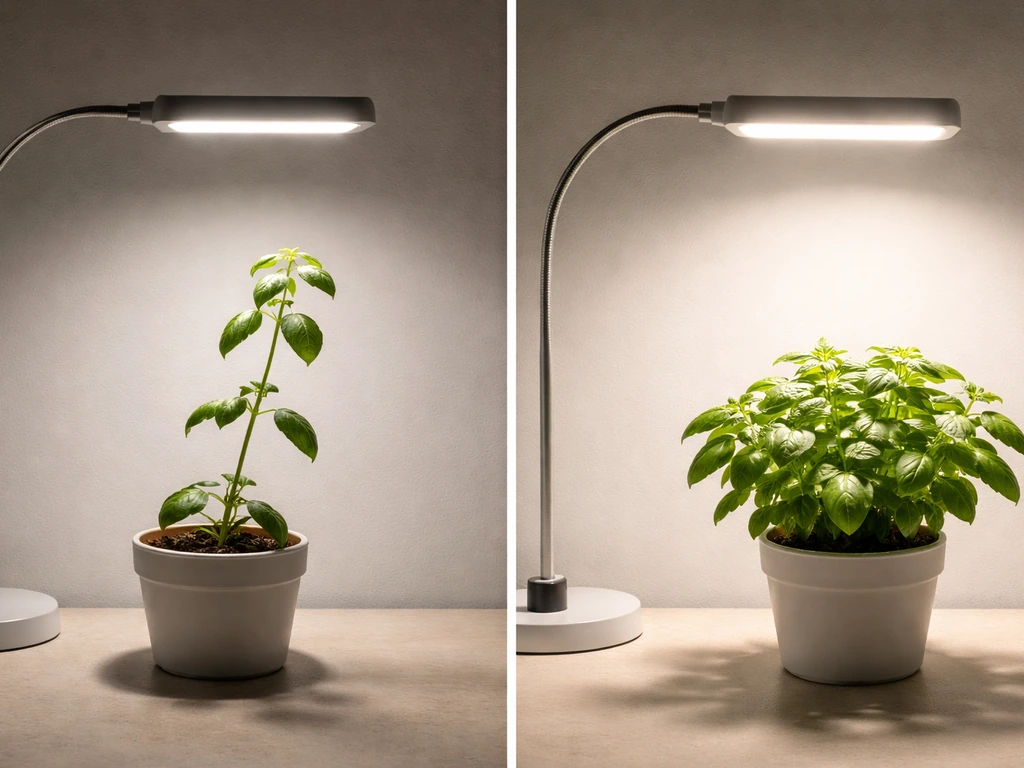
The GL06 has three switch modes controlled by a single button: mode A activates only the red LEDs (660 nm), mode B activates only the blue LEDs (460 nm), and the combined mode runs all 36 chips simultaneously. The manual ties these directly to growth stages: blue light supports germination and vegetative leaf development, while red light drives flowering and fruiting. Here is how to apply that in practice.
| Growth Stage | Recommended Mode | Brightness Level | Notes |
|---|---|---|---|
| Germination / sprouting | B (blue only) | 40–60% | Blue at 460 nm promotes root and shoot development; lower intensity protects delicate seedlings |
| Early seedlings (weeks 1–3) | A+B (both) | 60–80% | Combined spectrum supports stem and leaf growth without stressing young plants |
| Vegetative growth | A+B (both) | 80–100% | Maximum spectrum and intensity for established leafy plants and herbs |
| Pre-flower / transition | A+B (both) | 100% | Keep full spectrum on; increase daily light hours if photoperiod allows |
| Flowering / fruiting | A (red only) or A+B | 80–100% | Red at 660 nm is the primary driver for flower and fruit development |
For succulents and most houseplants that are not being pushed through a defined flowering cycle, just leave the light on A+B at 80 to 100% and forget about mode-switching. The main scenario where you would use a single-channel mode is if you are running seedling trays and want to keep intensity conservative early on, then ramp up by switching to combined mode once the plants are established.
It is worth being honest about the spectrum limitations here. The GL06's red/blue output is functional, but it is a narrowband approach. Plants grown under it may look purple and slightly unnatural under the light. If you want to compare how a full-spectrum white-LED design performs differently, the Agrobrite grow lights are a good reference point for what a broader-spectrum fixture looks like in a similar hobbyist price tier.
Operating settings: timer, intensity, and scheduling
The GL06's control panel has three distinct button functions: spectrum/switch mode, brightness, and timer. The timer button cycles through 3-hour, 6-hour, and 12-hour on-durations. When you press it, the corresponding indicator lights up. After the selected duration, the light automatically turns off. The circular memory timer then repeats the cycle every 24 hours from when you first powered it on, so it will turn back on at the same time the following day.
For most indoor plants, use the 12-hour timer. Seedlings do well with 14 to 16 hours of light per day, but since the GL06 only offers 12 hours as its maximum on-time, you would need a separate outlet timer to extend beyond that. For herbs in maintenance mode, 12 hours is sufficient. The 6-hour setting is really only practical as a supplemental boost during short winter days when your plants are already getting some natural light.
Brightness controls cycle through five levels with a single button. Each press steps up (20, 40, 60, 80, 100%) and wraps back around. The buttons produce a tactile click, making it easy to count steps without looking. The setting you choose is saved in memory along with the timer setting, so the whole configuration persists across power cycles. Start new plants at 40 to 60% and increase by one step every few days while watching for any signs of light stress (bleaching, curling leaf edges, or very tight internode spacing).
Troubleshooting and safety
Common problems and fixes
| Problem | Likely Cause | Fix |
|---|---|---|
| Plants are leggy / stretching toward light | Light is too far away or intensity too low | Move heads to within 6–8 inches; increase brightness to 80–100% |
| Uneven coverage across the pot cluster | Heads all aimed at one spot | Redistribute gooseneck arms so each head covers a different section |
| One or two plants not improving | Blocked by taller neighbors; no direct line-of-sight to a head | Rearrange pot positions or re-angle the affected head around the obstruction |
| Light turns off unexpectedly | Timer duration reached | Check which timer mode is active; switch to 12H if you want the longest on-cycle |
| Settings reset after a power outage | Circular memory requires a stable power cycle to save | Reconnect and re-enter your preferred settings; they will persist from the next cycle forward |
| Light flickers at startup | USB connection not fully seated | Unplug and re-seat both the USB cable and the AC adapter; check for bent pins |
| No light output on one head | Head physically disconnected internally or LED chip failure | Check that the gooseneck is not crimped sharply at the base; if flickering persists, contact Ankace support |
Electrical and heat precautions
The GL06 runs cool enough that heat damage to plants is not a realistic concern at normal operating distances. The LEDs do warm up during extended use, but the fixture does not generate significant radiated heat. More important is the electrical setup. The USB-to-AC adapter chain means you have two connection points that can work loose: the USB plug at the light and the adapter at the wall. Keep both connections snug and route the cable so it is not under tension or pinched by a shelf edge.
Do not use the GL06 in high-humidity environments like over an uncovered aquarium or in a humid propagation tent without good air circulation. The fixture is not rated for wet conditions. Place the AC adapter where it will not sit in standing water or be dripped on. Use a surge-protected power strip if you are running multiple devices on the same circuit. These are basic precautions that apply to most small grow lights, but the USB adapter format of the GL06 means the adapter itself is often sitting low on a power strip where it can be overlooked.
One last point on electrical safety: if you are evaluating whether a marketplace-sourced light from a less familiar brand carries similar risks, it is useful to understand how build quality varies across budget options. A broader comparison of AliExpress grow lights shows how the GL06's build quality stacks up against similar import-tier products. For shoppers who have considered sourcing from wholesale channels, the analysis in our Alibaba LED grow light review covers the tradeoffs of buying at that level versus a branded retail product like the Ankace.
So, is the Ankace GL06 worth buying?
For what it is designed to do, yes. If you have 4 to 6 small pots on a shelf, a herb garden on a counter with insufficient window light, or a seed-starting tray that needs a few extra weeks of reliable light in late winter, the GL06 is a practical, low-maintenance solution. The built-in timer with memory, five dimming steps, and the flexible three-head design genuinely make it more capable than single-head clip lights at a similar price.
The caveats are real, though. The coverage area is small, the power chain is less elegant than a direct-plug design, and the published wattage is not meaningful for comparison purposes. If your grow space is larger than a small shelf or you are working toward any kind of serious flowering yield, the GL06 will leave you underlit. In that case, step up to a panel-style fixture with published PPFD data. The setup workflow above will still serve you well as a framework for dialing in any grow light, so the time you spend learning the GL06's controls is not wasted even if you eventually upgrade.
FAQ
Can I run the Ankace GL06 for 14 to 16 hours a day for seedlings without buying extra equipment?
Yes, but you will likely need an external timer. The GL06’s built-in timer tops out at 12 hours per day, so for seedlings that want 14 to 16 hours, use a separate wall outlet timer for longer daily on-time, then let the GL06 handle its internal cycle within that window.
What should I do if the light is too low and touching the top leaves is a concern?
Avoid stacking it directly on top of plant material, because the three heads have overlapping but directional coverage. If you need more height, raise the entire unit and bring the brightness down slightly, then reassess leaf-level shadows and adjust head angles rather than simply increasing intensity until everything looks bright.
My seedlings look leggy, how do I troubleshoot the GL06 setup?
If you see stretched growth, the most common cause is the heads are too far away or too angled, reducing the effective illuminated patch. Return the heads to the 6 to 10 inch range for seedlings, keep angles within about 45 degrees off vertical, then raise brightness one step every few days.
Can I use only red or only blue on the Ankace GL06 at the beginning, and how should I transition?
Yes, especially for early germination and young seedlings. Start with red-only (mode A) or combined mode at lower brightness to reduce harshness, then switch to combined at higher brightness once leaves establish. Blue-only can be useful, but at low distance it can also make seedlings look a bit stressed if the light is too intense too fast.
Will the GL06 keep the same daily schedule if I power it off or it loses power?
The GL06’s dimming and timer settings persist, but the schedule repeats from the time you first powered it on. If you unplug it often, your on-time can drift relative to your desired daily routine. For consistent timing, set the GL06 once, avoid frequent unplugging, and use an outlet timer for anything beyond the built-in behavior.
Is it safe to use the Ankace GL06 in a humid tent if I keep the plants moist?
In high-humidity areas, the risk is not LED heat, it is condensation on the USB-to-AC adapter chain. If you must use it near humidity, keep the adapter elevated and sheltered from mist, and ensure airflow so water does not gather around the connectors and cable entry points.
How can I estimate whether the GL06 is enough for my space if I cannot compare PPFD?
No, the advertised 60W is not a reliable way to estimate how much light reaches your leaves. Instead, treat it as a low-watt supplemental light, then judge by coverage (4 to 6 small pots at about 12 inches) and plant response, adjusting distance and brightness before assuming you are underpowered.
How do I deal with shadows when plants are different heights under the tri-head light?
Rotate the gooseneck arms so each head has direct line of sight to the most important leaves. If one plant blocks another, you may need to rearrange pot positions, not just tilt the light, because tilt alone can shrink the lit area and increase shadowing between plants.
What’s the best way to route the USB and adapter cables so they do not loosen over time?
If you plan to place it on a shelf or rack, route the cable so it cannot sag and pull on the USB plug, because that connection is one of the two points that can loosen. Use a gentle cable slack loop, keep it away from shelf edges that can pinch, and check snugness after moving the light.
Why do plants look purple under the GL06, and does that mean the light is wrong?
Color appearance matters. Because it is red and blue only, plants can look more purple and less “normal” visually than under white full-spectrum lights, even when growth is fine. Judge performance by leaf posture, spacing, and slow adaptation signs, not by how natural the color looks to your eye.