Wakyme grow lights are budget-friendly LED panels aimed at hobbyist indoor growers who want more output than a cheap shelf light but aren't ready to spend on premium brands. The most commonly reviewed model is the Wakyme 1200W, though the line also includes a 600W and a dedicated VEG-optimized fixture. None of these are true 1200W or 600W lights in the wall-draw sense, those numbers are marketing equivalents, not actual power consumption.
Wakyme Grow Light Reviews: Test Results, Pros and Cons

Marcus Caldwell
18 Apr 2026
What you actually get is a dual-chip LED panel with separate Veg and Bloom switches, a passive or lightly active cooling system, and a price tag that consistently lands well under $60. Whether that's enough for your grow depends entirely on how you set it up and what you're growing.
What Wakyme grow lights actually are
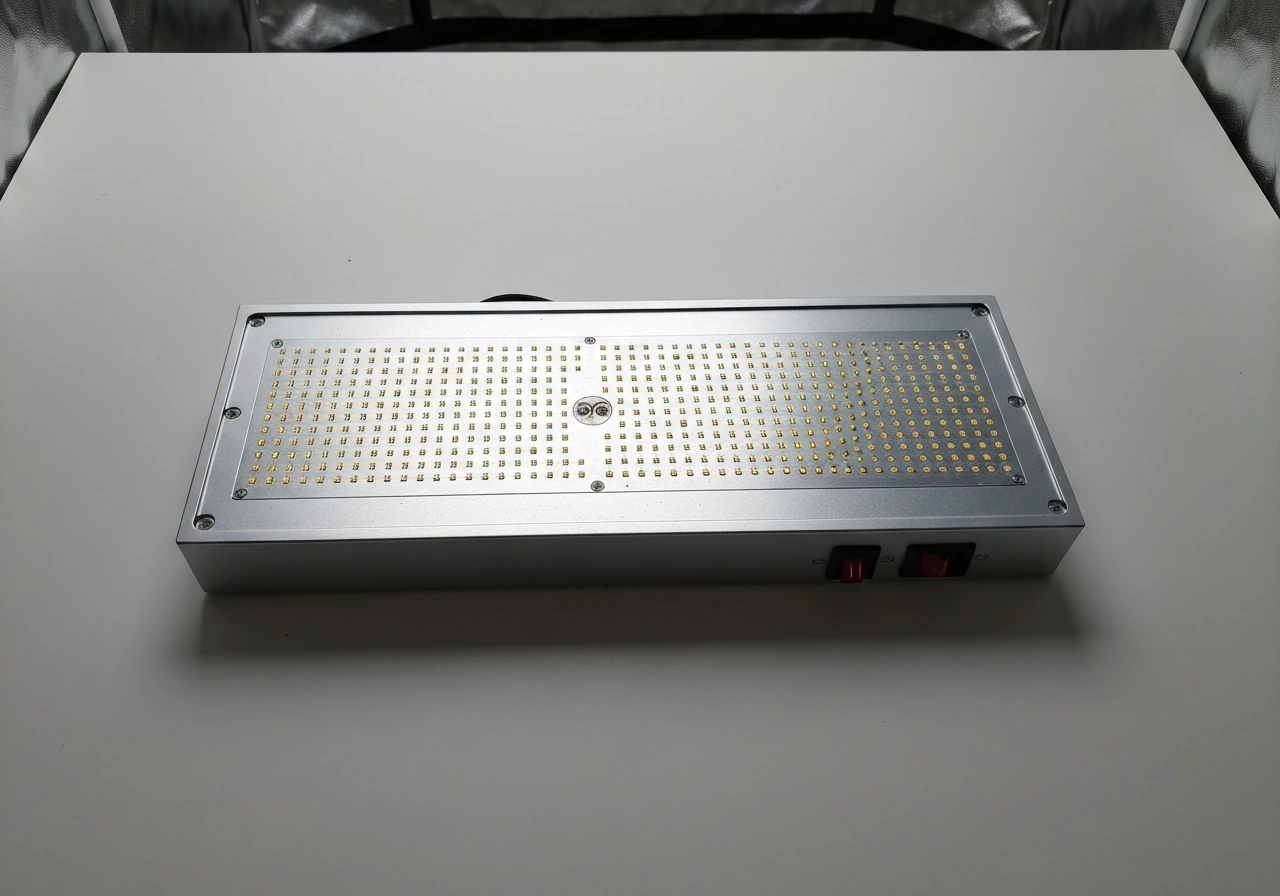
The Wakyme lineup centers on a few panel-style LED fixtures using dual-chip SMD LEDs arranged across a rectangular frame. The 1200W and 600W model names refer to HID-equivalent claims, not real wattage. In practice, the 1200W draws somewhere in the range of 120 to 200 watts from the wall depending on switch configuration, and the 600W draws roughly half that. The key design feature across the line is the split Veg/Bloom switching system. The Veg switch activates a blue-heavy spectrum suited to vegetative growth, while the Bloom switch shifts toward red-heavy output for flowering. You can run both switches simultaneously for full-power operation, or use one at a time to tune the spectrum to your growth stage.
The intended use is small to mid-sized indoor grows: a 2x2 to 3x3 tent for the 600W equivalent, and up to a 4x4 footprint (with realistic expectations) for the 1200W. Wakyme positions these lights with the phrase "maximum yield with minimum power consumption," which is standard marketing language for this price tier. The spectrum covers roughly 380nm to 780nm, including UV and IR diodes in some configurations, with the red and blue ratios being the primary differentiator between Veg and Bloom modes.
Quick verdict: who should buy this and who should skip it
If you're growing herbs, leafy greens, or starting seedlings and clones and you want a functional light under $50, the Wakyme 1200W is a reasonable starting point. The Veg/Bloom switching gives you more flexibility than a single-spectrum panel, and the light does produce usable PPFD at moderate hanging heights. For anyone growing cannabis through a full vegetative and flowering cycle in a 2x2 to 3x3 space, it can work, but you need to manage expectations: the PPFD uniformity across a 4x4 footprint is not strong, and the claimed coverage areas are optimistic.
Skip the Wakyme if you're running a 4x4 or larger tent and expecting full canopy coverage with flowering-level PPFD (above 600 µmol/m²/s across the whole space). Also skip it if you're doing a perpetual grow where reliability over 18 to 24 months matters, community feedback on longevity is mixed. Budget growers comparing options in this tier should also look at what a Wolezek grow light offers before committing, since that line targets a very similar buyer profile.
Performance metrics: PPFD, coverage, uniformity, and heat

Measured PPFD and distance behavior
Real-world PPFD data for Wakyme lights is mostly community-sourced rather than lab-verified, so treat these numbers as directional rather than definitive. A grow log measurement of a Wakyme VEG light recorded 829 µmol/m²/s at 30cm (roughly 12 inches) from the canopy. Wakyme's own instruction materials cite a measurement of approximately 1220 µmol/m²/s at around 19.69 inches (50cm) for their higher-power configuration, though it's unclear which specific model or switch setting produced that number. Both figures confirm that Wakyme panels can hit useful PPFD levels at close range, but intensity drops off significantly as you raise the fixture.
The practical takeaway is that PPFD is highly distance-sensitive with these lights. If you're targeting 400 to 600 µmol/m²/s for vegetative growth, you'll likely need to hang the light between 18 and 24 inches depending on your specific fixture and switch setting. For flowering targets above 600 µmol/m²/s, you may need to drop to 14 to 18 inches, which can create heat stress concerns unless airflow is managed well. Because Wakyme doesn't publish verified PPFD maps for all models, the most reliable approach is to measure at your actual canopy using the Photone app, then adjust height or dimming to hit your target range.
Coverage uniformity
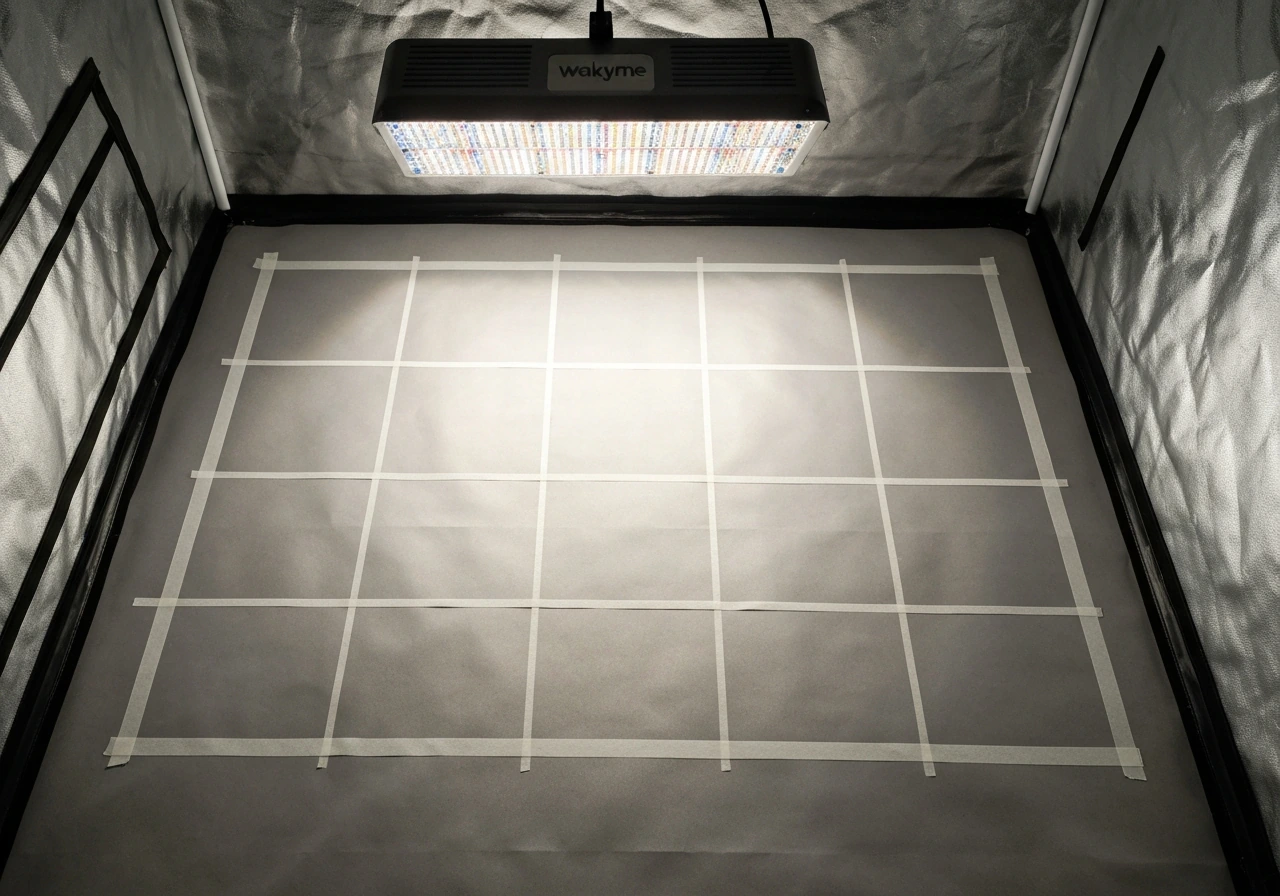
Uniformity is where budget panel lights like the Wakyme consistently show their limits. Center PPFD is always stronger than edges, and the drop-off toward corners of a 3x3 or 4x4 space is meaningful. In practical terms, the center 2x2 of a claimed 3x3 coverage area will receive substantially more light than the perimeter. For herbs and seedlings on an open shelf, this is manageable. For a flowering cannabis canopy where you want consistent bud development across the whole space, uneven PPFD distribution results in uneven development. Rotating plants weekly helps compensate, but it doesn't eliminate the issue.
Heat output
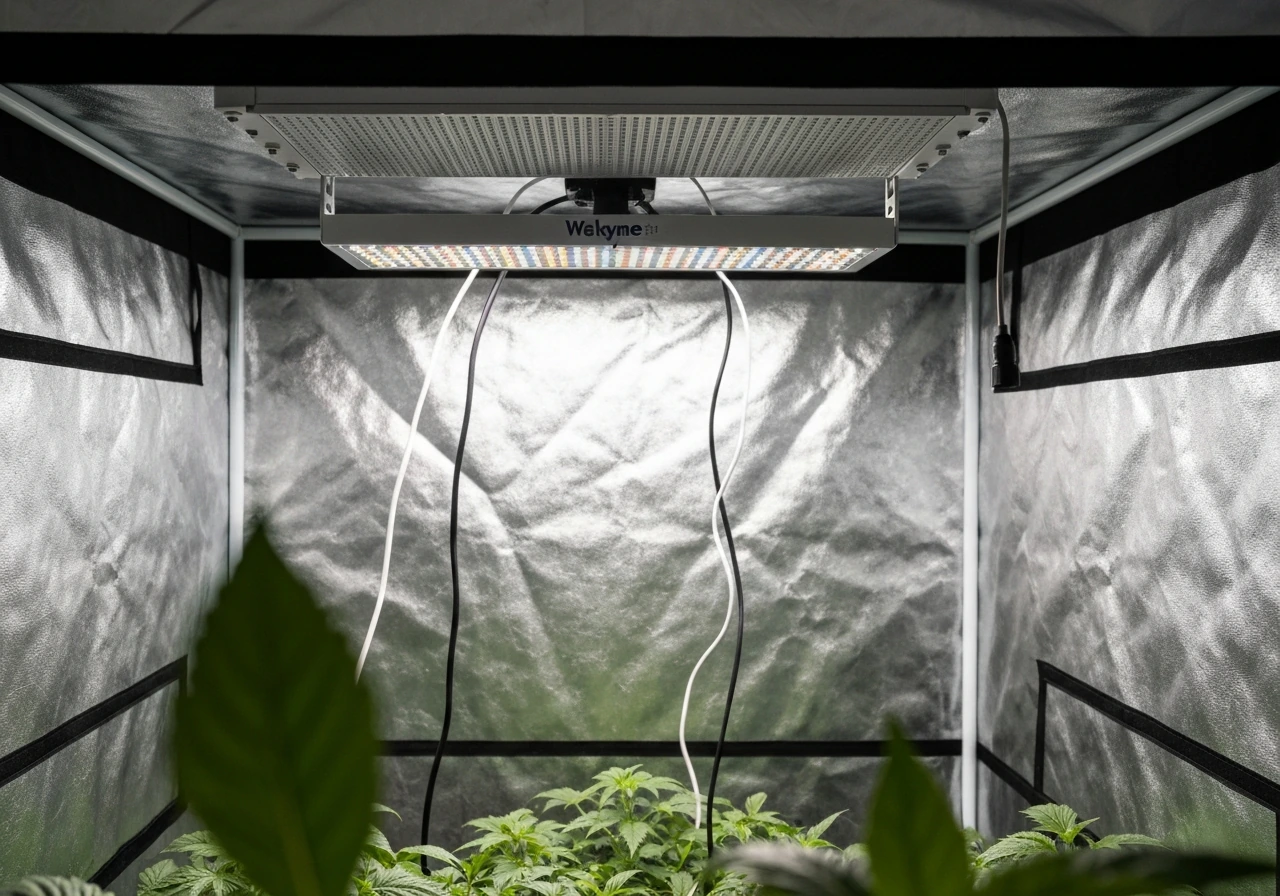
The Wakyme 1200W uses an aluminum heat sink with a built-in fan (on some configurations) for heat dissipation. The fixture runs warm but not dangerously hot in normal operation. Surface temperatures at the LED panel stay in an acceptable range when there's adequate airflow around the fixture, which means tent ventilation matters. Forum participants specifically called out the importance of airflow in the grow space, and that advice holds: in a sealed or poorly ventilated space, the Wakyme runs noticeably warmer and the diodes will degrade faster. The noise from the cooling fan is audible but not obtrusive, roughly comparable to a small desktop fan at low speed.
Build quality, design, and controls
The Wakyme 1200W is built around a stamped aluminum frame with a reflective housing. It feels functional rather than premium, the materials are adequate for the price but won't inspire confidence if you're used to handling higher-end fixtures. The hanging hardware is straightforward: adjustable rope hangers are included, and the fixture has two hanging points that distribute weight reasonably well. The power cord length is standard and should reach most tent setups without an extension cord.
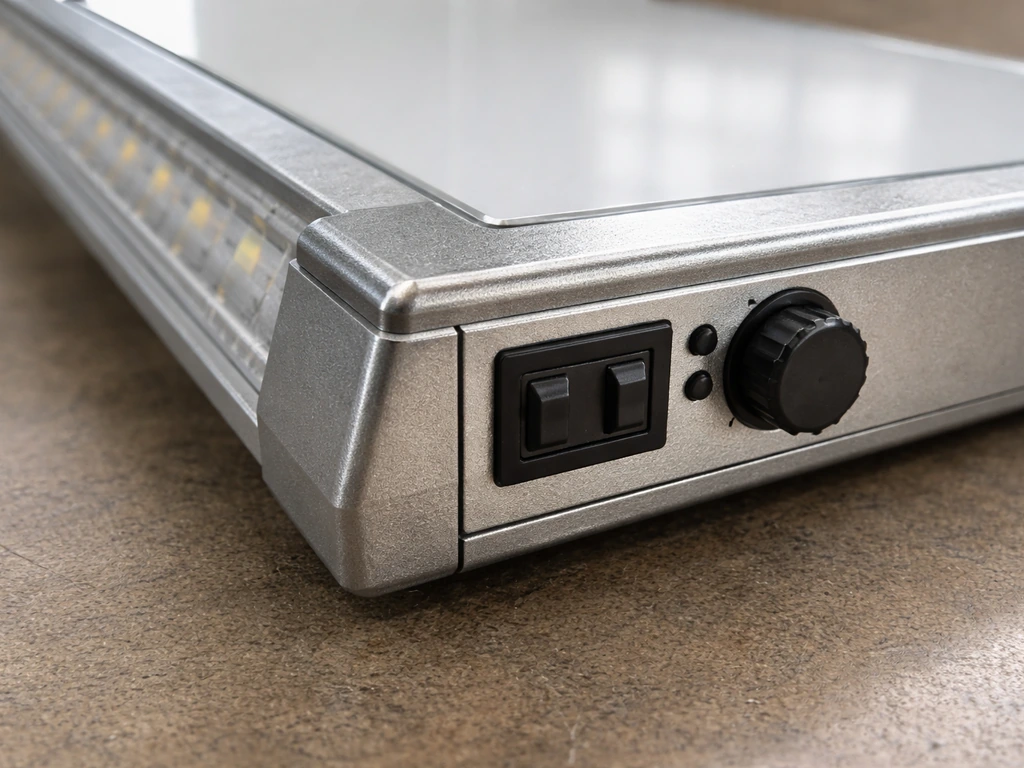
The controls are minimal by design. There's no built-in dimmer on the base 1200W model, you control intensity primarily through hanging height and by choosing Veg, Bloom, or both switches. Some Wakyme models do include a dial-style dimmer and a programmable timer, which is a meaningful upgrade for dialing in PPFD at a fixed hanging height. If the specific model you're considering lacks a dimmer, factor that into your setup planning: you'll be adjusting height more frequently to compensate. The Veg/Bloom switch mechanism itself is reliable and straightforward, with no reported issues in community discussions.
Reliability over the long term is the main question mark. Wakyme lights aren't built to the same component standard as mid-tier brands, and some users report diode failures after 12 to 18 months of daily use. For a seasonal or occasional grower this may not be a dealbreaker. For someone running lights 18 hours a day continuously, the lifespan uncertainty is worth factoring into the true cost of ownership.
Energy efficiency and value: what you're actually paying for
The single most important thing to know about Wakyme wattage claims is that the "1200W" label is a marketing equivalent, not the actual power draw. The true wall draw is significantly lower, which is actually good news for your electricity bill, but it also means the light isn't producing anything close to what 1200 real watts would deliver. Always check the actual wattage in the product specs or measure it with a plug-in power meter. This is standard practice for evaluating any budget LED, and it's the only way to calculate real operating cost and compare efficiency across brands.
On a dollars-per-usable-light basis, the Wakyme holds up reasonably well at its price point. The qualitative consensus from growers who've used it is that it delivers strong performance relative to its cost, good enough for seedlings and vegetative growth, adequate for flowering in a smaller footprint. For context, a rule of thumb from the cannabis growing community suggests targeting roughly 40 to 45 watts of true power draw per square foot for solid flowering PPFD.
Applying that to a 2x2 tent (4 sq ft) means you need 160 to 180 actual watts. If your Wakyme 1200W draws 150 to 200 watts at the wall on full power, it's in the right range for a 2x2 but stretched thin for anything larger. The value story is solid for small footprints, less compelling as you scale up.
It's also worth noting that "efficiency" claims on fixtures like this are often overstated in marketing materials. Rather than taking the manufacturer's word on efficiency, focus on what PPFD you can actually measure at canopy for the watts consumed. That ratio, µmol/J or PPFD per watt, is the only number that tells you whether you're getting your money's worth. Growers who've purchased from retail channels like big-box stores should be aware that Walmart grow lights in this price tier often share similar OEM origins and comparable specs, making head-to-head comparisons useful before you buy.
How plants actually respond: results by stage
Seedlings and clones
This is where the Wakyme performs most confidently. Seedlings need relatively low PPFD (around 100 to 300 µmol/m²/s), and even a budget LED can deliver that without difficulty. Hang the light at 24 to 30 inches, run only the Veg switch, and the light level is appropriate for germination and early establishment. Seedlings under a Wakyme at this height show normal internodal spacing and healthy cotyledon development. No heat stress at this distance.
Vegetative growth
Vegetative growth targets are typically 400 to 600 µmol/m²/s for most crops. Cannabis light requirement charts commonly target about 400, 600 µmol/m²/s for vegetative growth, though cultivar and conditions can shift the ideal PPFD 400 to 600 µmol/m²/s.
At 18 to 24 inches with both switches active, the Wakyme 1200W reaches this range at the center of the coverage area. Plants in vegetative stage under the Wakyme grow at a normal pace, showing good leaf development and reasonable lateral branching. The Veg switch's blue-heavy spectrum is appropriate here. The main limitation is that plants near the edges of a 3x3 footprint receive noticeably less light than those in the center, leading to slightly slower outer growth.
Keeping plants in the center two-thirds of the coverage area during veg avoids most of this problem.
Flowering and fruiting
Flowering is the most demanding stage and where the Wakyme's limitations are most visible. Running both Veg and Bloom switches simultaneously at 14 to 18 inches of hanging height, you can achieve flowering-level PPFD in the center of a 2x2 footprint. Bud development and fruit set are reasonable given the wattage. However, in a 3x3 or 4x4 space, the outer canopy receives significantly less light, resulting in smaller or less dense development compared to the center.
If you're growing a single large plant in a 2x2 or two to three smaller plants in a 2x4, the Wakyme can carry you through a full flowering cycle with acceptable results. For anything larger, you'll want to supplement or upgrade. Growers looking at similar-tier options for flowering should also consider what a Wills grow light delivers in the same price bracket before making a final call.
Setup and compatibility: how to configure it for your space
Recommended hanging heights by stage
| Growth Stage | Recommended Height | Target PPFD | Switch Setting |
|---|---|---|---|
| Seedlings / Clones | 24–30 inches | 100–300 µmol/m²/s | Veg only |
| Vegetative | 18–24 inches | 400–600 µmol/m²/s | Veg + Bloom |
| Flowering / Fruiting | 12–18 inches | 600–900 µmol/m²/s | Veg + Bloom (full power) |
These ranges are starting points based on manufacturer guidance and community-reported measurements. Because PPFD varies between individual units, always verify with a meter or app at your specific hanging height. The right workflow is: set the light at the stage-appropriate height, measure PPFD at canopy level, then raise or lower by 2-inch increments until you're in the target range. If your fixture has a dimmer, use it to fine-tune after you've found the right height. This approach, set distance first for PPFD ballpark, then use dimmer for precision, is more reliable than trying to manage both variables at once.
Grow tent vs open shelf compatibility
The Wakyme works better inside a reflective grow tent than on an open shelf. Tent walls bounce light back into the canopy, improving effective coverage and partially compensating for the center-heavy uniformity issue. In a 2x2 or 2x4 tent, reflective walls make a meaningful difference to edge PPFD. On an open shelf or in a basement corner without reflective surfaces, you lose that benefit and the coverage limitations become more pronounced. If you're using open shelving, lining the back and sides with Mylar or flat white paint helps considerably.
For power, the Wakyme 1200W plugs into a standard 120V outlet and draws well within the capacity of a standard 15-amp household circuit, even with other equipment running. Running multiple Wakyme fixtures on the same circuit is feasible but worth calculating before you do it. Pair the fixture with adequate tent ventilation: an inline fan rated for at least 1x to 1.5x the tent volume per minute keeps temperatures in range and extends diode lifespan. If you're exploring other grow light options to compare before purchasing, a IKEA grow light setup offers a very different approach for shelf-based growing, and warehouse retailer options like a Costco grow light are worth checking if you have access to one.
Practical PPFD verification steps
- Download the Photone app (iOS or Android) and select the correct light type setting for LEDs.
- Hang the Wakyme at your stage-appropriate starting height with switches set to your intended configuration.
- Place your phone face-up at canopy level — where the tops of your plants are or will be.
- Take readings at the center of your grow space and at multiple edge points to map uniformity.
- If center PPFD is too high, raise the fixture 2 inches and re-measure. If too low, lower it or increase power (switch both Veg and Bloom on).
- If your model has a dimmer, lock in the height first, then use the dimmer for fine adjustments.
- Repeat the check every time you raise your canopy or change growth stage.
Wakyme vs comparable budget options

The Wakyme sits in a crowded field of budget LED panels. Its main differentiator is the Veg/Bloom switching, which some competing lights at the same price point don't offer. Against a similarly priced single-spectrum or blurple-only panel, the Wakyme has a genuine advantage for growers who want one light to carry plants from veg to flower. Against newer quantum-board-style budget lights in the $60 to $80 range, the Wakyme's dual-chip SMD design starts to look dated, quantum boards typically deliver better efficiency (more PPFD per watt) and better uniformity. The trade-off is price: a quality quantum board costs more upfront, even in the budget tier.
For someone who specifically shops in the sub-$50 range and wants a multi-switch panel, the Wakyme is a competitive option. The Apelila grow light is another panel-style fixture targeting the same buyer, and comparing the two side by side on actual wall draw and measured PPFD is worth the extra 20 minutes before purchase. Similarly, if you're buying from a larger marketplace and want to understand what else is available in this category, checking a broader Costco grow light review gives useful context on how retail bundling affects value.
The bottom line on Wakyme grow lights
The Wakyme 1200W is a functional, entry-level grow light that does what it claims within a realistic footprint. It's not a 1200W light, it's not a premium fixture, and it won't cover a 4x4 tent with flowering-level uniformity. But for a 2x2 to 2x4 indoor grow, herbs on a shelf, or a seedling operation, it delivers usable PPFD at a price that makes the investment low-risk. The Veg/Bloom switching is a genuine feature, the heat output is manageable with good airflow, and the setup process is simple enough for a first-time grower.
The most important step after buying is to measure your actual canopy PPFD with the Photone app rather than trusting the marketing claims. Set your hanging height by stage, verify with a reading, and adjust. That workflow turns an average budget light into a reliably configured one. And if you're still in the comparison phase, spending 10 minutes with a Wills grow light review or checking what a similarly priced option from a major retailer delivers, for example, reading through a Walmart grow light review, will give you enough data to make a confident choice rather than a hopeful one.
FAQ
How do I know what a Wakyme grow light actually costs to run each month?
Verify the “1200W” or “600W” label against the actual wall draw. Use a plug-in power meter for at least 10 to 15 minutes with Veg only, Bloom only, and both switches, since the wattage can shift slightly by configuration.
What is the best setup workflow to hit the PPFD targets with a Wakyme light?
In practice, hang height is the main control, and switch mode is the second. Start with the stage-appropriate height from the article, then measure PPFD at the canopy edges, not just the center, because budget panels drop off toward corners.
Is Photone app measurement reliable for Wakyme PPFD, and how should I take readings?
Use the Photone app, but validate method consistency: place the sensor at leaf height for your tallest plant, keep the app’s reading time steady (don’t wave the phone around), and record readings at center and at least one edge point for each switch setting.
Can I use a Wakyme 1200W in a 3x3 or 4x4 tent for flowering, or will it be too uneven?
Yes, but be careful with expectations. If your goal is uniform flowering-level PPFD across the whole canopy, Wakyme’s edge drop-off is the limiting factor. For a 3x3 or 4x4, you may need plant positioning, rotation, or supplemental lighting.
Does ventilation really matter for Wakyme lights, and what airflow should I plan for?
Check your fan and airflow before assuming it will run cool. If the tent is sealed or ventilation is weak, the fixture can run noticeably warmer, which increases the risk of earlier diode degradation. Treat airflow as part of the “setup,” not an optional upgrade.
What if my Wakyme model has no dimmer, can I still dial in intensity safely?
If your specific model includes a dial dimmer or timer, you can fine-tune PPFD without constantly raising and lowering the light. If it does not, your practical “dimming” tool is height, which is slower but still effective when you make small 2-inch adjustments.
How should I set the Wakyme for seedlings or clones to avoid stretching or stress?
For seedlings and clones, start higher and use Veg mode only to avoid overexposure. Even if you do not get immediate leaf burn, pushing intensity too high can stunt early growth, so target the lower PPFD range and re-check after 24 to 48 hours.
Is the Veg/Bloom switching enough for full cannabis grow cycles, or do I need supplemental lights?
Wakyme can be used for cannabis through veg and flower, but plan around footprint limits. A good approach for flowering is to keep the canopy concentrated in the brighter center area (or use fewer plants) so the edges do not become the bottleneck for bud density.
What can I do to reduce the edge low-light issue with a budget panel like Wakyme?
Use fixture placement to manage uniformity: keep plants in the center two-thirds during veg, rotate plants weekly during flowering, and consider staggering plant heights so the tallest leaves are still at a consistent sensor height.
Is it safe to run multiple Wakyme fixtures on the same 120V 15-amp circuit?
Yes, but calculate circuit load if you run multiple fixtures plus other gear. Even if each unit draws well below its marketing wattage, heaters, dehumidifiers, or additional lighting can push the circuit beyond safe continuous usage.
What should I do if my Wakyme’s PPFD readings are much lower than what other growers reported?
Expect variability between individual units. If you measure significantly lower than community examples at your height, don’t just raise the light and hope, instead confirm readings at multiple points and consider lowering target canopy intensity only if the plants are healthy and stable.
How should I weigh Wakyme reliability risk if I run lights daily for 18 to 24 months?
For long daily schedules, think in terms of total operating hours, not purchase price. If you run lights 18 to 24 hours daily, lifespan uncertainty can outweigh the initial savings, so budget growers should plan replacement risk and warranty options.
How can I tell if my Wakyme is overheating or if the cooling is being blocked?
Warm temperatures alone are not the problem, poor heat dissipation is. Confirm that the fixture has clearance around it, and if the model uses a fan, listen for proper operation and avoid blocking intake or exhaust vents with tent walls, ducting, or stored items.
What should I compare when deciding between Wakyme and a different budget LED panel in the same price range?
If you are deciding between Wakyme and newer quantum-board-style budget options, compare based on measured PPFD per watt at your intended hanging height and your tent size. Quantum boards often improve efficiency and uniformity, which matters most when you want consistent results across a larger footprint.